nikon d5200 camera manual

Welcome to the Nikon D5200 camera manual, your comprehensive guide to unlocking the full potential of your DSLR․ This manual provides detailed instructions, tips, and tricks to help you master the camera’s features, ensuring you capture stunning images and videos with ease․

Overview of the Nikon D5200

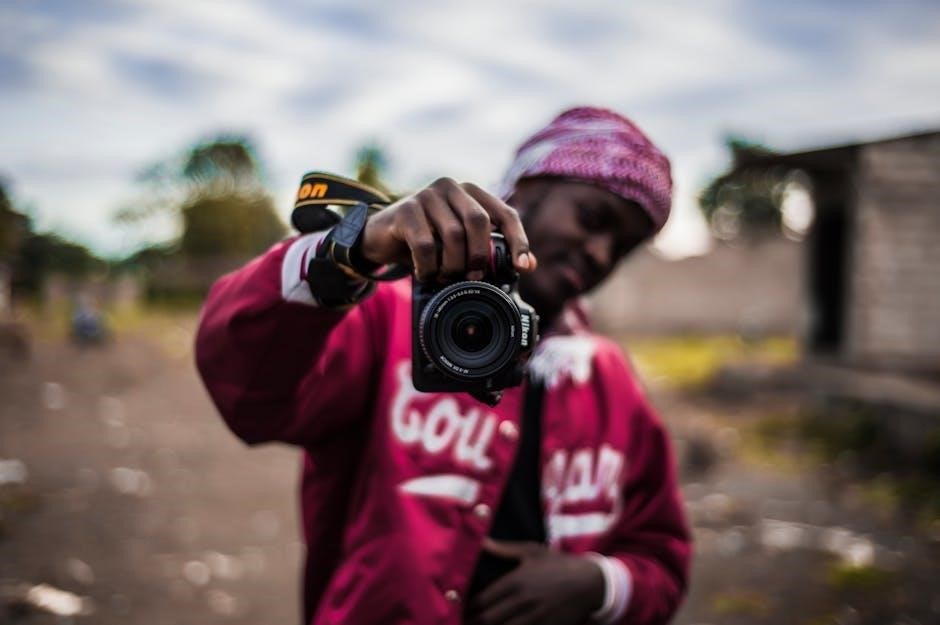
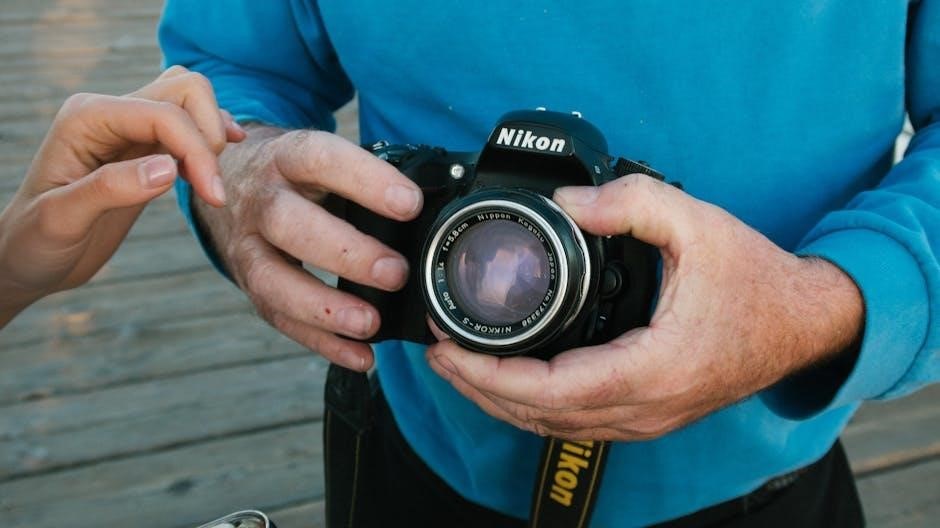
The Nikon D5200 is a versatile and feature-rich DSLR camera designed for both beginners and advanced photographers․ It boasts a 24․1-megapixel CMOS sensor, delivering sharp images with vibrant colors․ The vari-angle 3-inch LCD screen offers flexible shooting angles, while Full HD video recording capabilities make it ideal for capturing memories․ With a range of shooting modes, including Manual, Aperture Priority, and Shutter Priority, the D5200 empowers users to take creative control․ Its compact design and intuitive interface make it a favorite among photography enthusiasts․

Importance of Reading the Manual

Reading the Nikon D5200 manual is essential to fully utilize its advanced features and settings․ It provides detailed guidance on operating modes, customizing settings, and troubleshooting․ Understanding the manual ensures you optimize image quality, master video recording, and explore creative possibilities․ It also helps you navigate the menu system and maintain your camera properly․ Referencing the manual is key to enhancing your photography skills and getting the most out of your Nikon D5200 experience․

Key Features and Specifications

The Nikon D5200 boasts a 24․1MP CMOS sensor, vari-angle 3-inch LCD, and Full HD video recording, offering versatility for photography and videography enthusiasts․

24․1 Megapixel CMOS Sensor

The Nikon D5200 features a 24․1-megapixel CMOS sensor, delivering exceptional image quality with vivid colors and sharp details․ This sensor excels in low-light conditions, capturing images with reduced noise and high clarity․ Whether shooting landscapes, portraits, or action shots, the sensor ensures stunning results, making it ideal for both casual and professional photographers․

vari-angle 3-inch LCD Screen

vari-angle 3-inch LCD Screen

The 3-inch vari-angle LCD screen offers flexibility and convenience, allowing you to shoot from unique angles and review images with ease․ Its 921k-dot resolution ensures sharp and vibrant previews, while the swiveling design enables shooting in both creative and challenging positions․ This feature is perfect for self-portraits, low-angle shots, and high-angle photography, enhancing your overall shooting experience․

Full HD Video Recording

The Nikon D5200 supports Full HD video recording at 1080p resolution, offering cinematic-quality footage․ With frame rates of 60i, 50i, or 30p, you can capture smooth motion and detail․ Manual mode allows precise control over aperture, shutter speed, and ISO for professional-looking results․ The camera also features a stereo microphone input for high-quality audio․ Combined with the vari-angle LCD screen, recording videos from unique angles is effortless and intuitive․

Getting Started with the Nikon D5200

Unbox and set up your Nikon D5200, ensuring the battery is fully charged and a memory card is inserted․ Familiarize yourself with the camera’s controls and basic functions to begin capturing stunning images and videos effortlessly․

Unboxing and Initial Setup

Unboxing your Nikon D5200 reveals the camera body, 18-55mm VR lens, rechargeable battery, charger, USB cable, and strap․ Insert the battery into the grip, ensuring it clicks securely․ Install a memory card into the slot on the right side, formatting it via the menu for optimal performance․ Charge the battery fully before first use to ensure longevity and reliable operation․

Charging the Battery and Inserting the Memory Card

Charge the Nikon D5200’s battery using the provided MH-24 charger until the indicator turns green․ Insert the battery into the camera’s grip, ensuring it clicks into place․ For the memory card, open the compartment on the right side, insert the card with the label facing the camera, and close the door․ Format the card via the menu to ensure proper function and optimal performance for storing images and videos․

Shooting Modes

The Nikon D5200 offers various shooting modes to suit different photography needs, including Auto, Programmed Auto (P), Aperture Priority (A/Av), Shutter Priority (S/Tv), and Manual Mode (M), providing flexibility and creative control for capturing diverse scenes effectively․

Auto Mode

Auto Mode simplifies photography by automatically adjusting settings like aperture, shutter speed, and ISO for optimal results․ Ideal for beginners or quick shots, it ensures well-balanced images in various lighting conditions․ The camera handles all technical aspects, allowing you to focus solely on composition and capturing moments․ This mode is perfect for everyday photography, delivering consistent and high-quality outcomes without requiring manual adjustments․

Programmed Auto (P)

Programmed Auto (P) mode offers a balance between simplicity and control․ While the camera automatically sets aperture and shutter speed, you can adjust settings like ISO, white balance, and autofocus to enhance your photos․ This mode is ideal for photographers who want to explore manual controls without fully managing aperture and shutter speed, making it a stepping stone to more advanced shooting techniques․

Aperture Priority (A/Av)

Aperture Priority mode allows you to set the aperture while the camera automatically adjusts the shutter speed․ This mode is perfect for controlling depth of field, ensuring a sharp subject with a blurred background or vice versa․ Adjust the aperture using the control dial, and the camera will balance the exposure, giving you creative control while maintaining optimal results in various lighting conditions․

Shutter Priority (S/Tv)

Shutter Priority mode lets you set the shutter speed, with the camera adjusting the aperture automatically․ This mode is ideal for freezing fast-moving subjects or creating motion blur․ Use the control dial to select your desired shutter speed, and the camera will ensure proper exposure, making it perfect for sports, action shots, or artistic effects like blurred waterfalls or light trails․

Manual Mode (M)

Manual Mode (M) offers full control over both aperture and shutter speed, allowing you to customize every aspect of your shot․ Set the aperture using the sub-command dial and the shutter speed with the main command dial․ This mode is perfect for advanced photographers who want precise control, enabling them to achieve unique creative effects and tailor images exactly to their vision․

Understanding the Menu System

The Nikon D5200’s menu system provides easy access to settings, enabling intuitive customization․ Navigate through Playback, Shooting, Setup, and Retouch menus to optimize your camera experience․

Playback Menu

The Playback Menu allows you to review and manage your photos and videos․ Key features include deleting unwanted images, adjusting display options, and zooming into shots for detailed inspection․ You can also view histograms to check exposure balance and sort photos into albums for easier organization․ This menu is essential for post-shooting review and organization, helping you refine your workflow and ensure your best shots stand out․

Shooting Menu

The Shooting Menu is where you configure key camera settings for capturing photos․ Adjust image quality, white balance, ISO sensitivity, and autofocus modes to suit your scene․ Additionally, you can enable features like Active D-Lighting for better contrast and set the Picture Control to customize color and sharpness․ These options allow precise control over your camera, ensuring your photos match your creative vision and technical requirements․

Setup Menu

The Setup Menu allows you to configure your camera’s basic settings for optimal performance․ Adjust the date, time, and language, and customize monitor brightness․ Format memory cards, set auto shutdown timers, and manage firmware updates․ These options ensure your camera is personalized to your preferences and maintained in peak condition for reliable operation․ Use this menu to fine-tune your Nikon D5200 and keep it running smoothly․

Retouch Menu

The Retouch Menu offers a variety of in-camera editing tools to enhance your photos without needing a computer․ Options include D-Lighting for adjusting contrast, Red-eye correction for fixing flash-related issues, and Trim for cropping images․ Additional features like Monochrome, Filter effects, and Color balance allow you to creatively modify your shots․ These tools provide flexibility to refine your images directly on the camera, ensuring your photos look their best before sharing or printing․

Movie Recording

The Nikon D5200 supports Full HD video recording at 1080p with frame rates up to 60i․ Manual controls allow adjustment of aperture, shutter speed, and ISO for precise video capture․ The vari-angle LCD screen and stereo microphone input enhance movie recording capabilities, making it ideal for creative and professional use․

Setting Up for Movie Recording

To set up for movie recording on the Nikon D5200, navigate to the Shooting Menu and select Movie Settings․ Choose your desired frame size and rate, with options up to 1080p at 60i․ Enable manual controls to adjust aperture, shutter speed, and ISO for precise video capture․ Utilize the vari-angle LCD screen for flexible framing and connect an external microphone for enhanced audio quality․ These features ensure high-quality video production tailored to your creative vision․

Manual Movie Settings

In Manual Movie Settings on the Nikon D5200, you can control key parameters like aperture, shutter speed, and ISO sensitivity to achieve the desired cinematic effect․ Use manual focus for precise subject control or enable autofocus for dynamic tracking․ Adjust frame rates and resolution to suit your project, and utilize the vari-angle LCD for flexible framing․ These manual controls empower you to customize your video production, ensuring professional-grade results tailored to your creative vision․

Customization and Advanced Features

Customize your Nikon D5200 with advanced features like white balance, ISO sensitivity, and manual controls for precise image and video adjustments, ensuring creative flexibility․

Customizing White Balance

Customizing white balance on the Nikon D5200 allows you to adjust color temperature for accurate tones in various lighting conditions․ Use Auto, Preset modes, or set a manual Kelvin temperature for precise control․ Preset modes include options like Daylight, Fluorescent, and Cloudy, while manual mode lets you set a specific temperature or use the camera’s measurement tool․ This feature ensures natural colors, whether shooting indoors or outdoors, enhancing your creative control over images․

Using ISO Sensitivity

ISO sensitivity on the Nikon D5200 adjusts the camera’s light sensitivity, ranging from 100 to 6400 (expandable to 25600)․ Lower ISOs (100-400) are ideal for bright lighting to minimize noise, while higher ISOs (800-6400) are better for low-light conditions․ Use Auto ISO for convenience or Manual mode for precise control․ Balancing ISO settings ensures sharp, noise-free images, allowing you to capture high-quality photos in various lighting environments with ease and confidence․

Maintenance and Troubleshooting

Regularly clean the sensor and lens for optimal image quality․ Check for firmware updates to ensure camera functionality․ Store the camera in a cool, dry place, using a protective case․ For troubleshooting, refer to the manual or Nikon support resources to resolve common issues promptly and effectively, ensuring your camera performs at its best․

Cleaning the Camera Sensor

Cleaning the sensor is essential for maintaining image quality․ Use a soft, dry blower to remove dust․ For stubborn spots, use a sensor cleaning swab with gentle strokes․ Avoid compressed air to prevent damage․ Always turn off the camera and set it to cleaning mode․ Refer to the manual for detailed instructions to ensure safe and effective cleaning, preserving your camera’s performance and image clarity over time․

Tips for Storing the Camera

Store your Nikon D5200 in a cool, dry place, away from direct sunlight․ Use a protective case to prevent scratches and dust․ Avoid extreme temperatures and humidity, which can damage internal components․ Remove the battery and store it separately in a cool, dry location; Clean the camera thoroughly before storage to prevent dust buildup․ Follow these tips to ensure your camera remains in optimal condition when not in use․

Mastering the Nikon D5200 requires practice and exploration of its advanced features․ This manual serves as your foundation, guiding you to unlock its full potential and capture exceptional images․

Mastering the Nikon D5200

Mastering the Nikon D5200 involves understanding its advanced features and practicing various shooting techniques․ Experiment with manual modes, explore ISO settings, and utilize the vari-angle LCD for creative framing․ Regularly review your images and adjust settings to refine your skills․ By combining technical knowledge with artistic vision, you can unlock the full potential of your camera and capture stunning photographs consistently․

Additional Resources for Learning

To further enhance your skills with the Nikon D5200, explore official Nikon resources, including the Nikon Manual Viewer 2 app and downloadable PDF guides․ Online tutorials, community forums, and photography workshops also offer valuable insights․ Utilize Nikon’s official website for updates, tips, and troubleshooting․ These resources will help you deepen your understanding and make the most of your camera’s capabilities․

Continue Reading

manual ferrari california

The Ferrari California Manual is a comprehensive guide for drivers seeking to master the iconic sports car. It covers essential features, performance tips, and maintenance advice. Available as a PDF, this manual ensures optimal use of the California’s six-speed manual transmission, enhancing the driving experience. A must-have for Ferrari enthusiasts.

History of Manual Transmission in Ferrari

Ferrari, renowned for its commitment to performance and driving excellence, has a rich history intertwined with manual transmissions. Once a staple in the marque’s lineup, manual gearboxes played a pivotal role in delivering the precise control and tactile experience that drivers craved. Over the years, Ferrari’s manual transmissions evolved, offering enthusiasts a direct connection to the vehicle’s power and handling.

The decline of manual transmissions in Ferrari began in the early 2000s as the automotive industry shifted towards automated and dual-clutch transmissions. These newer systems offered quicker shifting and improved efficiency, appealing to a broader audience. Ferrari embraced this trend, gradually phasing out manual options across its models.

The Ferrari California stands as a notable exception in this narrative. Introduced in 2008, the California offered a six-speed manual transmission, catering to purists who valued the engagement of a traditional gearbox. This option was significant, as it marked one of the last instances where Ferrari provided a manual transmission in a production car.

By 2012, Ferrari had ceased production of the California with a manual gearbox, effectively ending the era of manual transmissions in its lineup. This shift reflected broader industry trends favoring automation and ease of use. Today, Ferrari’s heritage of manual transmissions remains a cherished memory among enthusiasts, symbolizing a bygone era of driving purity and mechanical connection.

Key Features of the Ferrari California Manual

The Ferrari California Manual is a standout model that combines elegance, power, and driving pleasure. At its core is a 4.3-liter V8 engine, delivering exceptional performance with 453 horsepower and 358 lb-ft of torque. The six-speed manual transmission offers precise control, allowing drivers to fully engage with the vehicle’s capabilities.

One of the defining features of the California Manual is its retractable hardtop, which seamlessly transitions between a sleek coupé and a dynamic convertible. This versatility, paired with its lightweight aluminum chassis, ensures both agility and strength. The car’s suspension system is finely tuned to balance comfort and responsiveness, making it equally adept on winding roads and city streets.

Inside, the California Manual boasts a luxurious interior, featuring premium leather upholstery and advanced infotainment systems. The driver-centric cockpit is designed to enhance the driving experience, with intuitive controls and a focus on connectivity. Optional features such as carbon-ceramic brakes and customizable trim further enhance the car’s performance and personalization potential.

The manual transmission, while offering a more engaging drive, also contributes to the car’s exclusivity. With a 0-60 mph time of approximately 4.2 seconds, the California Manual strikes a balance between heritage and modernity, appealing to those who cherish the art of driving. Its timeless design and robust engineering make it a memorable addition to Ferrari’s legacy.

Performance and Specifications

The Ferrari California Manual is a high-performance vehicle designed to deliver exceptional driving dynamics. Equipped with a 4.3-liter V8 engine, it produces 453 horsepower at 7,500 rpm and 358 lb-ft of torque at 5,250 rpm. This powerful engine is paired with a six-speed manual transmission, offering precise control and a more engaging driving experience.

The California Manual accelerates from 0 to 60 mph in approximately 4;2 seconds, showcasing its responsiveness and agility. Its top speed is electronically limited to 193 mph, ensuring a balance between performance and stability. The rear-wheel-drive layout, combined with Ferrari’s advanced suspension system, provides excellent handling and traction.

The manual transmission is a standout feature, as it was the last Ferrari model to offer this option before the company shifted to automated dual-clutch systems. The car’s lightweight aluminum chassis and optimized weight distribution further enhance its performance capabilities, making it a favorite among driving enthusiasts.

With a fuel economy estimated at 12 mpg in the city and 19 mpg on the highway, the California Manual strikes a balance between power and efficiency. Its sleek design, aerodynamic profile, and high-performance engine make it a testament to Ferrari’s commitment to excellence in automotive engineering.

Availability of Ferrari California Manuals

Ferrari California manuals are readily available for owners and enthusiasts, ensuring easy access to essential information. These manuals can be downloaded as PDF files from various online sources, including official Ferrari websites and enthusiast forums like FerrariChat. The manuals cover models from 2008 to 2012, with specific editions for the California and California T.

The manuals are comprehensive, offering detailed instructions on vehicle maintenance, troubleshooting, and optimal performance. They include step-by-step guides, illustrations, and technical specifications, making them invaluable for both novice and experienced drivers. Additionally, the manuals are available in multiple languages, catering to Ferrari’s global audience.

For collectors and enthusiasts, the rarity of manual transmission Ferrari California models has increased interest in these manuals. Since Ferrari discontinued manual gearboxes in 2012, the California remains one of the last models with this feature, making its manual particularly sought after. Many owners appreciate the hands-on driving experience it provides, and the manual serves as a guide to maximize this unique feature.

Owners can also access these manuals through authorized Ferrari dealerships or the Ferrari website. With their detailed content and user-friendly format, the Ferrari California manuals are indispensable resources for anyone looking to understand and maintain their vehicle to the highest standards.

How to Use the Manual Transmission Effectively

Mastering the manual transmission in the Ferrari California enhances driving enjoyment and performance. The six-speed manual gearbox is designed for smooth, precise shifts, allowing drivers to fully engage with the vehicle. To use it effectively, start by familiarizing yourself with the gear lever and clutch pedal. Press the clutch fully before shifting gears to avoid wear and tear;

When accelerating, shift gears at the optimal RPM range to maximize power delivery. For the Ferrari California, shifting between 4,500 to 6,500 RPM is ideal. Use the clutch smoothly to avoid jerky movements, especially when starting from a standstill. Heel-to-toe braking, a technique where the driver brakes and downshifts simultaneously, can improve control during deceleration.

  • Shift gears smoothly to maintain traction and stability, particularly on winding roads.
  • Use the clutch and accelerator in harmony to avoid wheelspin or loss of grip.
  • Practice shifting in different driving conditions to develop muscle memory and confidence.

The manual transmission in the California rewards skilled drivers with a more engaging experience. By refining your technique, you can unlock the full potential of this iconic sports car and enjoy a more connected driving experience.

Unique Aspects of the Ferrari California Manual

The Ferrari California Manual stands out for its blend of tradition and innovation. It is the last Ferrari model to feature a manual transmission, making it a standout choice for purists who value driver engagement. The six-speed manual gearbox offers a direct, mechanical connection to the engine, providing a unique driving experience that modern automatic transmissions cannot replicate.

One of its most distinctive features is the “manettino” dial on the steering wheel, allowing drivers to adjust driving modes without taking their hands off the wheel. This feature complements the manual transmission, offering enhanced control and adaptability. Additionally, the California’s manual transmission is paired with a rear-wheel-drive layout, delivering a classic sports car feel.

  • The manual transmission option was reintroduced in the California after a hiatus, catering to enthusiasts who prefer a more involved driving experience.
  • The gearbox is designed for smooth, precise shifts, with a short throw that enhances responsiveness.
  • It is the only Ferrari model in its generation to offer a manual transmission, making it a rare and sought-after choice.

These unique aspects make the Ferrari California Manual a cherished option for those who value traditional driving dynamics and the emotional connection of a manual gearbox in a high-performance sports car.

Maintenance and Care Tips

Regular maintenance is crucial to preserve the performance and longevity of your Ferrari California Manual. Start with routine checks of the transmission fluid, ensuring it meets Ferrari’s specifications for the six-speed manual gearbox. Replace the fluid as recommended to maintain smooth gear shifts and prevent wear.

Clutch care is essential; avoid riding the clutch, as it can cause premature wear. Ensure the clutch engages fully to prevent slippage. Brake systems should be inspected regularly, with pads and rotors replaced when worn to maintain stopping power. The engine oil and filters should be changed at intervals specified in the manual to keep the V8 engine in optimal condition.

Protect the exterior by washing regularly and applying a high-quality wax to shield the paint. For the interior, use gentle cleaning products on leather upholstery and condition it periodically to retain its luxury feel. Check tire pressure frequently and align wheels as needed to ensure precise handling and even tire wear.

Inspect the electrical systems, including the manettino dial and ignition, to ensure all functions operate correctly. Always refer to the Ferrari California Manual for specific guidelines and schedules. Lastly, schedule regular servicing with certified Ferrari technicians to address any issues promptly and maintain the car’s peak performance.

Comparison with Other Ferrari Models

The Ferrari California Manual stands out among its counterparts due to its unique blend of power and manual control. Unlike the Ferrari F430, which features a more aggressive design and a mid-engine layout, the California emphasizes versatility with its retractable hardtop and rear seats. The California’s six-speed manual gearbox offers a more engaging drive compared to the dual-clutch transmissions found in models like the 458 Italia, which prioritize speed over driver interaction.

While the Ferrari 488 GTB boasts advanced aerodynamics and a turbocharged engine, the California’s naturally aspirated V8 delivers a distinct exhaust note and driving character. The California T, an updated version, introduced a turbocharged engine, but it retained the manual option, appealing to purists who value the connection of a manual transmission.

In contrast to the more track-focused Ferrari 599 GTB Fiorano, the California is designed for everyday usability without sacrificing performance. Its manual transmission option makes it a rare gem in Ferrari’s lineup, as most modern models have transitioned to automatic or dual-clutch systems. This makes the California Manual a sought-after choice for enthusiasts who cherish the tactile experience of shifting gears.

The Ferrari California Manual represents a unique chapter in the history of Ferrari, offering a blend of classic driving engagement and modern performance. As one of the last Ferrari models to feature a manual transmission, the California stands out for its tactile driving experience in an era dominated by automatic and dual-clutch transmissions. The availability of comprehensive manuals and repair guides ensures that owners can maintain and optimize their vehicles, preserving the legacy of this iconic car.

With its powerful V8 engine and sleek design, the California Manual delivers a driving experience that resonates with purists who cherish the connection between driver and machine. Ferrari’s decision to discontinue manual gearboxes after 2012 makes the California a rare and sought-after model for enthusiasts. Its combination of elegance, performance, and driver involvement cements its place as a memorable addition to Ferrari’s lineup.

Continue Reading

husqvarna pw 2000 manual pdf free download

The Husqvarna PW 2000 manual is an essential guide for safe and efficient operation of your pressure washer․ It provides key information about features, troubleshooting, and maintenance to ensure optimal performance while adhering to safety guidelines․

1․1 Importance of the Manual for Safe and Efficient Operation

The Husqvarna PW 2000 manual is crucial for ensuring safe and efficient operation of the pressure washer․ It provides detailed safety guidelines, operating instructions, and maintenance tips to prevent accidents and prolong the product’s lifespan․ By following the manual, users can understand proper assembly, usage, and troubleshooting procedures․ Safety guidelines are emphasized to avoid hazards, while operating instructions ensure optimal performance․ Regular maintenance procedures outlined in the manual help maintain the washer’s efficiency and reliability․ Troubleshooting sections enable users to identify and resolve common issues quickly․ Adhering to the manual’s recommendations ensures compliance with manufacturer standards and enhances overall user experience․

1․2 Overview of the Husqvarna PW 2000 Pressure Washer

The Husqvarna PW 2000 is a high-performance pressure washer designed for heavy-duty cleaning tasks․ It features a robust engine and pump system, delivering consistent power for efficient cleaning․ The unit is built with durable materials to withstand regular use in demanding environments․ Key features include adjustable pressure settings, a range of nozzle attachments, and a compact design for easy mobility․ The PW 2000 is ideal for commercial or large-scale residential applications, offering reliability and versatility․ Its construction ensures minimal maintenance while providing superior cleaning results․ This pressure washer is a reliable choice for professionals and homeowners seeking durable and powerful cleaning equipment․

Finding the Husqvarna PW 2000 Manual Online

Accessing the Husqvarna PW 2000 manual is straightforward via online resources like ManualsLib or official Husqvarna websites․ Use search terms like “Husqvarna PW 2000 manual PDF” for quick results․

2․1 Popular Online Resources for PDF Downloads

Several reliable platforms offer free Husqvarna PW 2000 manual downloads․ ManualsLib is a top choice, providing easy access to PDF versions of user manuals․ Additionally, visiting Husqvarna’s official website ensures authenticity and the most updated versions․ Other resources like Scribd, Archive․org, and specific forums dedicated to Husqvarna products also host downloadable manuals․ When searching, use specific terms like “Husqvarna PW 2000 manual PDF” or “Husqvarna PW 2000 download free” for accurate results․ Always verify the source to avoid unauthorized or outdated documents, ensuring compliance with legal and safety standards․

2․2 Step-by-Step Guide to Locating the Manual

To locate the Husqvarna PW 2000 manual, start by visiting ManualsLib, a trusted platform for user manuals․ Use the search bar to type “Husqvarna PW 2000” and browse the results․ Ensure the manual matches your product by verifying the model number and language; Download the PDF directly from the site․ Alternatively, visit Husqvarna’s official website, navigate to the support section, and use their manual search tool․ Enter your model number to access the manual․ Always verify the source to ensure the document is genuine and up-to-date․ This process guarantees quick and secure access to the manual, enabling safe and efficient operation of your pressure washer․

Key Sections of the Husqvarna PW 2000 Manual

The manual includes detailed sections on product description, safety guidelines, operating instructions, and maintenance tips․ These sections ensure safe and efficient use of the pressure washer․

3․1 Product Description and Serial Number Information

The Husqvarna PW 2000 manual begins with a detailed product description, outlining the pressure washer’s features, specifications, and intended use․ It also provides information about the serial number, which is located on the product’s rating plate and packaging․ The serial number is essential for registering the product and accessing support services․ This section ensures users can identify their model accurately and understand its capabilities․ Additionally, it highlights Husqvarna’s commitment to quality and performance, emphasizing the importance of adhering to the manual’s guidelines for optimal functionality and safety․

3․2 Safety Guidelines and Operating Instructions

The Husqvarna PW 2000 manual emphasizes critical safety precautions to prevent accidents and ensure proper use․ It advises users to avoid touching hot engine or pump parts during operation and to never operate the pressure washer if there are signs of engine misfiring, smoke, or loss of pressure․ The manual also stresses the importance of keeping the muffler area free from debris and avoiding tilting the equipment, which could cause fuel spills․ Regular maintenance checks, such as inspecting hoses and connections, are highlighted to maintain safety and performance․ By following these guidelines, users can operate the PW 2000 safely and effectively․

Maintenance and Troubleshooting Tips

Regular cleaning of debris and checking for engine issues ensure optimal performance․ Proper oil and fuel management prevent malfunctions, while addressing pressure loss or misfires promptly avoids damage․

4․1 Regular Maintenance Procedures

Regular maintenance is crucial for extending the life of your Husqvarna PW 2000․ Start by cleaning debris from the muffler and surrounding areas using a soft-bristle brush․ Check the engine oil level regularly and ensure it meets the manufacturer’s recommendations․ Fuel should be free from contaminants, and the pump should be inspected for wear or damage․ Additionally, ensure all connections are secure and free from leaks․ Following these steps will prevent malfunctions and ensure the pressure washer operates efficiently․ Always refer to the manual for specific guidelines and schedules to maintain your equipment effectively․

4․2 Common Issues and Solutions

Common issues with the Husqvarna PW 2000 include low pressure output, engine misfiring, or loss of power; For low pressure, inspect the nozzle for blockages and ensure the pump is functioning properly․ If the engine misfires, check the air filter for cleanliness and ensure proper fuel flow․ Loss of power may indicate worn piston rings or a faulty pressure regulator․ Regularly cleaning debris from the muffler and ensuring the area around it is clear can prevent overheating․ Always refer to the manual for detailed troubleshooting steps and solutions to maintain optimal performance and extend the lifespan of your pressure washer․

Husqvarna Customer Support and Resources

Husqvarna provides dedicated customer support through authorized dealers and online resources․ Contact servicing dealers for assistance, or visit official websites for troubleshooting guides and product updates․

5․1 Contacting Husqvarna Servicing Dealers

Contacting Husqvarna servicing dealers is straightforward and ensures professional assistance․ Visit the official Husqvarna website to locate authorized dealers near you․ Use the dealer locator tool by entering your location․ Additionally, you can contact Husqvarna customer service for guidance or support․ Always have your product’s serial number ready, as it is required for registration and service requests․ Dealers provide genuine parts, maintenance, and troubleshooting expertise․ For queries about the PW 2000 manual or operational issues, reaching out to authorized dealers ensures accurate and reliable solutions tailored to your specific needs․

5․2 Additional Online Resources for Husqvarna Products

Beyond the official Husqvarna website, platforms like ManualsLib and ManualsOnline offer extensive libraries of user manuals, including the PW 2000․ These sites provide free access to PDF downloads, ensuring you can easily find and print the manual․ Additionally, Husqvarna’s official forums and customer support pages offer troubleshooting guides and FAQs․ Online marketplaces like eBay may also have listings for physical copies of the manual․ For further assistance, YouTube tutorials and DIY communities often share tips specific to Husqvarna pressure washers․ These resources complement the official manual, offering diverse avenues for support and information to enhance your user experience․

Downloading the Manual Safely and Legally

Always download the Husqvarna PW 2000 manual from trusted sources like ManualsLib or ManualsOnline to ensure legality and safety, avoiding unauthorized sites that may pose security risks․

6․1 Avoiding Unauthorized Websites

When searching for the Husqvarna PW 2000 manual, it’s crucial to avoid unauthorized websites that may offer free PDF downloads․ These sites often host outdated or incorrect manuals, which can lead to improper usage or safety risks․ Unauthorized platforms may also expose your device to malware or phishing attempts․ To ensure safety and legality, always download from trusted sources like ManualsLib or ManualsOnline, which verify the authenticity of their documents․ Be cautious of websites with poor design, excessive ads, or suspicious download links․ Prioritize official Husqvarna resources or reputable third-party platforms to guarantee you’re accessing accurate and secure information․

6․2 Ensuring the Manual is Up-to-Date

To ensure you have the most accurate and relevant information, always verify that the Husqvarna PW 2000 manual is up-to-date․ Updated manuals often include new safety guidelines, improved operating instructions, and additional troubleshooting tips․ Check the publication date on the document or visit the official Husqvarna website for the latest version․ Reputable platforms like ManualsLib or ManualsOnline frequently update their databases with the newest manuals․ Avoid using outdated versions, as they may lack critical information or fail to address newer features․ Regularly updating your manual ensures compliance with safety standards and optimal performance of your pressure washer․

7․1 Final Tips for Using the Husqvarna PW 2000 Manual

Always read the manual thoroughly before operating your Husqvarna PW 2000 to ensure safe and efficient use․ Pay special attention to safety guidelines and maintenance schedules to prolong the product’s lifespan․ Regularly check for updates to the manual and download the latest version from authorized sources․ Use the troubleshooting guide to resolve common issues quickly․ Keep the manual in an accessible location for easy reference․ By following these tips, you can maximize the performance of your pressure washer and ensure a safe operating experience․

Continue Reading

echo srm 225 manual

Welcome to the Echo SRM-225 manual‚ your comprehensive guide to safe and effective operation. This manual covers essential safety tips‚ operating instructions‚ and maintenance advice to ensure optimal performance. Always read both the operator’s and safety manuals provided by Echo for proper and secure use of the equipment.

1.1 Overview of the Echo SRM-225

The Echo SRM-225 is a high-performance grass trimmer and brush cutter designed for efficient cutting and durability. It features a powerful engine‚ adjustable cutting head‚ and ergonomic design‚ making it ideal for both small and large-scale tasks. The manual provides detailed information on its specifications‚ operation‚ and maintenance to ensure optimal performance. With a focus on safety and productivity‚ the SRM-225 is a versatile tool for landscaping and yard maintenance. The manual serves as a comprehensive guide to unlocking its full potential while ensuring safe and effective use.

1.2 Importance of Reading the Manual

Reading the Echo SRM-225 manual is crucial for safe and effective operation. It provides essential safety guidelines‚ operating instructions‚ and maintenance tips to ensure optimal performance. Failure to read the manual may lead to improper use‚ potentially causing accidents or damaging the equipment. Echo emphasizes the importance of understanding both the operator’s and safety manuals to maximize efficiency and prevent hazards. The manual also includes helpful operating tips and warnings to guide users in making the most of their trimmer while staying safe. Taking the time to review the manual ensures a better experience and prolongs the lifespan of the equipment.

Key Features of the Echo SRM-225

The Echo SRM-225 features a powerful engine‚ versatile cutting head options‚ and an ergonomic design for comfortable operation. Its robust construction ensures durability and efficient performance.

2.1 Engine Specifications

The Echo SRM-225 is equipped with a powerful two-stroke‚ single-cylinder‚ air-cooled engine‚ delivering reliable performance for demanding tasks. With a displacement of 21.2cc and a power output of 1.1 kW‚ it ensures efficient cutting and trimming. The engine features counter-clockwise rotation as viewed from the output end‚ optimizing torque for better cutting efficiency. Its lightweight design enhances portability while maintaining durability. Proper fuel management and regular maintenance are essential to maximize engine lifespan and performance‚ as outlined in the manual. The engine’s robust construction ensures consistent power delivery‚ making it ideal for both professional and residential use.

2.2 Cutting Head and Blade Options

The Echo SRM-225 offers versatile cutting options‚ including both a trimmer line for precise grass trimming and metal blades for tackling thicker brush and small shrubs. The cutting head is designed for quick and easy line reloading‚ minimizing downtime. For heavier tasks‚ the optional metal blade provides superior cutting power. The wide aperture of the cutting head allows for efficient mowing of large areas in a single pass. Always use Echo-recommended attachments to ensure optimal performance and safety. The equipment’s design enables seamless switching between cutting modes‚ making it adaptable to various landscaping needs. Proper blade maintenance is essential for longevity and effectiveness.

2.3 Ergonomic Design

The Echo SRM-225 is designed with ergonomics in mind‚ featuring an adjustable U-handle that provides comfortable grip and control during extended use. The balanced weight distribution reduces operator fatigue‚ allowing for smoother maneuverability. The padded grip ensures a secure hold‚ minimizing vibration and strain on the hands and arms. This ergonomic design enhances user comfort and efficiency‚ making it suitable for both professional and residential applications. The equipment’s lightweight construction further contributes to ease of operation‚ ensuring that users can tackle landscaping tasks with minimal physical strain.

Safety Precautions

Read and understand the safety manual to ensure proper and secure operation. Follow all guidelines to prevent accidents and serious injury during use of the equipment.

3.1 Personal Protective Equipment

Always wear appropriate personal protective equipment (PPE) when operating the Echo SRM-225. This includes safety glasses‚ gloves‚ long pants‚ and sturdy footwear to protect against debris and potential hazards. Steel-toe boots are recommended for added protection. Ensure all clothing is snug-fitting to avoid entanglement with moving parts. Never operate the trimmer without proper PPE‚ as serious injury could result. Additionally‚ wear hearing protection if operating in noisy environments. Proper PPE ensures a safer and more controlled operating experience‚ minimizing risks associated with trimmer use.

3.2 Safe Operating Practices

Always operate the Echo SRM-225 with caution and attention. Ensure the area is clear of bystanders‚ pets‚ and debris. Start the engine on a flat surface and maintain a firm grip on the handle. Avoid using the trimmer in wet conditions or near open flames. Never touch hot or moving parts‚ and keep loose clothing tied back. Use the trimmer only for its intended purpose and avoid overreaching. Regularly inspect the cutting head for damage or wear. Proper operating practices minimize risks and ensure safe‚ efficient performance of the equipment.

3.3 Handling Fuel Safely

Always handle fuel with care to avoid accidents. Use only approved fuel containers and ensure the area is well-ventilated. Never refuel near open flames or sparks. Place the trimmer on a level surface and allow the engine to cool before refueling. Use a funnel to prevent spills and wipe up any drips immediately. Store fuel in a cool‚ dry place away from living areas. Never smoke while handling fuel. Proper fuel handling is essential for safety and prevents potential hazards. Always follow the guidelines outlined in the Echo SRM-225 manual for safe fuel management.

Operating the Echo SRM-225

Mastering the Echo SRM-225 involves understanding its operation for efficient cutting. Familiarize yourself with starting procedures‚ adjusting the cutting head‚ and using attachments safely for optimal performance and results.

4.1 Starting the Engine

To start the Echo SRM-225 engine‚ ensure the Cutting Head is stopped and on level ground. Prime the engine by pressing the primer bulb 2-3 times. Move the choke lever to the “Start” position and pull the starter rope firmly until the engine ignites. Once running‚ gradually move the choke to the “Run” position. Allow the engine to warm up briefly before use. Always wear personal protective equipment‚ as outlined in the safety manual‚ for secure operation. Consult the manual for specific starting procedures tailored to your model.

4.2 Adjusting the Cutting Head

Adjusting the cutting head on your Echo SRM-225 ensures optimal performance and safety. Begin by ensuring the engine is turned off and the cutting head has stopped moving. For blade attachments‚ secure the blade bolt tightly using the provided wrench. For trimmer heads‚ adjust the cutting string length by winding it around the spool according to the manual’s guidelines. Always wear protective gear‚ such as gloves and safety glasses‚ when handling the cutting head. Proper adjustment ensures efficient cutting and minimizes wear on the equipment. Refer to the safety manual for additional precautions when adjusting or replacing attachments.

4.3 Using Different Attachments

The Echo SRM-225 supports various attachments for versatile use. For blade attachments‚ ensure the blade bolt is securely tightened using the provided wrench. When using trimmer heads‚ always follow the manual’s guidelines for string length and type. To switch attachments‚ turn off the engine and allow the cutting head to stop moving. Properly secure the attachment according to the manual’s instructions. Always maintain a safe distance and wear protective gear when operating with different attachments. This feature enhances the tool’s versatility for trimming‚ cutting thick brush‚ or edging. Refer to the safety manual for specific precautions when changing attachments.

Maintenance and Troubleshooting

Regularly inspect and clean the air filter‚ spark plug‚ and cutting head. Address common issues like poor engine performance or blade malfunction promptly. Store the equipment in a dry‚ secure location after use to prevent damage. Always refer to the manual for detailed troubleshooting and maintenance schedules to ensure longevity and optimal performance of your Echo SRM-225.

5.1 Routine Maintenance Tasks

Regular maintenance is crucial for the optimal performance of your Echo SRM-225. Clean or replace the air filter as needed to ensure proper engine airflow. Inspect and clean the spark plug periodically to maintain efficient combustion. Sharpen or replace the cutting blade to keep it in good working condition. Lubricate moving parts‚ such as the gearhead and handle joints‚ to reduce wear and tear. Drain old fuel and refill with fresh‚ properly mixed gasoline to prevent engine issues. Store the equipment in a dry‚ secure location after use to protect it from damage. Always follow the manual’s guidelines for maintenance schedules.

5.2 Common Issues and Solutions

If the engine fails to start‚ check for stale fuel‚ a clogged air filter‚ or a faulty spark plug. Replace or clean these components as needed. For poor cutting performance‚ ensure the blade is sharp and properly installed. If the trimmer is vibrating excessively‚ balance the cutting head or tighten loose parts. Lubricate moving parts if they feel stiff. Refer to the manual for troubleshooting steps and solutions to keep your Echo SRM-225 running smoothly. Addressing issues promptly prevents further damage and ensures reliable operation.

5.3 Storing the Equipment

Proper storage is crucial for maintaining the Echo SRM-225’s condition; Drain the fuel tank or use a fuel stabilizer to prevent degradation. Clean the machine thoroughly‚ removing dirt and debris. Store the equipment in a dry‚ secure location away from direct sunlight and moisture. Protect the blade or cutting head with a cover to prevent rust or damage. Regularly inspect for wear or damage before storing. Follow these steps to ensure your Echo SRM-225 remains in excellent condition for future use. Always refer to the manual for detailed storage recommendations.

Additional Resources

Access the full Echo SRM-225 manual online for detailed instructions. Visit Echo’s official website for parts manuals‚ customer support‚ and additional resources to enhance your user experience.

6.1 Accessing the Full Manual Online

To access the full Echo SRM-225 manual‚ visit Echo’s official website or trusted online platforms; The manual is available for free download‚ offering detailed instructions‚ safety guidelines‚ and troubleshooting tips. It covers operation‚ maintenance‚ and parts information to ensure optimal performance. Rated highly by users‚ the manual provides clear and concise instructions to help you make the most of your equipment. Download‚ print‚ or save it for easy reference. Always consult the manual before operating the SRM-225 to ensure safe and effective use. This resource is essential for both new and experienced users.

6.2 Parts Manual and Customer Support

Echo provides a detailed parts manual for the SRM-225‚ ensuring easy identification and ordering of components. This resource is ideal for maintenance and repairs‚ offering clear diagrams and part numbers. Additionally‚ Echo’s customer support is available to assist with inquiries‚ troubleshooting‚ and technical issues. Visit their website or contact their support team for professional guidance. The parts manual and customer support services enhance your ownership experience‚ ensuring your SRM-225 remains in top condition for years to come. Utilize these resources to maintain your equipment effectively and efficiently.

Continue Reading

dyson dc33 operating manual

The Dyson DC33 is a multi-floor vacuum designed for efficient cleaning, offering advanced suction power and cyclonic technology. This manual serves as your guide to unlocking its full potential, ensuring optimal performance and longevity through proper usage and maintenance.

1.1 Overview of the Dyson DC33 Model

The Dyson DC33 is a multi-floor vacuum designed for efficient cleaning across various surfaces. It features cyclonic technology for strong suction power and a lightweight design for easy maneuverability. The model includes a range of attachments and a washable filter, making it suitable for both hard floors and carpets while being allergy-friendly.

1.2 Importance of the Operating Manual

The operating manual is essential for maximizing the performance and longevity of your Dyson DC33. It provides detailed instructions for assembly, usage, and maintenance, ensuring you understand all features and functions. The manual also includes troubleshooting tips and safety guidelines, helping you address issues and operate the vacuum safely and effectively.

Key Features of the Dyson DC33

The Dyson DC33 features advanced suction power, cyclonic technology, and an allergy-friendly filtration system. Its lightweight and ergonomic design ensures ease of use for multi-floor cleaning efficiency.

2.1 Design and Build Quality

The Dyson DC33 showcases premium design with a lightweight, ergonomic build, making it easy to maneuver. Its durable construction and high-quality materials ensure long-lasting performance, while the sleek design enhances usability for various cleaning tasks efficiently.

2.2 Suction Power and Cyclonic Technology

The Dyson DC33 delivers robust suction power, leveraging cyclonic technology to capture microscopic dust and allergens effectively. This advanced system ensures consistent cleaning performance across various surfaces, minimizing clogs and maintaining strong airflow for efficient dust collection and improved air quality.

2.3 Filtration System and Allergy-Friendly Design

The Dyson DC33 features a robust filtration system designed to capture dust, pollen, and pet dander, making it ideal for allergy sufferers. Its allergy-friendly design ensures cleaner air circulation, reducing allergens in your home environment. Regular maintenance of the filter is crucial for sustained performance and optimal air quality.

Assembly and Initial Setup

Unpack and inventory all parts carefully. Ensure all components are in working order before assembly. Follow the step-by-step guide for proper setup to ensure optimal performance.

3.1 Unpacking and Inventory of Parts

Begin by carefully unpacking the Dyson DC33 from its box. Ensure all components, including the vacuum, attachments, and accessories, are present. Refer to the manual for a detailed list of included parts. Inspect each item for damage or defects. If any part is missing or damaged, contact Dyson customer support immediately for assistance;

3.2 Step-by-Step Assembly Instructions

Begin by attaching the wand to the vacuum body, ensuring it clicks securely into place. Next, connect the floor tool to the wand, aligning the connectors properly. Check that the belt is correctly fitted around the motor and the brush bar. Finally, insert the pre-filter and ensure all components are tightly secured. Refer to the manual for detailed diagrams and test the vacuum to confirm proper assembly.

Operating the Dyson DC33

Operate the Dyson DC33 by adjusting the suction control for different surfaces. Use the variable speed settings and attach suitable tools for carpets, hard floors, or upholstery. Ensure smooth movement by checking the wheels and belt alignment before cleaning to maintain efficiency and avoid damage.

4.1 Basic Controls and Settings

The Dyson DC33 features intuitive controls, including a suction control slider and variable speed settings. Use the on/off button to power the vacuum and adjust the suction power for different surfaces. The ergonomic handle includes a trigger for easy control, allowing seamless transitions between carpets, upholstery, and hard floors. Adjust settings according to surface type for optimal cleaning results.

4.2 Using Different Attachments and Accessories

The Dyson DC33 comes with various attachments, such as the crevice tool for tight spaces and upholstery brush for furniture. To use them, simply click the attachment onto the wand until it locks. For pet owners, the motorized brush attachment is ideal for deep cleaning. Always choose the right accessory for the task to avoid damage and ensure effective cleaning.

4.3 Tips for Effective Cleaning

For optimal results, use the correct attachment for each surface. Adjust suction control for delicate areas and higher settings for carpets. Empty the dustbin regularly to maintain performance and check for blockages. Clean in sections, moving furniture to ensure thorough coverage. Regular maintenance ensures consistent suction power and extends the vacuum’s lifespan.

Maintenance and Cleaning

Regularly clean the filter, empty the dustbin, and check the belt for wear. Proper maintenance ensures optimal performance and extends the vacuum’s lifespan effectively.

5.1 Cleaning the Filter

To maintain efficiency, clean the Dyson DC33 filter monthly. Tap gently to remove dust, then rinse with cold water. Allow it to air-dry completely before reinstalling to ensure proper function and avoid damage.

5.2 Emptying the Dustbin

Regularly empty the Dyson DC33 dustbin to maintain performance. Press the release button to open, then dispose of contents. Rinse with cold water if needed, but avoid hot water or detergents. Allow it to dry completely before reattaching to prevent moisture buildup and ensure optimal suction power.

5.3 Checking and Replacing the Belt

Inspect the drive belt regularly for wear or damage. If damaged, turn off and unplug the vacuum. Use a screwdriver to remove the cover, then pull out the old belt. Install the new belt, ensuring proper alignment. Replace the cover and test operation. Always refer to the manual for specific diagrams and instructions.

Troubleshooting Common Issues

Address common problems like loss of suction, blockages, or unusual noise by checking for obstructions, ensuring proper belt function, and verifying filter cleanliness. Follow manual guidance for quick solutions.

6.1 Loss of Suction Power

Loss of suction can occur due to blockages or a full dustbin. Check hoses and filters for obstructions. Ensure the dustbin is emptied regularly. Clean or replace filters as needed to restore performance. Refer to the manual for detailed troubleshooting steps to maintain optimal suction power and efficiency.

6.2 Blockages and Clogs

A blockage can significantly reduce performance. Check the hose, wand, and u-bend for obstructions. Remove any debris or hair tangled around internal parts. Ensure the pre-filter and filter are clean or replaced. Regularly emptying the dustbin and maintaining clear airflow pathways will help prevent clogs and maintain efficient operation.

6.3 Noise or Vibration Problems

Excessive noise or vibration may indicate a blockage or imbalance. Check for obstructions in the hose or wand. Ensure the brush bar is free of hair or debris. If issues persist, inspect the belt for wear and ensure all parts are securely fitted. Regular maintenance can help minimize noise and vibration for smoother operation.

Accessories and Optional Parts

The Dyson DC33 comes with standard accessories like a crevice tool and motorized brush bar. Optional parts include specialized nozzles for pet hair or extended hoses for reach.

7.1 Standard Accessories Included

The Dyson DC33 includes essential tools for versatile cleaning. The crevice tool tackles tight spaces, while the motorized brush bar handles carpets and upholstery effectively. A standard combination tool and quick-release wand enhance cleaning efficiency across various surfaces, ensuring comprehensive coverage for different cleaning tasks and needs.

7.2 Optional Attachments for Specific Cleaning Needs

Optional attachments for the Dyson DC33 include specialized tools like the turbo brush, ideal for pet owners, and a soft dusting brush for delicate surfaces. An extension hose and additional crevice tools can also be purchased to enhance cleaning versatility, catering to specific cleaning challenges and expanding the vacuum’s functionality for diverse tasks.

Safety Precautions

Always use the Dyson DC33 as intended, avoiding blockages or improper settings. Ensure regular maintenance, store safely, and avoid using damaged parts to prevent accidents or malfunctions.

8.1 General Safety Guidelines

Always operate the Dyson DC33 on stable, flat surfaces. Avoid vacuuming water or wet areas to prevent electrical hazards. Keep loose clothing tied back and long hair secured. Never leave the vacuum unattended while in use, especially around children or pets. Ensure all components are securely attached before operation to avoid accidents or damage.

8.2 Precautions for Specific Surfaces or Situations

Use the correct floor setting for hardwood, carpets, or tiles. Avoid vacuuming sharp objects or hot coals. For delicate surfaces, use the soft brush attachment. In areas with allergies, ensure the filter is clean. When cleaning pet hair, use the turbine tool gently. Avoid overheating by ensuring the vacuum is not blocked. Always adapt settings for surface type to prevent damage and ensure safe, effective cleaning.

Warranty and Support Information

Your Dyson DC33 comes with a comprehensive warranty covering parts and labor. For inquiries or repairs, contact Dyson’s dedicated customer support team via phone or their official website.

9.1 Warranty Coverage Details

The Dyson DC33 is backed by a 5-year warranty covering parts and labor. This includes repairs and replacements for defective components. The warranty period begins from the date of purchase and is valid for domestic use only. For full terms and conditions, refer to the official Dyson website or contact customer support.

9.2 Contacting Dyson Customer Support

For assistance, visit Dyson’s official website or call their customer support hotline, available 24/7. Live chat and email options are also accessible. The support team is ready to address inquiries, troubleshooting, and repair requests, ensuring a seamless experience for Dyson DC33 users. Visit www.dyson.com for more details.

The Dyson DC33 is a powerful and versatile vacuum designed for effective cleaning. Regular maintenance and proper usage ensure optimal performance. Refer to this manual for guidance and troubleshooting tips to maximize its efficiency and longevity. Happy cleaning with your Dyson DC33!

10.1 Summary of Key Points

The Dyson DC33 is a high-performance vacuum featuring advanced cyclonic technology and allergy-friendly filtration. Regular maintenance, such as cleaning the filter and emptying the dustbin, ensures optimal suction power. Proper assembly, usage of attachments, and adherence to safety guidelines are essential for longevity. Refer to this manual for troubleshooting and care tips to maximize efficiency.

10.2 Final Tips for Optimal Performance

Regularly clean the filter and empty the dustbin to maintain suction power. Use the correct attachments for different surfaces and check for blockages. Store the vacuum in a dry place and avoid overheating. Schedule professional servicing annually for prolonged durability. Follow these tips to ensure your Dyson DC33 performs at its best consistently.

Additional Resources

Visit Dyson’s official website for the full DC33 manual, customer support, and repair services. Explore forums and YouTube guides for troubleshooting and maintenance tips.

11.1 Where to Find the Full Dyson DC33 Manual Online

The Dyson DC33 manual is available on Dyson’s official website. Visit their support section, enter your model number, and download the PDF. Additionally, third-party websites like ManualsLib offer free access to the manual, ensuring you can easily find and print the guide for your convenience and reference.

11.2 Recommended Videos or Guides for Further Assistance

For visual learners, Dyson’s official YouTube channel offers detailed tutorials and maintenance guides. Additionally, third-party websites like YouTube and repair forums provide step-by-step videos and troubleshooting tips. These resources complement the manual, offering practical demonstrations for assembly, filter cleaning, and addressing common issues to enhance your understanding and maintenance of the Dyson DC33.

Continue Reading

calligraphy practice sheets pdf free download

Explore the art of calligraphy with free PDF downloads of practice sheets‚ perfect for mastering uppercase and lowercase letters‚ basic strokes‚ and decorative flourishes to enhance your skills.

Overview of Calligraphy and Its Importance

Calligraphy‚ the art of beautiful handwriting‚ has evolved over centuries‚ transforming from ancient scripts to modern styles. It combines creativity‚ precision‚ and patience‚ making it a timeless form of artistic expression. Beyond aesthetics‚ calligraphy holds cultural and historical significance‚ preserving languages and traditions. Today‚ it’s not only used for decorative purposes but also in design‚ branding‚ and personal projects. Practicing calligraphy fosters mindfulness and relaxation‚ while enhancing fine motor skills and focus. Whether for personal growth or professional use‚ mastering calligraphy offers a rewarding journey of creativity and self-improvement‚ making it a valuable skill to explore and refine.

Why Practice Sheets Are Essential for Beginners

Practice sheets are a cornerstone for calligraphy beginners‚ offering structured guidance to master letterforms‚ strokes‚ and spacing. They provide a clear starting point‚ helping learners progress from basic techniques to more complex flourishes. By repetition and tracing‚ beginners build muscle memory and consistency‚ essential for developing a steady hand. These sheets also foster creativity‚ allowing experimentation with different styles and tools. Regular practice with these resources enhances precision‚ confidence‚ and overall skill development. For those new to calligraphy‚ practice sheets are invaluable‚ serving as a foundation to grow from and refine their artistic expression.

Types of Calligraphy Practice Sheets

Calligraphy practice sheets include alphabet guides‚ stroke exercises‚ and style-specific worksheets. They cater to various skills‚ from basic lettering to intricate flourishes‚ helping refine technique and creativity.

Alphabet Practice Sheets (A-Z)

Alphabet practice sheets are essential for mastering both uppercase and lowercase calligraphy letters. These worksheets provide structured layouts for each letter‚ allowing you to trace and practice consistently. They often include guides for proper letter spacing‚ alignment‚ and stroke direction‚ making them ideal for beginners. Many free PDF downloads offer A-Z sheets in various calligraphy styles‚ such as modern‚ traditional‚ or faux calligraphy. By practicing each letter repeatedly‚ you can refine your technique and develop muscle memory. These sheets are available from websites like Loveleigh Loops and IAMPETH‚ offering a comprehensive resource to improve your lettering skills effectively.

Basic Stroke and Flourish Practice Sheets

Mastering basic strokes and flourishes is fundamental to calligraphy. These practice sheets focus on essential techniques like underturns‚ overturns‚ and hairlines‚ helping you build consistency. They often include exercises for foundational strokes‚ such as horizontal‚ vertical‚ and diagonal lines‚ which are crucial for letter formation. Flourish practice sheets allow you to experiment with decorative elements‚ enhancing your calligraphy with elegant touches. Many free PDF downloads offer detailed guides for strokes and flourishes‚ making them ideal for both beginners and advanced practitioners. Regular practice with these sheets will refine your skills‚ enabling you to create beautiful‚ flowing scripts with precision and confidence.

Modern vs. Traditional Calligraphy Sheets

Modern and traditional calligraphy sheets cater to different styles and preferences. Traditional sheets focus on historical scripts like Copperplate or Spencerian‚ emphasizing precise nib work and classic flourishes. They often require specialized tools and adhere to strict lettering rules. In contrast‚ modern calligraphy sheets are more flexible‚ incorporating contemporary styles and tools like brush pens or digital brushes. These sheets often include creative variations and flourishes‚ making them ideal for DIY projects and artistic expression. Both types are widely available as free PDF downloads‚ allowing enthusiasts to explore their preferred style. Whether you lean toward timeless elegance or modern creativity‚ these practice sheets provide the perfect foundation for mastering your chosen script.

Where to Download Free Calligraphy Practice Sheets

Find free calligraphy practice sheets on websites like Loveleigh Loops‚ IAMPETH‚ and UPrinting. These sites offer a variety of PDF downloads for modern and traditional scripts.

Top Websites for Free PDF Downloads

Discover the best websites offering free calligraphy practice sheets in PDF format. Loveleigh Loops provides sheets for uppercase and lowercase letters‚ ideal for beginners. IAMPETH offers historical specimens and detailed guides for traditional scripts. UPrinting features a variety of styles‚ including modern‚ brush‚ and faux calligraphy. Additionally‚ Scribblers Guide Paper Generator allows customization of practice sheets based on ascender‚ body‚ and descender heights. These platforms are perfect for mastering foundational skills‚ from basic strokes to intricate flourishes. Many sites also include tips‚ tutorials‚ and seasonal worksheets to enhance your learning journey. Whether you’re practicing with pen and paper or digitally‚ these resources make it easy to download and start improving your calligraphy skills immediately.

How to Choose the Right Practice Sheets

When selecting calligraphy practice sheets‚ consider your skill level and goals. Beginners should start with sheets focusing on basic strokes and alphabet letters‚ while more advanced practitioners can explore intricate flourishes and decorative elements; Choose sheets that align with the specific calligraphy style you’re learning‚ such as modern‚ brush‚ or traditional scripts. Ensure the sheets are compatible with your tools‚ like brush pens or nibs. Additionally‚ look for sheets that include guides or spacing markers to help maintain consistency. Some sheets also offer breathing drills or lettering exercises for a more comprehensive practice. Always opt for high-quality‚ downloadable PDFs from reputable websites to ensure clarity and usability. This tailored approach will help you progress effectively in mastering calligraphy.

How to Use Calligraphy Practice Sheets Effectively

Start by tracing letters‚ then transition to free-hand practice using the guides. Adjust sheet sizes and focus on consistency with each stroke to refine your calligraphy skills effectively.

Tools and Materials Needed

To begin practicing calligraphy‚ you’ll need a few essential tools. A good-quality brush pen or a dip pen with interchangeable nibs is ideal for varying line widths. Pair this with waterproof ink to prevent smudging. Printer paper or specialized calligraphy paper with guidelines is recommended for clarity. For digital practice‚ use a graphics tablet or iPad with a stylus. Download your preferred calligraphy practice sheets PDF and print them on standard letter-sized paper. Optional tools include light pads for tracing and erasers for corrections; Ensure your workspace is well-lit and comfortable for extended practice sessions. These tools will help you master the basics and refine your technique effectively.

Step-by-Step Guide to Practicing

Begin by printing your chosen calligraphy practice sheets PDF on high-quality paper. Start with basic strokes‚ tracing guidelines to build muscle memory. Practice breathing exercises to relax your hand. Dedicate 15-30 minutes daily to consistent practice. Begin with uppercase letters‚ then progress to lowercase. Use a brush pen or dip pen to replicate strokes. Trace letters multiple times before attempting them freehand. Focus on letter spacing and alignment. Gradually incorporate flourishes for decorative touches. Regularly review your progress to identify areas for improvement. Stay patient and enjoy the journey of mastering calligraphy with these structured practice sheets.

Advanced Techniques and Tips

Elevate your calligraphy by mastering flourishes and maintaining consistency in lettering. Experiment with varying styles‚ and refine your skills through dedicated practice with advanced PDF practice sheets.

Incorporating Flourishes and Decorative Elements

Mastering flourishes and decorative elements elevates your calligraphy to the next level. These intricate details add personality and elegance to your work. Start by practicing basic strokes‚ then gradually incorporate flourishes using free PDF practice sheets. Experiment with loops‚ swashes‚ and terminals to create unique styles. For modern calligraphy‚ focus on bold‚ expressive flourishes‚ while traditional styles like copperplate emphasize refined‚ delicate details. Use tools like brush pens or dip pens to achieve varying line widths. Begin with guided worksheets‚ then transition to free-hand techniques. Consistency is key‚ so dedicate time to mastering these elements. With practice‚ you’ll seamlessly integrate flourishes into your lettering‚ creating stunning‚ professional-looking pieces.

Mastering Consistency in Lettering

Achieving consistency in lettering is fundamental for professional-looking calligraphy. Use free PDF practice sheets to refine uniform letter spacing‚ sizing‚ and alignment. Start by tracing guidelines to develop muscle memory‚ then transition to free-hand practice. Focus on maintaining the same slant and height for each letter. Regular repetition builds accuracy and flow. Advanced techniques involve perfecting letter connections and spacing. Incorporate drills for stroke consistency‚ ensuring smooth transitions between thick and thin lines. Over time‚ this practice enhances readability and visual appeal. For intricate styles like copperplate or modern calligraphy‚ consistency is key to creating a cohesive look. Dedicate time daily to practice‚ and watch your skills flourish with each session. Consistency transforms basic lettering into stunning‚ polished calligraphy.

Calligraphy practice sheets are a valuable tool for mastering lettering‚ offering free PDF downloads to enhance creativity and consistency‚ helping you refine your skills with ease and precision.

Final Thoughts on Improving Calligraphy Skills

Improving calligraphy skills requires consistency‚ dedication‚ and the right tools. Free calligraphy practice sheets are an invaluable resource for learners‚ offering structured guidance to master letters‚ strokes‚ and flourishes. Whether focusing on traditional or modern styles‚ these sheets provide a clear path to progress. Start with basic strokes‚ then gradually incorporate uppercase and lowercase letters‚ ensuring each movement is deliberate and precise. As you advance‚ explore decorative elements to add personality to your work. With regular practice and patience‚ you’ll refine your technique‚ making even the most intricate designs achievable. Embrace the journey‚ and let these free PDF downloads be your guide to mastering the art of beautiful handwriting.

Continue Reading

building and delivering microservices on aws pdf free download

Building and delivering microservices on AWS is a comprehensive guide to developing scalable applications using cloud-native practices. Explore key concepts, architecture patterns, and best practices for seamless deployment and management.

1.1 What Are Microservices?

Microservices are an architectural style that structures an application as a collection of loosely coupled, independently deployable services. Each service is responsible for a specific business function, enabling modular development, scalability, and fault isolation. They communicate via APIs, allowing flexibility in technology choices and deployment options, making them ideal for cloud environments like AWS.

Benefits of Using AWS for Microservices

AWS offers scalability, flexibility, and cost-effectiveness for microservices, enabling seamless deployment, managed services, and robust security, while supporting diverse architectural patterns and tools for efficient application delivery.

2.1 Scalability and Flexibility

AWS provides unparalleled scalability and flexibility for microservices, allowing dynamic resource allocation based on demand. With services like Amazon ECS, AWS Lambda, and Fargate, developers can effortlessly scale applications while maintaining operational efficiency. These tools support both containerized and serverless architectures, enabling businesses to adapt quickly to changing workloads and deliver responsive applications with minimal overhead.

Key Architecture Patterns for Microservices on AWS

AWS supports various architecture patterns for microservices, including API-driven, event-driven, and data streaming architectures. These patterns enable scalable, responsive, and maintainable cloud-native applications tailored to business needs, ensuring efficiency and reliability in modern applications.

3.1 API-Driven Architecture

API-driven architecture is a popular pattern for microservices, enabling communication through well-defined APIs. AWS provides tools like Amazon API Gateway for managing RESTful APIs, ensuring loose coupling and scalability. This approach simplifies service integration, allowing microservices to interact seamlessly while maintaining independence. It’s ideal for building modern, cloud-native applications with clear boundaries and standardized communication protocols.

3.2 Event-Driven Architecture

Event-driven architecture enables microservices to communicate via events, promoting decoupling and scalability. AWS services like Amazon EventBridge simplify event management, allowing real-time data processing. This pattern is ideal for systems requiring high responsiveness, fault tolerance, and asynchronous communication, making it a cornerstone for modern, distributed applications built on AWS.

3.3 Data Streaming Architecture

Data streaming architecture leverages real-time data flows to enable efficient communication between microservices. AWS services like Amazon Kinesis and Amazon MSK handle high-throughput data streams, ensuring scalability and fault tolerance. This pattern is ideal for applications requiring immediate data processing, such as analytics, IoT, or financial systems, enhancing responsiveness and decision-making capabilities in distributed environments.

AWS Services for Building Microservices

AWS provides essential services like ECS, Lambda, and Fargate for container orchestration, serverless functions, and scalable deployments, enabling efficient microservices development and management.

4.1 Amazon ECS (Elastic Container Service)

Amazon ECS is a highly scalable, fast container management service that makes it easy to run, stop, and manage containers on AWS. It supports Docker containers and integrates seamlessly with other AWS services, enabling efficient orchestration of microservices. ECS allows developers to launch and manage containerized applications securely, with built-in scalability and monitoring capabilities, making it ideal for deploying modern web applications and microservices architectures.

4.2 AWS Lambda for Serverless Microservices

AWS Lambda is a serverless compute service that enables developers to run code without managing servers. It supports event-driven architectures, automatically scaling to handle variable workloads. With Lambda, microservices can be deployed as functions, reducing operational overhead and costs. It integrates seamlessly with other AWS services, making it a powerful tool for building scalable, efficient, and cost-effective serverless microservices.

4.3 Amazon Fargate for Serverless Containers

Amazon Fargate is a serverless compute engine for containers that works with Amazon ECS and EKS. It allows you to run containers without managing EC2 instances, offering a pay-as-you-go pricing model. Fargate handles provisioning, scaling, and security, enabling developers to focus on building microservices. It integrates seamlessly with AWS services, providing a scalable and secure environment for deploying containerized applications efficiently.

Implementing CI/CD Pipelines for Microservices Delivery

CI/CD pipelines automate the build, test, and deployment of microservices, ensuring consistent and reliable delivery. AWS provides tools like CodePipeline, CodeBuild, and CodeDeploy to streamline these processes.

5.1 AWS CodePipeline for Automated Deployment

AWS CodePipeline automates the deployment process for microservices, enabling consistent and reliable delivery. It integrates with CodeBuild for testing and CodeDeploy for controlled rollouts, ensuring seamless CI/CD workflows. By defining stages and actions, developers can manage deployments across multiple environments, reducing manual errors and enhancing efficiency in microservices delivery on AWS.

5.2 AWS CodeBuild for Continuous Integration

AWS CodeBuild is a fully managed service that automates the build and testing of code for microservices. It integrates seamlessly with AWS CodePipeline, enabling developers to run tests and compile code in scalable environments. CodeBuild supports various programming languages and frameworks, streamlining the CI/CD process for consistent and reliable microservices delivery on AWS.

5.3 AWS CodeDeploy for Controlled Rollouts

AWS CodeDeploy automates software deployments to on-premises and cloud environments, ensuring smooth and controlled rollouts. It integrates with CodePipeline, enabling developers to manage deployment stages, track progress, and handle rollbacks. CodeDeploy supports blue/green deployments and canary releases, minimizing downtime and ensuring high availability for microservices on AWS.

Security Best Practices for Microservices on AWS

Implement IAM roles, encryption, and access controls to secure microservices on AWS. Ensure least privilege, monitor activities, and protect sensitive data to maintain a robust security posture.

6.1 IAM Roles and Policies

IAM roles and policies are essential for securing microservices on AWS. They enable fine-grained access control, ensuring services operate with least privilege. Attach roles to resources like EC2 or Lambda, and define policies to specify permitted actions. This approach minimizes security risks and ensures secure communication between microservices without hardcoding credentials.

6.2 Encryption and Access Control

Encryption and access control are critical for securing microservices on AWS. Use AWS KMS for key management and SSL/TLS for data in transit. Encrypt data at rest in S3 or RDS. Implement VPCs, security groups, and network ACLs to control network access. Ensure only authorized services communicate, protecting sensitive data and maintaining compliance with security standards.

Monitoring and Logging Microservices on AWS

Monitor and log microservices using Amazon CloudWatch for metrics and AWS X-Ray for distributed tracing. These tools provide insights into performance, errors, and system health for proactive management.

7.1 Amazon CloudWatch for Metrics and Logging

Amazon CloudWatch is a monitoring service that collects metrics, logs, and insights for AWS resources. It provides real-time data to optimize performance, set alarms, and enable automated actions. With CloudWatch, you can track microservices health, troubleshoot issues, and generate detailed reports for compliance and analysis, ensuring seamless monitoring and logging across your microservices architecture.

7.2 Distributed Tracing with AWS X-Ray

AWS X-Ray provides end-to-end visibility into distributed applications, helping identify performance bottlenecks and errors. It traces requests as they travel through microservices, offering insights into latency, faults, and user experience. With X-Ray, developers can debug and optimize their architectures, ensuring reliable and efficient microservices delivery on AWS.

Infrastructure as Code with AWS CDK

AWS CDK enables defining infrastructure in code, ensuring consistency and repeatability. It simplifies managing cloud resources, promoting efficient and collaborative development of microservices architectures.

8.1 Defining Infrastructure in Code

Infrastructure as Code (IaC) with AWS CDK allows you to define cloud resources using programming languages. This approach ensures consistency, version control, and repeatability, bridging the gap between development and operations. By codifying infrastructure, teams can manage and evolve their microservices architecture efficiently, promoting collaboration and reducing errors. AWS CDK integrates seamlessly with AWS services, enabling automated deployments and consistent environments across the application lifecycle.

8.2 Reusable Infrastructure Patterns

Reusable infrastructure patterns with AWS CDK enable developers to create modular, scalable, and maintainable templates. These patterns ensure consistent environments across applications, reducing redundancy and improving efficiency. By leveraging predefined constructs, teams can accelerate deployment while maintaining flexibility. Reusable patterns also promote best practices, simplify compliance, and enhance collaboration, making it easier to scale microservices architectures efficiently.

Best Practices for Implementing Microservices

Implementing microservices requires a modular design, clear service communication, and robust fault tolerance to ensure scalability, resilience, and maintainability.

9.1 Service Discovery and Communication

Service discovery is crucial for enabling microservices to dynamically locate and communicate with each other. AWS provides tools like Amazon ECS Service Discovery, which simplifies service registration and lookup. Implementing load balancing and circuit breakers ensures efficient communication and fault tolerance. Using APIs and event-driven architectures enhances interoperability and scalability across distributed systems.

9.2 Circuit Breakers and Fault Tolerance

Circuit breakers are essential for preventing cascading failures in microservices. AWS provides tools like Amazon ECS and ALB to implement load balancing and fault tolerance. By automatically rerouting traffic during service outages, these patterns ensure high availability and system reliability, maintaining seamless operation even in failure scenarios.

10.1 Summary of Key Concepts

Building and delivering microservices on AWS involves mastering architecture patterns like API-driven, event-driven, and data streaming. Key services include ECS, Lambda, and Fargate. CI/CD pipelines with CodePipeline, CodeBuild, and CodeDeploy ensure efficient delivery. Security best practices, monitoring with CloudWatch and X-Ray, and infrastructure as code with CDK are essential for robust implementations. These concepts streamline cloud-native development, ensuring scalable and resilient applications.

10.2 Resources for Further Learning

For deeper insights, explore the Packt book Building and Delivering Microservices on AWS. Additionally, AWS provides extensive whitepapers on microservices architecture and implementation. Leverage free resources like the O’Reilly Building Microservices ebook and AWS documentation for hands-on guidance; These materials offer practical examples, best practices, and advanced techniques to enhance your microservices development skills on the AWS platform.

Continue Reading

hitch guide

A trailer hitch is essential hardware for enhancing your vehicle’s towing capabilities, offering versatile solutions for hauling trailers, campers, and cargo carriers safely and efficiently.

Overview of Trailer Hitches and Their Importance

A trailer hitch is a critical component for vehicles, enabling safe and efficient towing of trailers, campers, boats, and other heavy loads. Its primary function is to connect a trailer to a vehicle, distributing weight evenly to ensure stability and control while towing. Trailer hitches are designed to handle varying weight capacities, making them essential for both recreational and commercial use. They come in different classes, each tailored to specific towing needs, ensuring compatibility with the vehicle’s capabilities. Properly installed hitches enhance safety, prevent damage to the vehicle or trailer, and provide peace of mind for drivers. Whether for lightweight tasks like hauling bikes or heavy-duty applications like towing large RVs, a trailer hitch is a versatile and indispensable tool for any towing scenario.

Key Features to Consider When Choosing a Trailer Hitch

When selecting a trailer hitch, several key features are crucial to ensure compatibility and safety. The receiver size is essential, with common sizes being 1.25-inch and 2-inch, as it determines the ball mount compatibility. Weight capacity is another critical factor, as it must match the load you plan to tow. Hitch classes range from Class I to Class V, each offering different towing capacities. Additionally, consider the type of hitch, such as receiver, fifth wheel, or gooseneck, based on your towing needs. Durability and construction materials, like steel or aluminum, also matter for longevity. Proper installation and wiring for lights and brakes are necessary for safe operation. Always ensure the hitch is specifically designed for your vehicle to avoid compatibility issues and ensure optimal performance.

Trailer Hitch Classes Explained

Trailer hitch classes determine towing capacity, ranging from Class I for small loads to Class V for heavy-duty needs, each with specific weight ratings and capabilities.

Class I Trailer Hitches: Weight Capacity and Uses

Class I trailer hitches are designed for light-duty towing, making them ideal for smaller vehicles like passenger cars and compact SUVs. These hitches typically have a 1.25-inch receiver opening and can handle up to 2,000 lbs of gross trailer weight (GTW) with a maximum tongue weight of 200 lbs. They are perfect for towing small utility trailers, bike racks, or lightweight campers. Class I hitches are great for casual users who need to haul smaller loads occasionally. However, they are not suitable for heavier trailers or large vehicles. Always check your vehicle’s towing capacity to ensure safe and efficient towing. This hitch class is a practical choice for those seeking a reliable, easy-to-install solution for light towing needs.

Class II Trailer Hitches: Medium-Duty Towing Solutions

Class II trailer hitches are designed for medium-duty towing, offering a balance between versatility and strength. These hitches typically feature a 1.25-inch or 2-inch receiver opening and can handle up to 3,500 lbs of gross trailer weight (GTW) with a maximum tongue weight of 300 lbs. They are ideal for towing larger trailers, small boats, and campers, making them a popular choice for mid-size SUVs and trucks. Class II hitches are also suitable for hauling heavier cargo carriers and bike racks. Their sturdy construction ensures reliable performance for everyday towing needs. Installation is relatively straightforward, and they often come with bolt-on designs for easy setup. Regular maintenance, such as lubricating moving parts and inspecting for wear, will help extend the hitch’s lifespan and ensure safe towing experiences.

Class III Trailer Hitches: Heavy-Duty Towing Options

Class III trailer hitches are heavy-duty towing solutions, offering a 2-inch receiver size and a maximum gross trailer weight (GTW) capacity of up to 8,000 lbs, with a tongue weight of 800 lbs. Designed for larger vehicles like pickup trucks and SUVs, these hitches are ideal for towing boats, RVs, and heavy utility trailers. Their robust construction ensures durability and stability for demanding towing tasks. Class III hitches are also compatible with a wide range of ball mounts and accessories, making them versatile for various applications. Proper installation and regular maintenance are crucial to ensure optimal performance and safety. They are a reliable choice for those needing to tow heavier loads frequently, providing both strength and reliability for medium to large-scale towing needs.

Class IV Trailer Hitches: High Capacity for Larger Loads

Class IV trailer hitches are engineered for high-capacity towing, featuring a 2-inch receiver size and a maximum gross trailer weight (GTW) of up to 12,000 lbs, with a tongue weight capacity of 1,200 lbs. These hitches are designed for heavy-duty applications, such as towing large boats, travel trailers, and livestock trailers. They are typically installed on full-size pickup trucks and heavy-duty SUVs. Class IV hitches are known for their durability and strength, making them a preferred choice for commercial and industrial use. Their robust construction ensures stability and control, even with the heaviest loads. Additionally, they offer excellent compatibility with a variety of towing accessories, enhancing their versatility. Regular maintenance is essential to maintain their performance and longevity, ensuring safe and reliable towing experiences for years to come.

Class V Trailer Hitches: Maximum Towing Capacity

Class V trailer hitches are designed for maximum towing capacity, making them ideal for heavy-duty applications. With a robust 2.5-inch receiver size, these hitches can handle up to 20,000 lbs of gross trailer weight (GTW) and 2,000 lbs of tongue weight, depending on the model. They are typically used for towing large RVs, horse trailers, and heavy construction equipment. Class V hitches are built to withstand extreme stress and provide exceptional stability and control. Their heavy-duty construction ensures reliability and durability, making them a top choice for professional and heavy-duty towing needs. These hitches are often paired with advanced towing accessories to enhance safety and performance. If you’re tackling the heaviest loads, a Class V hitch is the ultimate solution for your towing requirements.

Types of Trailer Hitches

Trailer hitches come in various types, each designed for specific towing needs. Receiver hitches offer versatility, while fifth wheel and gooseneck hitches provide stability for heavy loads. Pintle hitches are ideal for commercial use, ensuring durability and control.

Receiver Hitches: Versatility and Compatibility

Receiver hitches are among the most popular and versatile towing solutions, offering compatibility with a wide range of vehicles and trailer setups. Available in five classes, they cater to different towing needs, from light-duty tasks like bike racks to heavy-duty applications such as large trailers. Their design features a square receiver tube, with common sizes including 1.25-inch and 2-inch openings, ensuring compatibility with various ball mounts and accessories. Receiver hitches are known for their ease of use, as they allow quick installation of interchangeable towing components. This adaptability makes them ideal for drivers who need a hitch that can handle multiple tasks. Whether towing a small utility trailer or a heavy camper, receiver hitches provide a reliable and flexible solution for safe and efficient towing.

Fifth Wheel Hitches: Ideal for Heavy-Duty Towing

Fifth wheel hitches are designed for heavy-duty towing, making them a top choice for large trailers, luxury RVs, and long-haul campers. Unlike bumper-pull hitches, they use a kingpin-style plate system that mounts in the bed of a pickup truck, providing exceptional weight distribution and stability. This design enhances control, improves turning radius, and ensures safer towing experiences. Fifth wheel hitches are perfect for heavy loads and are commonly used for travel trailers and high-capacity applications. Their robust construction and advanced coupling mechanisms make them ideal for professional and recreational use, offering a reliable solution for towing large and heavy vehicles with ease and precision.

Gooseneck Hitches: Stability and Control for Large Loads

Gooseneck hitches are designed to provide exceptional stability and control for large, heavy loads, making them ideal for agricultural, construction, and heavy-duty towing applications. These hitches are mounted in the bed of a pickup truck, typically in a recessed area, and use a ball-and-coupler system for a secure connection. Their design minimizes trailer movement, offering superior towing performance for oversized loads like horse trailers, large RVs, and heavy-duty equipment. Gooseneck hitches are known for their high weight capacity and are often preferred for their durability and reliability. Installation typically requires specialized tools and a thorough setup to ensure proper alignment and safety. They are a top choice for professionals and enthusiasts needing to tow heavy loads with confidence and precision.

Pintle Hitches: Heavy-Duty Towing for Commercial Use

Pintle hitches are robust towing solutions designed for heavy-duty applications, primarily in commercial and industrial settings. They feature a pintle hook and lunette ring system, offering exceptional strength and durability for hauling large, heavy loads. Commonly used in construction, agriculture, and military contexts, pintle hitches are ideal for towing oversized trailers, heavy machinery, and equipment. Their high weight capacity and secure coupling make them a reliable choice for demanding tasks. Unlike other hitch types, pintle hitches are built to withstand harsh conditions and extreme loads, making them a preferred option for professional and industrial towing needs. Their simplicity and rugged design ensure long-lasting performance in challenging environments.

Installation and Maintenance Tips

Proper installation and regular maintenance ensure optimal performance and safety. Follow manufacturer instructions, use appropriate tools, and check electrical connections for functionality. Inspect hitch components regularly for wear and damage to extend lifespan.

Step-by-Step Installation Guide for Trailer Hitches

Installing a trailer hitch requires careful preparation and attention to detail to ensure safety and proper function. Start by gathering all necessary tools and hardware, following the manufacturer’s instructions. Position the hitch aligning it with your vehicle’s frame, ensuring it is level. Secure the hitch using bolts, tightening them firmly. If drilling is required, use the correct drill bits and avoid damaging surrounding areas. Once installed, wire the electrical components, connecting lights and brakes according to the wiring diagram. Test the hitch by towing a trailer, checking for stability and proper light function. Always refer to your vehicle and hitch manual for specific guidance. Proper installation ensures safe and reliable towing experiences.

Wiring and Electrical Setup for Trailer Hitches

Proper wiring and electrical setup are crucial for safe and functional trailer operation. Begin by connecting the trailer connector to your vehicle’s wiring system, ensuring all lights, brakes, and signals function correctly. Use a wiring harness or adapter to match your vehicle’s electrical system to the trailer’s connector. Test the setup by activating turn signals, brakes, and taillights to confirm they work in sync with your vehicle. If your vehicle doesn’t have a built-in tow package, consider installing a wiring kit with a 4-way or 7-way connector. Always refer to your vehicle and hitch manufacturer’s wiring diagrams for accuracy. Proper electrical connections ensure safety and compliance with towing regulations, preventing potential hazards on the road.

Maintenance Tips to Extend Hitch Lifespan

Regular maintenance is essential to ensure your trailer hitch performs optimally and lasts longer. Start by lubricating all moving parts, such as the ball mount and hitch pins, to prevent rust and wear. Inspect the hitch for signs of damage or corrosion and address any issues promptly. After each use, clean the hitch to remove dirt and debris, especially if exposed to moisture. Tighten all bolts and screws regularly to maintain proper alignment and security. Additionally, apply a protective coating or rust inhibitor to metal components to shield them from environmental factors. Finally, store the hitch in a dry place when not in use to prevent long-term damage. By following these maintenance tips, you can extend the lifespan of your trailer hitch and ensure safe towing experiences.

Understanding trailer hitches is crucial for safe and efficient towing. By choosing the right hitch class and type for your vehicle and load, you can ensure reliable performance and durability. Whether you’re towing a small trailer or a heavy RV, proper installation, maintenance, and adherence to weight limits are essential. Regular inspections and lubrication of moving parts will extend the lifespan of your hitch. With the variety of options available, from receiver hitches to fifth-wheel and gooseneck setups, there’s a solution for every towing need. Always follow manufacturer guidelines and prioritize safety to enjoy hassle-free towing experiences. Use this guide to make informed decisions and find the perfect hitch for your next adventure.

Continue Reading

full body kettlebell workout pdf

A full-body kettlebell workout is a comprehensive training method that enhances strength, agility, and endurance using minimal equipment. It targets all major muscle groups, promoting efficiency and fat loss. Downloadable PDF guides provide structured routines for all fitness levels, ensuring a balanced and effective workout experience.

1.1 What is a Full Body Kettlebell Workout?

A full-body kettlebell workout is a holistic training approach that engages all major muscle groups using dynamic movements. It combines strength, agility, and endurance exercises, often requiring minimal equipment. Ideal for home or gym use, it promotes fat loss, muscle toning, and improved coordination. The workout is adaptable to various fitness levels, making it accessible for beginners and challenging for advanced trainees.

1.2 Benefits of Kettlebell Training

Kettlebell training enhances strength, speed, and agility while promoting fat loss and muscle building. It improves coordination and endurance, offering a versatile workout for all fitness levels. The dynamic movements engage multiple muscle groups, making it efficient for full-body conditioning. Kettlebells are ideal for home workouts, requiring minimal equipment and providing a variety of exercises to keep routines engaging and challenging.

Key Kettlebell Exercises for a Full Body Workout

Kettlebell swings, goblet squats, presses, rows, and deadlifts are essential exercises that target major muscle groups, ensuring a balanced and effective full-body workout experience.

2.1 Kettlebell Swings

Kettlebell swings are a dynamic exercise that engages the entire body, improving power and endurance. They target the hips, glutes, and core while enhancing cardiovascular fitness. Swings are foundational in full-body routines, promoting functional strength and coordination. Proper form ensures maximum effectiveness and safety, making them a cornerstone of kettlebell training for all fitness levels.

2.2 Goblet Squats

Goblet squats are a versatile exercise that strengthens the legs, hips, and core while improving balance and stability. Holding the kettlebell close to the chest, this movement targets the quadriceps, hamstrings, and glutes. It’s an excellent compound exercise for full-body engagement, suitable for all fitness levels, and ensures proper form and muscle activation throughout the squatting motion.

2.3 Kettlebell Presses

Kettlebell presses are an essential upper-body exercise that targets the shoulders, triceps, and chest. They involve pressing the kettlebell overhead, promoting muscle growth and strength. Variations include shoulder presses, side raises, and chest presses, all of which enhance overall physique. This exercise is highly effective for building a strong, balanced upper body and improving overall functional strength.

2.4 Kettlebell Rows

Kettlebell rows are a powerful exercise targeting the back, shoulders, and core. They involve pulling the kettlebell towards the torso, enhancing strength and posture. Variations include bent-over rows and single-arm rows, allowing for targeted muscle engagement. This exercise is excellent for improving overall upper-body strength and promoting better muscle balance.

2.5 Kettlebell Deadlifts

Kettlebell deadlifts are a fundamental exercise that strengthens the posterior chain, including hamstrings, glutes, and lower back muscles. Proper form is crucial to avoid injury, with a focus on maintaining a straight back and engaging the core. This exercise is excellent for building overall lower-body strength and improving functional movement patterns in a full-body workout routine.

Structuring a Full Body Kettlebell Workout

A well-structured full-body kettlebell workout includes a dynamic warm-up, targeted exercises, and a cool-down. Downloadable PDF guides offer routines tailored to fitness levels, ensuring balanced training and progressive results.

3.1 Warm-Up and Preparation

A proper warm-up is essential for a safe and effective full-body kettlebell workout. Begin with dynamic stretches like arm circles and bodyweight squats. Incorporate light kettlebell movements, such as swings or around-the-worlds, to activate your muscles. Focus on core engagement and proper form from the start. A 5-10 minute warm-up prepares your body for the workout ahead, reducing injury risk and improving performance.

3.2 Workout Duration and Intensity

A full-body kettlebell workout typically lasts 40-60 minutes, depending on your fitness level and goals. Start with moderate intensity, aiming for 3-4 sets of 8-12 reps per exercise. Adjust the weight and reps to challenge yourself while maintaining proper form. For weight loss, focus on higher reps and shorter rest periods. For muscle building, use heavier kettlebells with lower reps and controlled movements.

3.3 Cool-Down and Recovery

After your workout, dedicate 5-10 minutes to cooling down with static stretches for major muscle groups. Focus on deep breathing to lower heart rate and promote relaxation. Rehydrate and consider foam rolling to reduce muscle tension. Proper recovery ensures your body adapts to the workout, preventing soreness and enhancing future performance. Prioritize rest and nutrition for optimal results.

Downloadable PDF Resources

Downloadable PDF guides offer structured full-body kettlebell workout plans, ideal for all fitness levels. These resources include exercise routines, warm-ups, and nutrition tips to enhance your training.

4.1 Free Full Body Kettlebell Workout PDFs

Free full-body kettlebell workout PDFs are accessible online, offering comprehensive training plans for all fitness levels. These guides include detailed exercise routines, warm-up strategies, and nutritional advice. Resources from DAREBEE and Hungry 4 Fitness provide structured workouts, ensuring effective home training. Download these PDFs to access proven routines designed to enhance strength, agility, and overall fitness, perfect for achieving your goals efficiently.

4.2 How to Use the PDF Guide Effectively

To maximize the benefits of a full-body kettlebell workout PDF, start with the warm-up section to prepare your muscles. Follow the structured routines, tracking progress and adjusting sets as needed. Use the included countdown timers for AMRAP workouts and focus on proper form to avoid injury. Print or save the guide for easy access during sessions, ensuring consistent and effective training.

Advanced Techniques and Modifications

Incorporate complex movements and progressive overload to enhance your kettlebell workout. Focus on proper form and technique to prevent injury and maximize results effectively.

5.1 Progressive Overload with Kettlebells

Progressive overload involves gradually increasing the intensity of your kettlebell workouts; This can be achieved by using heavier kettlebells, adding repetitions, or performing more sets. Incorporating variations of exercises, such as single-arm or complex movements, also enhances challenge. This approach ensures continuous strength and muscle growth, preventing plateaus and keeping your training dynamic and effective over time.

5.2 Incorporating Complex Movements

Incorporating complex movements, such as Turkish get-ups or kettlebell snatches, enhances full-body engagement and coordination. These exercises combine strength, mobility, and endurance, targeting multiple muscle groups simultaneously. By integrating dynamic and multi-planar movements, you can improve functional fitness and elevate your workout’s intensity. This approach keeps routines engaging and maximizes overall physical development, ensuring a well-rounded training experience.

Safety and Injury Prevention

Ensuring proper form and technique is crucial to prevent injuries. Start with lighter weights, focus on controlled movements, and avoid overtraining. Supervision from a professional can help maintain safety and effectiveness throughout your full-body kettlebell workout routine.

6.1 Proper Form and Technique

Maintaining proper form and technique is essential for maximizing results and preventing injuries. Focus on a neutral spine, engage your core, and use your hips to generate power. Avoid rounded shoulders and ensure controlled movements throughout each exercise. Starting with lighter weights and progressing gradually helps build strength safely. Professional guidance can also help refine your technique for optimal effectiveness.

6.2 Common Mistakes to Avoid

Common mistakes in kettlebell workouts include rounding the back during swings or deadlifts, which can strain the spine. Using only the arms to lift instead of generating power from the hips leads to poor form and inefficiency. Failing to engage the core can cause instability and reduce effectiveness. Letting the kettlebell swing too high can result in loss of control. Avoiding these errors ensures safer, more effective workouts and prevents injuries.

Troubleshooting Common Issues

Addressing fatigue and plateaus requires adjusting workout intensity or modifying exercises. Proper form corrections and consistent practice help overcome challenges, ensuring continued progress in your kettlebell journey.

7.1 Addressing Fatigue and Plateaus

Combat fatigue by incorporating rest days and adjusting workout intensity. To overcome plateaus, modify exercises or increase weight. Downloadable PDF guides offer structured routines and tips to maintain progress, ensuring consistent improvement in your full-body kettlebell workout journey. Proper form and varied movements help prevent stagnation and keep your training engaging.

7.2 Modifying Exercises for Different Fitness Levels

Modify kettlebell exercises to suit individual fitness levels by adjusting reps, sets, or weight. Beginners can start with lighter kettlebells and progress gradually, while advanced users can increase intensity. Incorporating bodyweight exercises or using one or two kettlebells allows for scalable workouts. Downloadable PDF guides often include variations, ensuring workouts remain challenging and effective for all fitness levels.

Variations for Different Goals

Kettlebell workouts can be tailored to specific goals, such as weight loss or muscle building, by adjusting intensity, volume, and exercise selection. PDF guides offer customizable routines.

8.1 Kettlebell Workouts for Weight Loss

Kettlebell workouts are highly effective for weight loss due to their high-intensity, full-body nature. Focus on dynamic exercises like swings, goblet squats, and presses to maximize calorie burn. Incorporate circuits or HIIT (High-Intensity Interval Training) to boost metabolism. downloadable PDF guides often include specific routines tailored for fat loss, emphasizing efficiency and results. Adjust reps and sets based on fitness level for optimal impact.

8.2 Kettlebell Workouts for Muscle Building

Kettlebell workouts are excellent for muscle building due to their focus on compound movements. Exercises like kettlebell swings, goblet squats, and presses target multiple muscle groups, promoting hypertrophy. Progressive overload is key, and downloadable PDF guides offer structured routines to maximize muscle growth. Focus on higher reps and controlled movements to engage muscles effectively and achieve balanced development.

Kettlebell workouts are effective for building strength, burning fat, and enhancing muscle mass. Download the PDF guide to start your transformative fitness journey today!

9.1 Final Tips for Success

Master proper form to maximize results and prevent injuries. Start with lighter weights and progress gradually. Incorporate variety in your routines to keep workouts engaging. Stay consistent, aiming for 3-4 sessions weekly. Listen to your body and rest when needed. Celebrate small victories to stay motivated. Download the PDF guide for structured plans and inspiration to achieve your fitness goals effectively.

9.2 Encouragement to Start Your Journey

Embrace the power of kettlebell workouts and transform your body with confidence. These routines are designed for all fitness levels, making them accessible and effective. Consistency is key, so commit to your goals and celebrate every small victory. Download the PDF guide and take the first step toward a stronger, healthier you today!

Continue Reading

lakshmi ashtothram in english pdf

Lakshmi Ashtothram is a sacred hymn dedicated to Goddess Lakshmi‚ comprising 108 divine names that extol her virtues and attributes. It is a powerful prayer for prosperity‚ wealth‚ and spiritual growth‚ often chanted in devotion to seek her blessings and foster a deeper connection with the divine.

Significance of Lakshmi Ashtothram

Lakshmi Ashtothram holds immense spiritual significance as it embodies the 108 divine names of Goddess Lakshmi‚ each highlighting her unique attributes and virtues. These names symbolize her role as the embodiment of wealth‚ prosperity‚ and spiritual enlightenment. Chanting Lakshmi Ashtothram is believed to bring blessings of abundance‚ peace‚ and harmony in life. It is a powerful tool for devotees to connect with the divine energy of Goddess Lakshmi‚ fostering a deeper sense of reverence and gratitude. The hymn is often recited during puja ceremonies‚ festivals‚ and daily worship to invoke her grace and seek protection from adversity. Its significance lies in its ability to transcend material wealth‚ offering spiritual growth and inner fulfillment. The availability of Lakshmi Ashtothram in English PDF has made it accessible to a global audience‚ allowing devotees worldwide to embrace its sacred teachings and experience its profound benefits.

Benefits of Chanting Lakshmi Ashtothram

Chanting Lakshmi Ashtothram offers numerous spiritual and material benefits‚ making it a revered practice among devotees. It is believed to attract wealth‚ prosperity‚ and good fortune by pleasing Goddess Lakshmi‚ the deity of abundance. Regular recitation fosters a sense of calm and inner peace‚ helping to alleviate stress and negativity. The hymn is also known to enhance spiritual growth by deepening one’s connection with the divine. Additionally‚ it is thought to resolve financial difficulties and bring stability to one’s life. Chanting Lakshmi Ashtothram during rituals or daily worship is considered auspicious‚ as it invokes blessings for success‚ happiness‚ and fulfillment. Its availability in English PDF has made it accessible to a wider audience‚ allowing devotees to chant with ease and experience its profound benefits firsthand. This sacred prayer is a powerful tool for those seeking both material and spiritual enrichment.

Structure and Content of Lakshmi Ashtothram

Lakshmi Ashtothram consists of 108 sacred names of Goddess Lakshmi‚ each describing her divine attributes and significance. The hymn is structured to glorify her as the embodiment of wealth‚ prosperity‚ and spiritual enlightenment‚ making it a comprehensive devotion to her greatness.

The 108 Names of Goddess Lakshmi

The 108 names of Goddess Lakshmi‚ as detailed in the Lakshmi Ashtothram‚ are a profound expression of her divine attributes and virtues. Each name is a mantra‚ encapsulating her role as the goddess of wealth‚ prosperity‚ and spiritual growth. These names‚ often prefixed with “Om‚” reflect her various forms and qualities‚ such as “Vishnupriya” (beloved of Vishnu) and “Dhanyalakshmi” (goddess of grains). They are not merely names but invocations that connect devotees to her divine energy‚ offering blessings and inner peace. The Ashtothram is structured to cover all aspects of Lakshmi’s benevolence‚ from material wealth to spiritual enlightenment‚ making it a comprehensive and revered prayer in Hindu devotion. Each name is chanted with reverence‚ amplifying its spiritual significance and fostering a deeper connection with the goddess. This sacred list is a treasure of spiritual knowledge‚ guiding followers on the path to prosperity and harmony.

English Translation and Interpretation

The English translation of Lakshmi Ashtothram provides a meaningful interpretation of the sacred hymn‚ making it accessible to a broader audience. Each of the 108 names of Goddess Lakshmi is translated with precision‚ ensuring the spiritual essence remains intact. The translation captures the depth of her divine attributes‚ such as her role as the embodiment of wealth‚ prosperity‚ and wisdom. Names like “Om Mahalakshmiyei Namaha” underscore her supreme status‚ while others highlight her nurturing and protective qualities. The interpretation also reveals how these names symbolize her connection to creation‚ preservation‚ and spiritual growth. By translating these sacred verses into English‚ devotees who may not be fluent in Sanskrit can still experience the profound significance of the Ashtothram. This translation serves as a bridge‚ allowing individuals to deepen their understanding and connect with Goddess Lakshmi on a personal level‚ fostering devotion and inner peace. The English version retains the sanctity of the original text‚ making it a valuable resource for daily worship and reflection.

How to Chant Lakshmi Ashtothram

Chanting Lakshmi Ashtothram requires focus and devotion. Recite each name with clarity‚ ideally during early mornings or evenings‚ to invoke Goddess Lakshmi’s blessings for prosperity and inner peace. Regular practice enhances spiritual growth and mindfulness.

Best Time to Chant Lakshmi Ashtothram

The ideal time to chant Lakshmi Ashtothram is during the early morning hours‚ specifically during the Brahma Muhurta (4:30 AM to 6:00 AM)‚ when the mind is calm and focused. This period is considered sacred for spiritual practices‚ allowing the devotee to connect deeply with Goddess Lakshmi. Additionally‚ chanting during the evening‚ just before sunset‚ is also beneficial‚ as it helps in winding down and seeking blessings for the coming day. Fridays are particularly auspicious for worshipping Goddess Lakshmi‚ making it a popular day for reciting the Ashtothram. Many devotees also chant it during festivals like Diwali and Akshaya Tritiya‚ which are associated with wealth and prosperity. Regardless of the time‚ chanting with sincerity and devotion yields the best results. Using the English PDF version of Lakshmi Ashtothram can help non-Sanskrit speakers follow the hymn effortlessly during these sacred moments.

Procedure for Chanting Lakshmi Ashtothram

Chanting Lakshmi Ashtothram requires a structured approach to maximize its spiritual benefits. Begin by purifying the space with a quick cleansing ritual‚ such as lighting incense or sprinkling holy water. Sit comfortably in a clean‚ quiet area‚ preferably facing east or north‚ which are considered auspicious directions. Offer flowers‚ fruits‚ or sweets to a picture or idol of Goddess Lakshmi as a symbol of devotion. Recite the hymn with focus and clarity‚ maintaining a steady tone and rhythm. Pause briefly after each name to absorb its significance. For those using the English PDF‚ ensure proper pronunciation and understanding of the names. Conclude the chanting by performing aarti or ringing a bell to signify completion. Maintain a calm and meditative state throughout‚ allowing the divine energy of the hymn to resonate within. Regular and sincere practice enhances the spiritual connection and fosters prosperity in life.

Downloading Lakshmi Ashtothram in English PDF

The Lakshmi Ashtothram in English PDF is readily available for free download on various spiritual websites. It includes the 108 divine names of Goddess Lakshmi‚ along with their meanings and significance.

Where to Find the PDF Online

The Lakshmi Ashtothram in English PDF can be easily found on various spiritual and religious websites. Popular platforms like Vaidika Vignanam‚ Hindu spiritual hubs‚ and devotional portals offer free downloads. You can search for “Lakshmi Ashtothram English PDF” on search engines to access multiple sources. Many websites provide the PDF in both Sanskrit and English scripts‚ making it accessible to a broader audience. Additionally‚ some sites allow you to read the text online without needing to download it. Ensure you verify the credibility of the source to download an accurate and complete version of the Ashtothram. These resources are widely available‚ catering to devotees seeking spiritual guidance and worship materials.

How to Use the PDF for Daily Worship

The Lakshmi Ashtothram English PDF can be seamlessly integrated into daily worship for a meaningful spiritual practice. Begin by creating a peaceful and clean worship space‚ free from distractions. Open the PDF on your device or print it for convenience. Start with a brief prayer to Goddess Lakshmi‚ expressing your intent to seek her blessings. Recite each of the 108 names slowly and mindfully‚ pausing to reflect on their meanings and significance. You can chant aloud or silently‚ depending on your preference. To enhance the experience‚ accompany the recitation with offerings such as flowers‚ incense‚ or a lamp. Regular chanting fosters a sense of calm and gratitude‚ aligning your thoughts with prosperity and positivity. Over time‚ this practice can deepen your connection to Goddess Lakshmi and bring harmony to your life. Consistency is key‚ so aim to incorporate this ritual into your daily routine‚ such as during early morning or evening prayers.

Continue Reading