home run inn sausage pizza cooking instructions

Home Run Inn Sausage Pizza is a legendary choice, offering a thin-crust delight with all-natural ingredients and homemade Italian sausage․ Perfect for a quick, delicious meal․

1․1 Overview of Home Run Inn Pizza Brand

Home Run Inn Pizza, a family-run business, began as a small pizzeria and expanded into frozen pizza distribution in the late 1950s․ Known for its thin crust and premium ingredients, it offers a classic Chicago-style pizza experience․ The brand prides itself on using all-natural ingredients, including homemade Italian sausage and uncured pepperoni, ensuring a flavorful and authentic taste in every bite․

1․2 Popularity of Sausage Pizza Variety

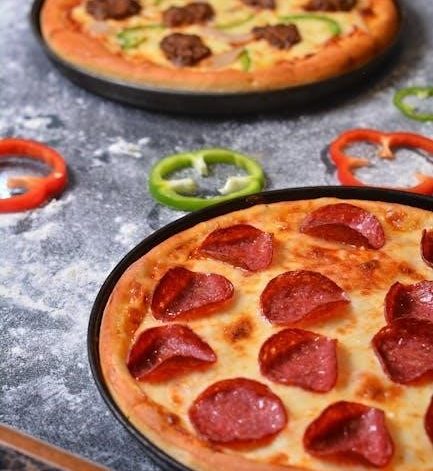
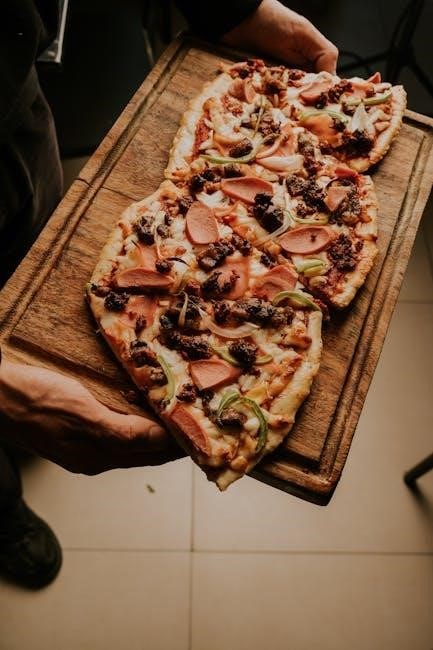
Home Run Inn’s Sausage Pizza is a fan favorite, praised for its thin crust, flavorful homemade Italian sausage, and all-natural ingredients․ Its unique taste, combining crispy crust with savory sausage, has made it a top choice for pizza lovers seeking an authentic Chicago-style experience with a homemade touch․

Oven Baking Instructions

Preheat oven to 450°F․ Place pizza directly on the middle rack without a pan․ Bake for 8-12 minutes until golden brown, monitoring closely for even cooking․

2․1 Preheating the Oven

Preheat your oven to 450°F for optimal cooking․ Place the pizza directly on the middle rack without a pan․ Allow the oven to fully preheat to ensure a crispy crust․ Monitoring is essential as oven performance may vary, leading to different cooking results․ Proper preheating guarantees even cooking and the perfect texture for your Home Run Inn pizza․

2․2 Placing the Pizza

Remove the pizza from all packaging and place it directly on the middle rack of the preheated oven․ Do not use a pan or cookie sheet, as this can prevent the crust from crisping evenly․ Ensure the pizza is centered and flat to avoid uneven cooking․ Proper placement ensures the signature crispy crust and even flavor distribution․

2․3 Baking Time and Temperature

Preheat the oven to 450°F․ Bake the pizza for 8-12 minutes or until golden brown․ All ovens vary, so monitor closely․ For a crisper crust, bake towards the higher end of the time range․ Adjustments may be needed based on personal preference for crust texture and cheese melt․

2․4 Monitoring the Cooking Process

Keep an eye on your pizza during baking, as oven performance can vary․ Check halfway through the recommended time to ensure even cooking․ Look for a golden-brown crust and melted cheese․ Avoid using a pan or cookie sheet for optimal results․ If browning too quickly, cover edges with foil to prevent burning․

Air Fryer Cooking Method

Air frying offers a crispy crust and evenly cooked toppings․ Preheat the air fryer, place the pizza inside, and cook at the recommended temperature for perfect results․

3․1 Benefits of Air Fryer Cooking

Air fryer cooking provides a crispy crust and well-cooked toppings with less oil․ It achieves restaurant-quality results at home, ensuring a delicious and evenly cooked Home Run Inn pizza every time․

3․2 Temperature and Time Guidelines

Preheat the air fryer to 400°F (200°C)․ Cook the pizza for 8-12 minutes, adjusting based on size and toppings․ Monitor the pizza closely during the last few minutes to ensure the crust doesn’t overcook․

3․3 Achieving Crispy Crust

For a crispy crust, preheat the air fryer and ensure the pizza fits without overcrowding․ Lightly spray the crust with oil before cooking․ Cook at 400°F, checking crust color in the last 2-3 minutes to avoid over-browning․ Proper air circulation ensures a golden, crackery texture, enhancing the pizza’s flavor and texture․

Microwave Cooking Instructions

Microwave cooking offers a quick alternative for Home Run Inn pizza․ Cook on medium-high power for 3-4 minutes, adjusting time based on pizza size and microwave strength․

4․1 Cooking Time

Microwave cooking time for Home Run Inn sausage pizza typically ranges from 3 to 4 minutes on medium-high power․ Adjust time based on pizza size and microwave strength․ A 12-inch pizza generally takes 3-4 minutes, while larger pizzas may require an additional minute․ Ensure the pizza is cooked to your desired crispiness without overcooking․

4․2 Limitations of Microwave Cooking

Microwave cooking lacks the crispiness of oven-baked crusts and may result in uneven heating․ It’s not ideal for achieving the signature Home Run Inn crust texture․ Additionally, cooking time varies by microwave power, and larger pizzas may not cook evenly․ While convenient, microwave cooking sacrifices some flavor and texture quality compared to other methods․

Grill Cooking Instructions

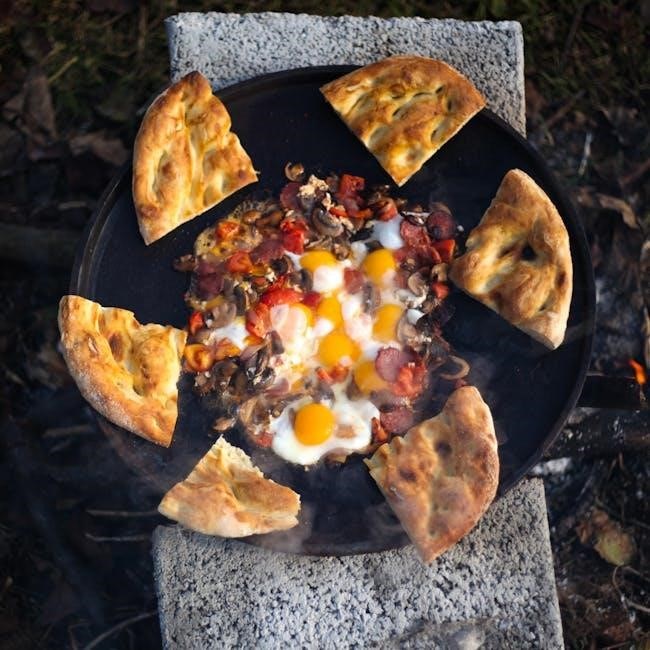
Preheat the grill to medium-high heat (400-450F)․ Place the pizza directly on clean grates for a smoky flavor․ Monitor closely to ensure even cooking and avoid burning․

5․1 Preparing the Grill

Preheat your grill to medium-high heat (400-450F) for optimal results․ Clean the grates thoroughly to prevent sticking and ensure even cooking․ Allow the grill to reach the desired temperature before placing the pizza․ This step ensures a smoky flavor and a perfectly cooked crust․ Proper preparation is key to achieving the best grilling outcome․

5․2 Placing the Pizza

Once the grill is preheated, carefully place the pizza directly on the grill grates, away from direct flames․ Ensure the pizza is centered for even cooking․ Avoid overlapping or overcrowding the grates․ Proper placement ensures the crust cooks evenly and prevents burning․ Keep the pizza away from direct heat to achieve a balanced smoky flavor without charring the crust prematurely․

5․3 Achieving Smoky Flavor

To achieve a smoky flavor, close the grill lid while cooking to trap smoke and heat․ Wood chips can enhance the smokiness․ Rotate the pizza halfway to ensure even flavor distribution․ Medium-high heat helps develop a charred, smoky crust․ This method brings out the richness of the sausage and cheese, creating a grilled pizzeria taste at home․

Special Tips for Perfect Cooking

Use parchment paper to prevent sticking and ensure even cooking․ Rotate the pizza halfway through baking for uniform crispiness․ Avoid overcooking to maintain the perfect texture and flavor․

6․1 Using Parchment Paper

Using parchment paper prevents sticking and promotes even cooking․ Place the pizza on parchment-lined oven racks or baking sheets for effortless cleanup and a perfectly cooked crust every time․

6․2 Rotating the Pizza

Rotating the pizza halfway through baking ensures even cooking and prevents hot spots․ This step is crucial for achieving a crispy crust and well-cooked toppings․ For optimal results, rotate the pizza 180 degrees to ensure uniform cooking and avoid undercooked areas․

6․3 Avoiding Common Mistakes

To ensure the best results, avoid overcooking, as it can make the crust brittle․ Never store the pizza at room temperature for extended periods, and always use parchment paper to prevent sticking․ Monitor the pizza closely during cooking to avoid burning, especially in the air fryer or grill․ Proper rotation and adherence to time guidelines are key to achieving perfection․

Ingredients and Quality of Home Run Inn Pizza

Home Run Inn Pizza features all-natural ingredients, including homemade Italian sausage and uncured pepperoni, ensuring a preservative-free and flavorful dining experience that stands out in frozen pizzas․

7․1 All-Natural Ingredients

Home Run Inn Pizza prides itself on using all-natural ingredients, including its signature homemade Italian sausage and uncured pepperoni, ensuring a preservative-free and flavorful experience without artificial additives․

7;2 Homemade Italian Sausage

Home Run Inn’s homemade Italian sausage is crafted with traditional recipes, featuring a cracker-thin crust topped with a blend of spices and premium meats, offering a taste of authentic Chicago-style pizzeria flavors at home․

7․3 Uncured Pepperoni

Home Run Inn’s uncured pepperoni adds a smoky, flavorful touch without preservatives․ Made with all-natural ingredients, it enhances the pizza’s taste, ensuring a fresh and authentic experience in every bite, just like their classic pizzeria recipes․

Common Mistakes to Avoid

Avoid overcooking to prevent a burnt crust and ensure proper storage to maintain freshness․ These mistakes can significantly impact the pizza’s taste and overall quality․

8․1 Overcooking

Overcooking can lead to a burnt crust and dry toppings, ruining the pizza’s texture and flavor․ Always monitor the pizza closely during the final minutes of baking․ Recommended temperature is 450°F with a baking time of 15-20 minutes․ Check the crust’s golden-brown color and the cheese’s melt for perfect doneness․ Adjust time as needed to avoid overcooking․

8․2 Improper Storage

Improper storage can affect the pizza’s quality and freshness․ Always store Home Run Inn Sausage Pizza in the freezer at 0°F to prevent freezer burn․ If thawed, refrigerate in an airtight container and consume within 24-48 hours․ Avoid storing at room temperature to maintain crispness and flavor․ Proper storage ensures the best taste and texture when cooking․

Home Run Inn Sausage Pizza offers a delicious, easy meal with versatile cooking options․ Enjoy its crispy crust and flavorful toppings by following the provided tips for perfect results․

9․1 Summary of Cooking Methods

Home Run Inn Sausage Pizza can be cooked in an oven at 450°F for 15-20 minutes, or in an air fryer for crispiness․ The microwave offers a quick option but may result in a softer crust․ Grilling adds a smoky flavor, while parchment paper and rotation ensure even cooking․ Monitor closely to avoid overcooking and achieve a golden-brown finish․

9․2 Final Tips for Enjoying Home Run Inn Pizza

For the best experience, use parchment paper and rotate the pizza halfway through cooking․ Monitor closely to avoid overcooking, ensuring a golden-brown crust․ Serve with your favorite sides or dips for added flavor․ Experiment with toppings for a personalized touch and savor the perfect blend of crispy crust and premium ingredients in every bite․

Continue Reading

graco nautilus 65 owners manual

Welcome to the Graco Nautilus 65 Owner’s Manual, your guide to understanding and using this 3-in-1 car seat safely and effectively․ This manual provides detailed instructions for proper installation, harness adjustment, and maintenance to ensure your child’s safety and comfort․ By following the guidelines outlined in this manual, you can maximize the seat’s performance and longevity․ Always store the manual in the designated slot for future reference․

Overview of the Graco Nautilus 65 Car Seat

The Graco Nautilus 65 is a versatile 3-in-1 car seat designed to accommodate children from infancy through early childhood․ It functions as a rear-facing seat, forward-facing seat, and high-back booster, ensuring it grows with your child․ Built with safety and comfort in mind, the seat features a steel-reinforced frame and energy-absorbing foam for superior protection․ The Simply Safe Adjust Harness System allows for easy adjustments, while the padded seat and integrated cup holders provide comfort during rides․ Its durable design and easy-to-clean materials make it a practical choice for families․ This seat is ideal for parents seeking a long-lasting, reliable car seat that adapts to their child’s needs․

Importance of Reading the Manual

Reading the Graco Nautilus 65 Owner’s Manual is essential to ensure the car seat is used correctly and safely․ Proper installation, harness adjustment, and maintenance are critical for your child’s protection․ The manual provides step-by-step instructions and safety guidelines to avoid potential risks․ Failure to follow the instructions can lead to improper installation, compromising safety․ The manual also includes troubleshooting tips and maintenance advice to extend the seat’s lifespan․ Familiarizing yourself with the manual ensures you understand all features and functions, from rear-facing to booster modes․ Always store the manual in the designated slot for easy access and future reference․ Your child’s safety depends on it․

Key Features and Benefits of the Graco Nautilus 65

The Graco Nautilus 65 offers a 3-in-1 convertible design, accommodating children from infant to booster stages․ It features weight and height limits for extended use, enhanced safety ratings, and certifications․ The seat provides a secure and comfortable fit, with easy installation options․ Its durability and versatile design make it a practical choice for growing families․ Regular maintenance ensures long-term reliability and safety․ The Nautilus 65 is designed to adapt to your child’s needs, offering peace of mind for parents seeking a reliable car seat solution․

3-in-1 Convertible Design

The Graco Nautilus 65 features an innovative 3-in-1 convertible design, allowing it to transition seamlessly from a rear-facing infant seat to a forward-facing toddler seat and finally to a booster seat․ This versatility accommodates children from 20 to 100 pounds, providing years of reliable use․ The rear-facing mode supports infants from 20 to 40 pounds, ensuring optimal protection during early development․ As your child grows, the seat converts to forward-facing for toddlers weighing 22 to 65 pounds․ Finally, it adapts to a booster seat for children up to 100 pounds, offering a comfortable and secure fit․ This design ensures that the seat grows with your child, eliminating the need for frequent replacements and offering long-term value․ The 3-in-1 system is a testament to Graco’s commitment to safety, convenience, and adaptability, making it a practical choice for families․ By following the manual’s guidance, parents can easily transition through each stage, ensuring their child’s safety and comfort are maintained throughout․

Weight and Height Limits

The Graco Nautilus 65 car seat is designed to accommodate children within specific weight and height ranges to ensure safe and proper use․ For rear-facing mode, the seat supports children weighing 20 to 40 pounds, while forward-facing mode is suitable for children weighing 22 to 65 pounds․ The booster mode accommodates children weighing 40 to 100 pounds․ Height limits also apply, with the seat designed to fit children up to a certain stature in each mode․ Adhering to these limits is crucial for ensuring the seat functions correctly and provides optimal protection․ Parents should regularly check their child’s growth against these specifications to ensure proper fit and safety․ Always refer to the manual for precise measurements and guidelines to avoid exceeding the recommended limits․ This ensures the seat remains a safe and reliable option as your child grows․ By following these guidelines, you can maximize the seat’s effectiveness and longevity․ Proper adherence to weight and height restrictions is essential for maintaining safety standards and ensuring your child’s comfort during travel․ Regular monitoring of your child’s size relative to these limits will help you determine when adjustments or transitions between modes are necessary․ This attention to detail ensures the Graco Nautilus 65 remains a trusted and secure choice for years to come․

Safety Ratings and Certifications

The Graco Nautilus 65 car seat meets or exceeds federal safety standards, ensuring reliable protection for your child․ It has been rigorously tested and certified by the National Highway Traffic Safety Administration (NHTSA) and complies with Federal Motor Vehicle Safety Standard (FMVSS) 213․ This seat is also crash-tested for various scenarios, including front, side, and rear impacts, to provide superior safety․ Its robust design, including a steel-reinforced frame and energy-absorbing foam, enhances its ability to shield your child in the event of a collision․ Parents can trust the Graco Nautilus 65 to deliver exceptional safety performance․ Regularly reviewing the manual ensures you understand all safety features and proper usage․ This seat is a trusted choice for families prioritizing safety and reliability․

Installation and Assembly Instructions

Follow the step-by-step guide in this manual to ensure proper assembly and installation of the Graco Nautilus 65․ Secure the seat firmly in your vehicle, and reference the manual for detailed instructions on harness adjustment and seatbelt or LATCH installation․ Proper assembly is crucial for safety and performance․ Store the manual in the designated slot for easy access․ Always ensure all hands, fingers, and objects are clear during assembly to avoid accidents․ This document provides essential instructions for safe and correct installation․ Contact customer service for additional support․

Step-by-Step Installation Guide

Begin by reading the entire manual to understand the installation process․ Place the Graco Nautilus 65 in your vehicle, ensuring it fits snugly․ For rear-facing installation, locate the vehicle’s seat belt or LATCH connectors․ Thread the seat belt through the designated belt path or attach the LATCH straps to the vehicle’s anchors․ Tighten the straps until the seat is secure and level․ For forward-facing, follow similar steps but ensure the harness is correctly routed․ After installation, test the seat’s stability by gently rocking it side to side․ Ensure no movement occurs․ Always refer to your vehicle’s manual for specific instructions․ If unsure, consult a certified technician or contact Graco’s customer service for assistance․

Securing the Seat in Your Vehicle

To secure the Graco Nautilus 65, start by ensuring the seat is properly positioned in your vehicle․ Use either the LATCH system or the vehicle’s seat belt, following the manual’s guidance․ For LATCH, attach the connectors to the vehicle’s anchors, then tighten the straps firmly․ If using a seat belt, thread it through the designated belt path and fasten it․ After securing, check the seat’s level using the built-in indicator․ Tighten the straps until the seat feels stable and immovable․ Finally, test the seat by gently rocking it side to side to ensure it’s properly anchored․ Always refer to both the car seat and vehicle manuals for specific instructions․

Maintenance and Cleaning Tips

Regularly clean the Graco Nautilus 65 by washing the seat pad with mild soap and water․ Avoid using fabric softeners or bleach․ Spot-clean stains promptly and ensure all parts are dry before reassembly․ Inspect harness straps and buckles for wear and damage․ Store the manual in the designated slot for easy access․ Always follow the manufacturer’s guidelines for cleaning and maintenance to ensure the seat remains safe and functional for your child․

Washing the Seat Pad and Harness

For the Graco Nautilus 65, wash the seat pad using mild soap and warm water․ Avoid fabric softeners or bleach, as they may damage the material․ Gently scrub stains and rinse thoroughly․ Allow the pad to air dry completely before reattaching it to the seat․ The harness can be cleaned with a damp cloth, but ensure it is free from soap residue․ Regular cleaning prevents odors and extends the seat’s lifespan․ Always inspect the harness for wear or fraying and replace it if necessary․ Follow the manual’s guidelines to maintain the seat’s safety and functionality for your child․

Regular Inspection Checklist

Regularly inspect the Graco Nautilus 65 to ensure optimal safety and functionality․ Check the harness for tightness, ensuring it passes the pinch test․ Examine the seatbelt or LATCH system for proper securement․ Inspect the expiration date on the seat to avoid using it past its safe lifespan․ Verify that all parts are free from damage, such as fraying or cracks․ Ensure the seat is correctly positioned and installed in your vehicle․ Test the recline and adjustability features to confirm they function smoothly․ Address any issues promptly to maintain your child’s safety․ Refer to the manual for detailed inspection steps and guidelines․

Troubleshooting Common Issues

Troubleshoot Common Issues

Troubleshoot common issues with the Graco Nautilus 65, such as harness tightness or installation difficulties․ Loosen straps if too snug and ensure proper LATCH or seatbelt securement․ Consult the manual for detailed solutions and verify adjustments for safety․

Resolving Harness Tightness Problems

If the harness feels too tight, check that it is properly adjusted․ Loosen the straps by pulling the harness adjuster strap located at the bottom of the seat․ Ensure the harness is snug but not overly restrictive․ If the issue persists, refer to the manual for guidance on rethreading the harness or adjusting the height․ Regularly inspect the harness for twists or tangles, which can cause uneven tightness․ Always test the harness by pinching the shoulder straps at your child’s shoulder—proper fit allows no more than one finger between the harness and their chest․ Adjust as needed to ensure safety and comfort․

Addressing Seat Belt or Latch Installation Difficulties

If you encounter difficulties during seat belt or LATCH installation, ensure the vehicle seat belt or LATCH connectors are properly aligned with the car seat․ Consult the manual for specific instructions tailored to your vehicle type․ Tighten the seat belt or LATCH straps gradually, checking for a snug fit without excessive slack․ If the seat moves more than an inch side to side, adjust the installation․ For persistent issues, refer to the troubleshooting section or contact Graco’s customer service for assistance․ Always test the installation by tugging firmly on the car seat to ensure stability․ Proper installation is critical for safety, so don’t hesitate to seek help if needed․

Always prioritize proper installation and maintenance for optimal safety and comfort․ Store the manual for easy reference and ensure all guidelines are followed meticulously․

Ensuring Proper Use for Maximum Safety

To ensure your child’s safety, always follow the guidelines outlined in the Graco Nautilus 65 Owner’s Manual․ Proper installation and regular inspections are crucial to prevent accidents․ Adhere strictly to the weight and height limits specified in the manual to avoid misuse․ The harness and seatbelt should always be correctly secured, and loose straps should be tightened immediately․ Regularly check for wear and tear, and replace any damaged parts promptly․ Never skip the recommended maintenance steps, as they are designed to ensure the seat’s longevity and performance․ By following these steps, you can guarantee your child’s protection and comfort while using the Graco Nautilus 65 car seat․

Storing the Manual for Future Reference

Properly storing the Graco Nautilus 65 Owner’s Manual ensures it remains accessible for future use․ Place the manual in the designated storage slot located on the seat, marked with an instruction book icon․ This keeps it clean, dry, and within easy reach․ For added convenience, Graco offers a digital version of the manual on their official website, allowing you to download or view it whenever needed․ Store the physical copy securely to avoid loss or damage․ Regularly reviewing the manual helps reinforce proper usage and safety guidelines, ensuring your child’s continued protection․ Keep it handy for quick reference during inspections or adjustments․

Continue Reading

louisiana travel guide by mail

Louisiana captivates travelers with its rich cultural heritage‚ vibrant history‚ and stunning natural beauty. Discover the Pelican State’s unique charm with our comprehensive travel guides‚ available by mail for effortless planning.

Why Louisiana is a Unique Travel Destination

Louisiana stands out as a distinctive travel destination due to its unparalleled cultural richness and historical depth. The state seamlessly blends French‚ Spanish‚ African‚ and Native American influences‚ creating a vibrant tapestry of traditions‚ music‚ and cuisine. From the lively streets of New Orleans to the serene beauty of the Mississippi River‚ Louisiana offers a diverse array of experiences. Its unique Creole and Cajun heritage is reflected in its world-renowned dishes‚ such as gumbo and jambalaya‚ and its festivals like Mardi Gras‚ which attract global attention. The state’s swamps‚ bayous‚ and wildlife refuges provide an opportunity to connect with nature‚ while its historic plantations and museums offer glimpses into its complex past. Louisiana’s ability to merge the past with the present makes it a captivating destination for travelers seeking authenticity and adventure.

Popular Attractions and Activities in Louisiana

Louisiana is home to a wide array of attractions that cater to diverse interests. The French Quarter in New Orleans‚ with its iconic Bourbon Street‚ offers a vibrant atmosphere of historic architecture‚ lively nightlife‚ and renowned cuisine. Visitors can indulge in beignets at Café du Monde or explore the National WWII Museum. Baton Rouge‚ the state capital‚ features the Louisiana State Capitol building and the Baton Rouge Zoo‚ perfect for family outings. The state’s plantations‚ such as Oak Alley and Nottoway‚ provide a glimpse into its rich history. Nature enthusiasts can explore the Honey Island Swamp or Jean Lafitte National Historical Park‚ while adventure seekers might enjoy kayaking or birdwatching in the Atchafalaya Basin. Mardi Gras celebrations and jazz festivals add to the state’s unique cultural appeal‚ making Louisiana a destination filled with endless possibilities for exploration and enjoyment.

Cultural and Historical Experiences in Louisiana

Louisiana offers a unique cultural tapestry‚ blending French‚ Spanish‚ African‚ and Native American influences. The state’s historic sites‚ such as the Louisiana State Capitol and the National WWII Museum‚ provide insights into its significant role in American history. Plantations like Oak Alley and Nottoway showcase antebellum architecture and the region’s complex past. New Orleans‚ with its French and Spanish colonial roots‚ is a hub for cultural exploration. The city’s museums‚ historic churches‚ and iconic cemeteries‚ such as St. Louis Cemetery No. 1‚ highlight its rich heritage. Additionally‚ Louisiana’s vibrant music scene‚ from jazz to zydeco‚ reflects its diverse cultural traditions. Festivals like Mardi Gras and the New Orleans Jazz & Heritage Festival celebrate this heritage‚ offering visitors immersive experiences into the state’s history and traditions.

The Importance of Using Travel Guides for Planning

Travel guides are essential for planning a well-organized and memorable trip to Louisiana. They provide a wealth of information about attractions‚ accommodations‚ and activities‚ helping visitors make informed decisions. Guides highlight must-see destinations‚ hidden gems‚ and local favorites‚ ensuring travelers experience the best of what Louisiana offers. They also include practical details like maps‚ transportation options‚ and dining recommendations‚ saving time and effort. Additionally‚ travel guides often feature special coupons and discounts‚ helping travelers save money. By using a Louisiana travel guide‚ visitors can avoid missing out on unique cultural and historical experiences‚ ensuring a richer and more fulfilling journey. Whether planning a city tour or an outdoor adventure‚ these guides serve as invaluable resources for creating an unforgettable trip.

Louisiana Travel Guides by Mail

Louisiana offers free travel brochures and guides‚ mailed directly to your doorstep. These comprehensive resources include valuable coupons‚ detailed maps‚ and insider tips on attractions‚ dining‚ and festivals across the Pelican State.

How to Order Louisiana Travel Guides by Mail

Ordering Louisiana travel guides by mail is a straightforward process. Visit websites like Go-Louisiana.com or the official Louisiana tourism portal to request your free printed guide. Simply fill out the online form with your mailing address and preferences.

Once submitted‚ your guide will be mailed directly to your doorstep. Some sites also offer digital versions for immediate access.

These guides are packed with valuable information‚ including coupons‚ maps‚ and insider tips on attractions‚ dining‚ and festivals.

Ordering by mail ensures you have a physical copy to plan your trip effortlessly. Start exploring Louisiana’s unique culture and natural beauty with a comprehensive guide tailored to your travel needs.

Types of Travel Guides Available

Louisiana offers a variety of travel guides tailored to different interests and preferences. The official Louisiana Visitors Guide provides a comprehensive overview of the state‚ highlighting attractions‚ festivals‚ and cultural experiences.

City-specific guides‚ such as the Baton Rouge Welcome Guide and the Lake Charles Visitors Guide‚ focus on local attractions‚ dining‚ and events.

Special interest guides cater to specific activities like outdoor adventures‚ historical tours‚ and culinary explorations.

Many guides include valuable coupons for dining‚ tours‚ and museums‚ as well as detailed maps to help navigate the state.

Whether you’re planning a family vacation‚ a romantic getaway‚ or an adventure-filled trip‚ Louisiana’s diverse travel guides ensure you find the perfect resources to suit your travel style.

Benefits of Using Mailed Travel Guides

Mailed travel guides provide a tangible and convenient way to plan your Louisiana adventure. They offer a comprehensive overview of attractions‚ dining‚ and accommodations‚ making it easy to organize your trip.

These guides often include valuable coupons‚ maps‚ and insider tips‚ helping you save money and discover hidden gems.

With a physical guide‚ you can easily share plans with travel companions and reference information offline‚ which is especially useful in areas with limited internet access.

Mailed guides are free and arrive directly at your doorstep‚ eliminating the need to search for information online.

They also serve as a keepsake‚ allowing you to cherish memories of your trip long after it ends.

Overall‚ mailed travel guides streamline the planning process‚ ensuring a hassle-free and enjoyable experience in Louisiana.

Digital vs. Print Travel Guides

When planning a trip to Louisiana‚ travelers can choose between digital and print travel guides‚ each offering unique advantages.

Digital guides provide instant access‚ interactive features‚ and real-time updates‚ making them ideal for spontaneous planning.

Print guides‚ however‚ offer a tactile experience‚ allowing travelers to easily share and reference information offline.

Both options are available for Louisiana‚ with print guides mailed directly to your home and digital versions downloadable online.

Print guides often include maps‚ coupons‚ and detailed itineraries‚ while digital guides offer clickable links and up-to-the-minute information.

The choice between the two depends on personal preference and travel style.

Whether you prefer the convenience of digital or the charm of print‚ Louisiana travel guides ensure you’re well-prepared for your adventure.

Both formats are designed to enhance your experience‚ providing valuable insights and tips to make your trip unforgettable.

Regional Travel Guides for Specific Areas

Louisiana offers regional travel guides tailored to specific areas‚ allowing travelers to explore distinct regions in depth.

From the vibrant city of New Orleans to the natural beauty of Lake Charles‚ these guides highlight local attractions‚ dining‚ and events.

The Baton Rouge Visitors Guide‚ for example‚ focuses on the state capital’s historic sites and cultural experiences.

Similarly‚ the Lake Charles guide emphasizes outdoor activities and festivals in southwest Louisiana.

These regional guides provide detailed insights into each area’s unique character‚ helping travelers plan trips that align with their interests.

Whether you’re interested in urban adventures or rural landscapes‚ Louisiana’s regional guides ensure you discover the best of each locale.

They are available by mail or download‚ making it easy to access information specific to your destination.

Regional guides are a valuable resource for travelers seeking an authentic and memorable Louisiana experience.

Coupons and Discounts Included in the Guides

Louisiana travel guides by mail often include valuable coupons and discounts‚ enhancing your travel experience.

These guides provide savings on dining‚ tours‚ music venues‚ and museums‚ making exploration more affordable.

For instance‚ the New Orleans guide features coupons for iconic attractions and local eateries‚ while Lake Charles guides offer discounts for outdoor activities.

These perks are designed to help travelers enjoy Louisiana’s vibrant culture and natural beauty without breaking the bank.

The guides also include exclusive offers for festivals and events‚ ensuring you don’t miss out on unique experiences.

Whether you’re planning a city tour or a rural getaway‚ the coupons and discounts in Louisiana’s travel guides add tremendous value.

They are conveniently accessible both in print and digital formats‚ making it easy to plan your trip with savings in hand.

These guides are a practical tool for maximizing your Louisiana adventure while staying within budget.

Maps and Navigation Information in the Guides

Louisiana travel guides by mail feature detailed maps and navigation information to help travelers explore the state seamlessly.

These guides include maps highlighting key attractions‚ roadways‚ and points of interest across Louisiana’s diverse regions.

From the vibrant streets of New Orleans to the scenic byways of rural areas‚ the maps provide a clear visual guide for navigation.

Many guides offer regional maps‚ such as those for Baton Rouge or Lake Charles‚ ensuring visitors can pinpoint local landmarks and hidden gems.

The maps often include information on public transportation‚ bike trails‚ and walking routes‚ catering to various travel preferences.

Some guides also provide GPS-friendly formats‚ making it easier to plan and follow routes during your trip.

With these resources‚ travelers can navigate Louisiana’s unique landscapes and urban centers with confidence and ease.

Continue Reading

japji sahib with meaning in punjabi pdf

Japji Sahib, composed by Guru Nanak, is the foundational prayer in Sikhism, beginning with the Mool Mantra and followed by 38 pauris, concluding with a salok. Its profound teachings and divine essence make it a cornerstone of Sikh faith, included in daily Nitnem prayers. The Punjabi PDF translation by Prof. Sahib Singh offers a deeper understanding of its spiritual significance and philosophical depth.

Overview of Japji Sahib

Japji Sahib, composed by Guru Nanak, is a foundational Sikh prayer that begins with the Mool Mantra and consists of 38 pauris, concluding with a salok. It is the opening text of the Guru Granth Sahib and holds a central place in Sikh daily prayers (Nitnem). The prayer explores themes of truth, divine nature, and spiritual liberation, offering guidance for living a virtuous life. Its Punjabi translation, such as Prof. Sahib Singh’s work, provides deep insights into its philosophical and spiritual teachings, making it accessible for devotees seeking enlightenment.

Importance of Japji Sahib in Sikhism

Japji Sahib, composed by Guru Nanak, is a cornerstone of Sikh spirituality and philosophy. It is the opening text of the Guru Granth Sahib and a mandatory part of daily Nitnem prayers. Its profound teachings emphasize divine truth, moral values, and the path to spiritual liberation. Reciting Japji Sahib fosters a deep connection with the divine and provides guidance for ethical living. Its availability in Punjabi PDF, especially with meanings, makes it accessible for spiritual reflection and growth, reinforcing its significance in Sikh faith and practice.

Structure and Meaning of Japji Sahib

Japji Sahib begins with the Mool Mantra, followed by 38 pauris, and concludes with a salok. Its structure reflects profound spiritual teachings, guiding seekers toward divine truth and self-realization.

The Mool Mantra: Foundation of Sikh Beliefs

The Mool Mantra, the opening verse of Japji Sahib, is the cornerstone of Sikh theology. It declares, “Ik Oankar,” affirming the oneness of God. This sacred phrase, penned by Guru Nanak, outlines the divine attributes: truth, creativity, fearlessness, and ubiquity. Recited daily by Sikhs worldwide, it embodies the essence of Sikhism, guiding followers toward spiritual awakening and a deeper connection with the divine. The Mool Mantra’s profound wisdom sets the tone for Japji Sahib, making it a timeless source of inspiration and reflection.

38 Pauris: Spiritual and Philosophical Teachings

The 38 pauris of Japji Sahib, following the Mool Mantra, delve into profound spiritual and philosophical truths. Each stanza explores themes of divine nature, truth, and the path to liberation. Guru Nanak’s teachings emphasize the pursuit of truth, the futility of materialism, and the importance of devotion. Through poetic and metaphysical language, the pauris guide seekers to self-realization and inner harmony. These teachings remain central to Sikh philosophy, offering timeless wisdom for spiritual growth and ethical living, as reflected in the Punjabi translation by scholars like Prof. Sahib Singh.

The conclusion of Japji Sahib is marked by a salok, a short couplet that encapsulates the essence of the entire prayer. This final stanza reinforces the central themes of devotion, truth, and the pursuit of divine wisdom. It serves as a poignant reminder of the spiritual journey outlined in the preceding pauris, urging the seeker to embrace humility and seek guidance from the divine. The salok’s concise yet profound message leaves a lasting impression, inspiring reflection and spiritual growth. Its inclusion completes Japji Sahib’s transformative narrative, offering solace and enlightenment to all who recite it.

Historical Context and Composition

Composed by Guru Nanak, Japji Sahib is the opening text of Guru Granth Sahib. Its composition is a cornerstone of Sikhism, offering deep spiritual insights. The Punjabi PDF translation by Prof. Sahib Singh enhances understanding and accessibility to its divine teachings.

Guru Nanak Dev Ji: The Composer

Guru Nanak Dev Ji, the founder of Sikhism, composed Japji Sahib as his first divine revelation. This sacred text encapsulates the essence of Sikh philosophy, emphasizing the oneness of God and the path to spiritual liberation. The composition begins with the Mool Mantra, followed by 38 pauris, each imparting profound teachings on truth, divine nature, and self-realization. Guru Nanak’s visionary wisdom laid the foundation for Sikhism, making Japji Sahib a revered and integral part of daily Sikh prayers, known as Nitnem.

Significance in Guru Granth Sahib

Japji Sahib holds a revered position as the opening composition in Guru Granth Sahib, the sacred scripture of Sikhism. It is considered the essence of Sikh teachings, encapsulating the core beliefs and spiritual principles. As the first Bani in Nitnem, Japji Sahib is integral to daily Sikh prayers, guiding followers on the path of truth and divine connection. Its inclusion in Guru Granth Sahib underscores its importance, making it a foundational text for understanding Sikh philosophy and practice.

Translation and Interpretation

Prof. Sahib Singh’s translation of Japji Sahib offers a profound understanding, blending spiritual depth with modern accessibility, making Guru Nanak’s teachings resonate deeply with readers.

Prof. Sahib Singh’s Contribution

Prof. Sahib Singh’s Punjabi translation of Japji Sahib is renowned for its authenticity and clarity. His work, part of the Guru Granth Sahib Darpan, provides a detailed interpretation, making the sacred text accessible while preserving its spiritual essence. Singh’s meticulous approach ensures that the original teachings of Guru Nanak are conveyed accurately, offering readers a comprehensive understanding of Japji Sahib’s profound meanings and philosophical insights.

Understanding the Punjabi Translation

The Punjabi translation of Japji Sahib provides a clear and accessible interpretation of Guru Nanak’s teachings. It serves as a spiritual guide, helping readers navigate life’s challenges with wisdom. Reciting Japji Sahib in Gurmukhi connects one deeply with its divine essence, offering insights into themes like truth and divine nature. The translation maintains the original text’s authenticity, making it a valuable resource for those seeking to understand and embrace Sikh philosophy. It enriches spiritual growth and fosters a deeper connection with the sacred teachings of Sikhism.

Downloading Japji Sahib in Punjabi PDF

Japji Sahib in Punjabi PDF is readily available for free download. It includes Prof. Sahib Singh’s authentic translation, offering 79 pages of spiritual wisdom.
This comprehensive guide helps followers understand the essence of Sikhism through Guru Nanak’s teachings, making it ideal for daily Nitnem prayers and spiritual growth.

Steps to Download the PDF

To download Japji Sahib in Punjabi PDF, visit trusted sources like SikhBookClub or MySikhi. Locate the download link for “Japji Sahib Path in Punjabi” and click it. Ensure the file includes Prof. Sahib Singh’s translation for authenticity. Once redirected, select the PDF format and complete the download. This 79-page document provides the complete prayer with meanings, making it ideal for daily recitation and spiritual reflection.

Popular Sources for the PDF

Trusted platforms like MySikhi and SikhBookClub offer free downloads of Japji Sahib in Punjabi PDF. These sites provide authentic translations, including Prof. Sahib Singh’s renowned work, ensuring the text is both accessible and faithful to its original teachings. Users can easily navigate these websites, select the desired PDF, and download it for personal or communal use, facilitating deeper engagement with the sacred text.

Daily Recitation and Benefits

Daily recitation of Japji Sahib is a cornerstone of Sikh Nitnem, offering spiritual growth and mental clarity. It fosters a deep connection with divine teachings, promoting truth, wisdom, and inner peace, while guiding followers on a path of self-realization and liberation from worldly bonds.

Role in Nitnem: Daily Sikh Prayers

Japji Sahib is the cornerstone of Nitnem, the daily Sikh prayers, recited first each morning. Composed by Guru Nanak, it begins with the Mool Mantra, followed by 38 pauris, and ends with a salok. Prof. Sahib Singh’s Punjabi translation provides deep insights, helping Sikhs understand its divine essence and liberation path. Daily recitation fosters spiritual growth, mental clarity, and a connection with Sikh philosophy, guiding followers to navigate life’s challenges with wisdom and grace.

Spiritual and Mental Benefits

Reciting Japji Sahib fosters spiritual growth, mental clarity, and emotional balance. Its divine verses guide individuals to navigate life’s challenges with wisdom and grace, promoting inner peace and self-realization. The prayer’s profound teachings on truth and divine nature inspire a deeper connection with the Almighty, offering solace and strength. By integrating its philosophy, one can achieve liberation from worldly attachments, cultivating a serene and enlightened mindset.

Spiritual Teachings and Values

Japji Sahib embodies core Sikh values, emphasizing truth, divine nature, and the path to liberation. It inspires a deep connection with the Almighty, guiding seekers toward self-realization and enlightenment.

Themes of Truth and Divine Nature

Japji Sahib profoundly explores the themes of truth and divine nature, beginning with the Mool Mantra, which declares the oneness of God. It emphasizes the timeless and universal truth of the Creator’s existence, transcending human comprehension. The text guides seekers to understand the divine nature, highlighting qualities like fearlessness, formlessness, and eternal presence. Through its verses, Japji Sahib inspires a deeper connection with the Almighty, urging individuals to embrace truth and live in harmony with divine will, fostering spiritual growth and self-realization.

Path to Liberation and Self-Realization

Japji Sahib illuminates the path to liberation and self-realization through meditation on the divine name and introspection. It emphasizes the pursuit of truth, encouraging believers to transcend worldly attachments and seek spiritual enlightenment. The sacred text guides individuals to recognize their true self and connect with the divine, ultimately achieving liberation from the cycle of birth and death. By following its teachings, one can attain inner peace, wisdom, and a profound understanding of the ultimate reality, as explained in the Punjabi PDF translation.

Comparison with Other Sikh Scriptures

Japji Sahib stands out as the foundational Sikh prayer, distinct in its structure and profound teachings, offering a unique pathway to spiritual growth compared to other sacred texts.

Japji Sahib vs. Other Banis in Nitnem

Japji Sahib is the first and most foundational Bani in Nitnem, unlike Jaap Sahib, Rehras Sahib, and Kirtan Sohila. Its unique structure—Mool Mantra, 38 pauris, and a salok—provides profound spiritual and philosophical insights. While other Banis complement it, Japji Sahib stands out as Guru Nanak’s composition, encapsulating the essence of Sikhism. Its emphasis on truth, divine nature, and liberation makes it indispensable for daily recitation, offering a distinct pathway to spiritual growth compared to other sacred texts in the Sikh tradition.

Unique Aspects of Japji Sahib

Japji Sahib’s uniqueness lies in its foundational status as Guru Nanak’s first composition, blending philosophical depth with spiritual guidance. It begins with the Mool Mantra, establishing core Sikh beliefs, followed by 38 pauris exploring truth, divine nature, and liberation. Unlike other texts, its structure and teachings provide a comprehensive path to self-realization. The Punjabi PDF translation enhances accessibility, offering modern readers a profound understanding of its timeless wisdom, making it a cornerstone of Sikh scripture and daily Nitnem practice.

Japji Sahib, a sacred Sikh text by Guru Nanak, embodies timeless spiritual wisdom. Its Punjabi PDF translation offers accessible insight into its profound teachings, enriching daily Nitnem practice and fostering deeper understanding of Sikhism’s core values;

Final Thoughts on Japji Sahib

Japji Sahib is a timeless treasure of Sikh spirituality, offering profound wisdom for personal growth and divine connection. Its universal teachings resonate with seekers of all backgrounds, encapsulating the essence of Sikhism. The availability of the Punjabi PDF with meaning has made it more accessible, allowing readers to delve into its spiritual depth. Daily recitation fosters resilience, clarity, and a deeper understanding of life’s purpose. This sacred text continues to inspire millions, guiding them toward self-realization and harmony with the divine.

Encouragement for Further Study

Exploring Japji Sahib’s teachings through the Punjabi PDF offers a deeper connection to Sikh philosophy. Delve into its themes of truth, divine nature, and liberation. Reflect on its verses to enrich your understanding of Sikhism. Engage with commentaries and discussions to broaden your perspective. Embrace this journey of learning, allowing Japji Sahib to inspire personal growth and spiritual awakening. Continue exploring its wisdom to integrate its timeless lessons into daily life.

Continue Reading

rosario de los 7 dolores pdf

The Rosario de los 7 Dolores is a traditional Catholic devotion honoring the Seven Sorrows of Mary‚ focusing on her maternal suffering during Christ’s life‚ death‚ and burial. It emphasizes meditation on her pain and spiritual strength‚ offering a profound way to connect with her compassion and find solace in faith. Available as a PDF‚ it guides prayerful reflection on her sorrows‚ fostering a deeper understanding of her role in Christ’s sacrifice.

The Seven Sorrows of Mary

The Seven Sorrows of Mary are central to the Rosario de los 7 Dolores‚ reflecting her profound emotional and spiritual suffering. They include:

  • The Prophecy of Simeon
  • The Flight into Egypt
  • The Loss of Jesus in the Temple
  • The Meeting on the Way to Calvary
  • The Crucifixion of Jesus
  • The Descent from the Cross
  • The Burial of Jesus

2.1. The Prophecy of Simeon

The first sorrow begins with the Prophecy of Simeon‚ who revealed to Mary that her heart would be pierced by a sword of sorrow. This prophecy‚ fulfilled through her son Jesus’ passion‚ marked the start of her maternal suffering. Simeon’s words foretold the deep pain Mary would endure‚ preparing her for the trials ahead. Reflecting on this sorrow‚ devotees meditate on Mary’s faith and acceptance of God’s will‚ even in the face of immense pain. The Rosario de los 7 Dolores guides prayerful reflection on this moment‚ inviting believers to share in her sorrow and find strength in her unwavering devotion. This sorrow highlights her role as a mother and her unity with Christ’s mission.

2.2. The Flight into Egypt

The second sorrow recalls the Flight into Egypt‚ where Mary‚ Joseph‚ and the infant Jesus fled to escape King Herod’s persecution. This journey‚ filled with uncertainty and hardship‚ tested Mary’s faith and trust in God. The challenges of the journey—unknown dangers‚ exhausting travel‚ and separation from family—deepened her sorrow. Yet‚ Mary embraced this trial with courage‚ trusting in God’s plan. The Rosario de los 7 Dolores invites devotees to reflect on Mary’s resilience and unwavering faith during this difficult time. Her example teaches believers to face life’s adversities with trust in divine providence‚ even when the path seems uncertain and fraught with suffering.

2.3. The Loss of Jesus in the Temple

The third sorrow of Mary is the Loss of Jesus in the Temple‚ a moment of profound anxiety and grief. After traveling to Jerusalem for the Passover‚ Mary and Joseph discovered Jesus was missing. Frantically searching for three days‚ they finally found Him in the Temple‚ where He was engaged in deep discussion with the elders. Though relieved‚ Mary felt the weight of His mission unfolding‚ foreseeing the future trials He would face. This event deepens devotion to Mary’s maternal heart‚ inviting believers to reflect on her faith and trust in God’s plan amidst uncertainty. The Rosario de los 7 Dolores guides meditation on this sorrow‚ emphasizing Mary’s unwavering love and trust.

2.4. The Meeting on the Way to Calvary

The fourth sorrow of Mary is her heart-wrenching encounter with Jesus as He carried the cross to Calvary. This poignant meeting‚ known as the “Meeting on the Way to Calvary‚” captures the depth of a mother’s anguish. As Mary beheld her Son‚ battered and burdened‚ she shared in His physical and emotional suffering. Her maternal love and sorrow intertwined with His divine mission‚ exemplifying her unwavering faith and devotion. This sorrow reminds believers of the profound bond between Mary and Jesus‚ inviting reflection on the sacrifice of love and the strength found in unity with God’s will. The Rosario de los 7 Dolores guides prayerful meditation on this moment‚ deepening compassion and trust in divine providence.

2.5. The Crucifixion of Jesus

The fifth sorrow of Mary is the Crucifixion of Jesus‚ where she witnessed her Son nailed to the cross‚ enduring immense physical and spiritual agony. Standing at the foot of the cross‚ Mary’s heart was pierced with grief as she saw Jesus suffer for the sins of humanity. Her love and faith remained unshaken‚ even in the face of such torment. This sorrow emphasizes Mary’s role as a co-redemptrix‚ sharing in her Son’s sacrifice. The Rosario de los 7 Dolores invites believers to meditate on this profound moment‚ uniting their own sufferings with Mary’s and Jesus’‚ seeking strength and redemption through their shared pain. The Ave María prayer is recited to honor this sorrow‚ reflecting on the depth of maternal love and divine sacrifice.

2.6. The Descent from the Cross

The sixth sorrow of Mary is the Descent from the Cross‚ where she receives the lifeless body of her Son‚ Jesus‚ after His crucifixion. This moment‚ known as the “Pietà‚” captures Mary’s profound grief as she cradles her Son’s body‚ overwhelmed by the reality of His death. Her sorrow is not just maternal but also deeply spiritual‚ as she mourns the loss of the Messiah. The Rosario de los 7 Dolores reflects on this intimate and heartbreaking scene‚ inviting believers to contemplate the depth of Mary’s love and faith amidst unimaginable loss. Through prayer‚ devotees seek to share in her sorrow and find comfort in the promise of eternal life. The Ave María prayer is recited to honor this sorrow‚ emphasizing the union of Mary’s pain with the redemption of humanity.

2.7. The Burial of Jesus

The seventh sorrow of Mary is the Burial of Jesus‚ where she witnesses the final act of laying her Son’s lifeless body in the tomb. This moment signifies the culmination of her grief‚ as she must relinquish His physical presence‚ trusting in God’s promise of resurrection. The Rosario de los 7 Dolores reflects on Mary’s profound sorrow and unwavering faith as she entrusts Jesus to the earth. The Ave María prayer is recited to honor this sorrow‚ emphasizing the depth of her maternal love and the triumph of faith over death. This meditation invites believers to contemplate the surrender required in letting go and the hope found in eternal life. Through this sorrow‚ Mary’s strength and devotion inspire believers to embrace their own trials with faith and trust in God’s plan.

How to Pray the Rosario de los 7 Dolores

The Rosario de los 7 Dolores is prayed by meditating on the Seven Sorrows of Mary‚ with specific prayers for each sorrow. Begin with the Sign of the Cross‚ then recite one Our Father and seven Hail Marys for each of the seven sorrows. After each sorrow‚ reflect on Mary’s pain and how it relates to your own life. The prayer concludes with a final Our Father‚ Hail Mary‚ and Glory Be. A PDF guide is available to help structure the prayer‚ ensuring a meaningful and devotion-filled experience. This method allows believers to deeply connect with Mary’s suffering and find comfort in her intercession. Regular prayer fosters spiritual growth and a closer bond with the Virgin of Sorrows.

The Significance of the Rosario de los 7 Dolores

The Rosario de los 7 Dolores holds profound spiritual significance as it invites believers to reflect on Mary’s deep sorrow and unwavering faith during her son’s Passion. By meditating on her sufferings‚ devotees can deepen their empathy for her pain and appreciate her role as a mother and intercessor. This devotion fosters a closer connection to Mary’s compassion and strength‚ offering solace in times of personal sorrow. The Rosario also emphasizes the value of uniting one’s suffering with Mary’s‚ transforming pain into a pathway for spiritual growth. Its practice is a powerful way to honor Mary’s maternal love and seek her guidance‚ while the PDF guide provides a structured format for meaningful prayer and reflection.

The Origin and History of the Devotion

The Rosario de los 7 Dolores traces its origins to the medieval period‚ developed by the Servite Order‚ which emphasized devotion to Mary’s sorrows. It gained renewed popularity following the Marian apparitions in Kibeho‚ Rwanda‚ where Mary revealed the importance of praying the Rosary of the Seven Sorrows. The devotion is structured around seven key events in Mary’s life that caused her profound suffering. Each sorrow is accompanied by specific prayers‚ fostering a deep connection with her maternal pain. The Rosario is traditionally prayed on September 15th‚ the Feast of Our Lady of Sorrows‚ and its practice has been embraced globally‚ offering comfort and spiritual growth to believers.

The Role of the Rosario de los 7 Dolores in Modern Spirituality

The Rosario de los 7 Dolores holds a significant place in modern spirituality as a powerful tool for emotional and spiritual healing. It invites believers to connect with Mary’s maternal sorrow‚ fostering empathy and compassion. In a world facing challenges like grief and isolation‚ this devotion offers solace and strength. The Rosary’s focus on suffering and redemption resonates deeply‚ helping individuals process their own pain while finding hope in faith. Its accessibility‚ including through downloadable PDF guides‚ makes it easy to practice individually or in groups‚ ensuring its relevance in contemporary spiritual practices. It remains a timeless bridge between tradition and modern life‚ nurturing a deeper relationship with Mary and her divine son.

The Promise of Seven Graces

The Rosario de los 7 Dolores is deeply intertwined with the promise of seven graces bestowed upon those who devoutly pray it. These graces‚ as revealed through Marian apparitions and traditions‚ include peace for families‚ illumination on divine mysteries‚ and the strength to resist temptation. Additionally‚ it is said that those who honor Mary’s sorrows will receive the grace of a good death‚ forgiveness of sins‚ and eternal happiness. The devotion also promises comfort in times of sorrow and the blessing of spiritual growth. These promises‚ rooted in Catholic tradition‚ inspire many to embrace this prayer as a powerful means of spiritual enrichment and connection with Mary’s maternal love.

Cultural and Artistic Representations

The Rosario de los 7 Dolores has inspired rich cultural and artistic expressions‚ reflecting its deep spiritual significance. In Catholic traditions‚ the Seven Sorrows of Mary are often depicted in religious art‚ such as paintings and sculptures of the Virgin holding a sorrowful heart pierced by seven swords. These representations emphasize her maternal suffering and divine compassion. Additionally‚ hymns‚ prayers‚ and devotional literature dedicated to her sorrows are common in many Catholic communities. The rosary’s themes are also reflected in processions and ceremonies‚ particularly during Holy Week‚ where the faithful honor her pain and resilience. This devotion continues to influence art‚ literature‚ and cultural practices worldwide‚ serving as a testament to its enduring spiritual impact.

How to Download the Rosario de los 7 Dolores PDF

To download the Rosario de los 7 Dolores PDF‚ visit reliable Catholic websites or platforms offering religious resources. Search for terms like “Rosario de los 7 Dolores PDF” or “Seven Sorrows Rosary PDF.” Many websites provide free downloads‚ including prayers‚ meditations‚ and images. Ensure the source is trustworthy to maintain the devotion’s authenticity. Once found‚ click the download link to save the PDF. Some versions include bilingual text or artistic illustrations. After downloading‚ you can print it for personal use or share it with others. This format makes it easy to carry and pray wherever you are‚ deepening your connection to Mary’s sorrows and graces.

Practical Tips for Meditating on the Rosario de los 7 Dolores

For a meaningful meditation on the Rosario de los 7 Dolores‚ create a quiet‚ prayerful environment. Begin with an opening prayer‚ asking Mary to guide your reflection. As you pray each sorrow‚ focus on the emotional and spiritual pain Mary endured. Use the PDF guide to follow the prayers and meditations systematically. Reflect on how her sorrows relate to your own life challenges‚ fostering empathy and spiritual growth. Consider incorporating hymns or sacred music to deepen your devotion. After each sorrow‚ take a moment of silence to internalize the experience. Conclude with a closing prayer‚ seeking Mary’s intercession and grace. This practice strengthens your connection to her maternal love and the redemptive journey of Christ.

The Rosario de los 7 Dolores is a profound devotion that invites us to share in Mary’s sorrows‚ deepening our understanding of her maternal love and Christ’s sacrifice. Through its meditative prayers and reflections‚ this rosary fosters empathy‚ spiritual growth‚ and a closer connection to Mary’s compassion. The promise of seven graces for those who honor her sorrows adds a layer of hope and divine assurance. Whether prayed individually or in community‚ this devotion offers solace and strength. The availability of a PDF guide makes it accessible to all‚ ensuring that the timeless beauty of this tradition continues to inspire faith and devotion in modern times.

Continue Reading

georgia rental agreement pdf

A Georgia Rental Agreement PDF is a legally binding contract outlining terms between landlords and tenants, ensuring compliance with state laws. It’s customizable and available as templates for residential and commercial properties.

Key Components of a Georgia Rental Agreement

A Georgia Rental Agreement outlines essential details such as tenant and landlord information, property description, lease duration, payment terms, and security deposit requirements.

1.1 Tenant and Landlord Information

The Georgia Rental Agreement PDF requires detailed information about both the tenant and landlord, including full names, addresses, and contact details. This ensures clarity and accountability for both parties. The landlord’s section typically includes their legal name and property management company, if applicable, while the tenant’s section lists all occupants. Accurate identification of both parties is crucial for enforcing the agreement and resolving disputes. This section also establishes a clear line of communication, ensuring both parties can reach each other regarding lease-related matters. Proper documentation of this information is essential for legal compliance and maintaining a formal rental relationship.

1.2 Property Description

The Georgia Rental Agreement PDF includes a detailed description of the rented property to avoid disputes and ensure clarity. This section specifies the property’s address, type (residential or commercial), and any unique features. It outlines the intended use of the property, such as solely for residential purposes or allowing home-based businesses. The description may also include details about shared spaces, parking, or specific amenities like a backyard or pool. This section ensures both parties agree on the property’s condition and usage, providing a clear understanding of what is being rented. Accurate property description is essential for legal compliance and maintaining a transparent rental relationship.

1.3 Lease Duration

The Georgia Rental Agreement PDF specifies the lease duration, outlining the start and end dates of the tenancy. This section clarifies whether the agreement is for a fixed term or month-to-month. Fixed-term leases typically last for one year, while month-to-month agreements renew automatically. The document may also include details about renewal options or automatic extensions. Clear lease duration terms prevent disputes and provide stability for both landlords and tenants. It’s essential to define the timeframe to establish a legally binding timeline for occupancy and payment obligations. This section ensures both parties understand their commitments and the expected duration of the rental relationship. Accurate lease duration is crucial for maintaining order and compliance with Georgia rental laws.

Types of Georgia Rental Agreements

Georgia rental agreements include residential and commercial leases. Residential agreements are for personal housing, while commercial agreements cover business properties, each tailored to specific needs.

2.1 Residential Lease Agreement

A Georgia Residential Lease Agreement is a legal contract between a landlord and tenant for residential property. It outlines terms like rent, duration, and tenant responsibilities. Typically for a fixed term, this agreement ensures both parties’ rights are protected under Georgia law. Rent is usually due monthly, with specifics on payment methods and due dates. Tenants must adhere to lease terms, including property maintenance and noise policies. The agreement also covers renewal options or termination notices. Smoking and visitor rules are often included to maintain property standards. This document is essential for establishing a clear, legally binding relationship, ensuring compliance with state-specific regulations.

2.2 Commercial Lease Agreement

A Georgia Commercial Lease Agreement is a legally binding contract tailored for business-related property rentals. It outlines specific terms such as rent, lease duration, and permissible property uses, reflecting the unique needs of commercial operations. Unlike residential leases, commercial agreements often include clauses related to business activities, like operational hours or exclusive use rights. The lease must comply with Georgia state laws, ensuring both landlord and tenant rights are protected. Renewal or extension terms may differ, and security deposit requirements can be more substantial. Typically, such agreements are more complex, sometimes necessitating legal advice to ensure all business-specific clauses are appropriately addressed. Standard templates are available, but customization is common to suit individual commercial arrangements.

Lease Terms and Conditions

Lease terms outline payment details, due dates, renewal policies, and tenant responsibilities, ensuring compliance with Georgia laws and protecting both parties’ rights.

3.1 Rental Payment Details

Rental payment details in a Georgia lease agreement specify the amount, due date, and payment methods; Typically, rent is due on the first of each month, with late fees applied after a grace period. Tenants must pay rent without deductions or offsets. The agreement may outline accepted payment methods, such as checks, bank transfers, or online platforms. Landlords often require the first month’s rent and a security deposit before occupancy. Clear payment terms ensure both parties understand their financial obligations, preventing disputes. Rent increases must comply with Georgia laws and be disclosed in advance. Proper documentation of payments is essential for transparency and legal compliance.

3.2 Renewal/Extension Policies

Rental agreements in Georgia often include renewal or extension policies to outline the process for continuing the tenancy. Typically, a lease agreement may automatically convert to a month-to-month arrangement if no renewal is requested. Landlords and tenants must agree in writing to extend the lease, with terms potentially differing from the original agreement. Renewal terms should be communicated in advance, usually 60 days before the lease expires, to ensure both parties are informed. If no renewal is sought, proper notice must be given to avoid legal issues. Clear renewal policies help maintain a smooth transition and prevent misunderstandings, ensuring both landlord and tenant rights are protected under Georgia law.

Security Deposit Requirements

In Georgia, security deposits are a common practice to protect landlords against potential damages or unpaid rent. The deposit amount varies but is typically equal to one month’s rent. Landlords must return the deposit within one month of the tenant vacating the property, provided there are no damages or unpaid rent. Deductions must be itemized and justified. Georgia law does not cap the maximum security deposit amount but prohibits landlords from charging additional fees for pets or other items separately. Tenants should ensure the deposit is documented and returned promptly to avoid disputes. Clear terms regarding security deposits should be outlined in the rental agreement to comply with state regulations and protect both parties’ interests.

Rental Rules and Regulations

Rental rules and regulations in Georgia typically include quiet hours, pet policies, smoking restrictions, and visitor guidelines to ensure a harmonious living environment.

5.1 Smoking Policies

Smoking policies in Georgia rental agreements often specify where smoking is permitted. Typically, smoking is allowed only outside the rental property, with tenants required to dispose of cigarette butts properly using ashtrays. Landlords may prohibit smoking entirely on the premises to maintain cleanliness and reduce fire risks. Tenants are usually expected to adhere to these rules to avoid penalties or damages. Some agreements may outline specific areas where smoking is allowed, ensuring compliance with local regulations and maintaining a pleasant living environment for all occupants; Violations of smoking policies can lead to lease violations, fines, or even termination of the agreement.

5.2 Visitor Rules

Visitor rules in Georgia rental agreements outline guidelines for tenants regarding guests. Typically, agreements specify that visitors must be accompanied by the tenant and may not stay overnight without prior approval. Tenants are often responsible for ensuring their visitors comply with property rules, such as noise restrictions or shared space usage. Some agreements may limit the number of visitors or require advance notice for extended stays. Tenants are usually held accountable for any damages caused by their guests. These rules help maintain order and protect the property, ensuring a harmonious living environment for all occupants. Violations of visitor policies can lead to penalties or lease termination if not addressed promptly.

Tenant Responsibilities

Tenants in Georgia are required to fulfill specific obligations under the rental agreement. These include paying rent on time, maintaining the property in good condition, and complying with all rules and regulations outlined in the lease. Tenants must also ensure their actions do not violate local, state, or federal laws. Additionally, tenants are responsible for reporting any needed repairs to the landlord promptly to prevent further damage. They must also allow the landlord reasonable access to the property for inspections or maintenance, provided proper notice is given. Failure to meet these responsibilities can result in penalties or lease termination. Tenants are expected to respect the property and adhere to all agreed-upon terms to maintain a positive rental relationship.

Landlord Obligations

Landlords in Georgia are legally required to maintain the rental property in a habitable condition, ensuring compliance with all applicable housing codes and regulations. They must address necessary repairs promptly to prevent damage or safety hazards. Landlords are also obligated to provide tenants with a written lease agreement that outlines all terms and conditions. Additionally, they must respect tenants’ privacy rights, providing proper notice before entering the property for inspections or maintenance. Landlords are responsible for returning security deposits within the legally specified timeframe after the lease ends, minus any deductions for damages. They must also adhere to Georgia’s eviction laws, ensuring any eviction process is conducted lawfully and fairly. Failure to meet these obligations can result in legal consequences for the landlord.

Download and Customization Options

Georgia Rental Agreement templates are widely available for download online in PDF format, offering convenience for landlords and tenants. These templates can be easily customized to suit specific needs, such as residential or commercial properties. Users can fill out the forms digitally or print them for manual completion. Many websites provide editable versions in MS Word or other formats, allowing for tailored adjustments. Customization options include adding property details, lease terms, and unique clauses. Ensure the agreement complies with Georgia state laws to maintain legality. Downloading and personalizing a Georgia Rental Agreement PDF is a straightforward process, making it accessible for everyone to create a formal and enforceable contract.

Legal Compliance and Considerations

A Georgia Rental Agreement must comply with state and federal laws to ensure enforceability. Key legal considerations include adherence to Georgia’s landlord-tenant statutes, fair housing laws, and security deposit regulations. The agreement must outline tenant rights, landlord obligations, and eviction procedures. Specific clauses should address lease duration, rent payment terms, and property use restrictions. It’s essential to include legally binding language to protect both parties. Consulting a legal professional can help ensure the document meets all requirements. Compliance with Georgia’s laws ensures the agreement is valid and enforceable, avoiding potential disputes or legal issues. Always verify state-specific legal standards before finalizing the contract.

Continue Reading

nebosh scenario based questions and answers pdf

NEBOSH scenario-based questions simulate real-world workplace situations, requiring applicants to apply health and safety knowledge practically. These assessments evaluate the ability to analyze incidents, identify risks, and propose solutions, ensuring comprehensive understanding and application of safety principles.

Overview of NEBOSH Assessments

NEBOSH assessments are designed to evaluate a candidate’s ability to apply health and safety knowledge in real-world scenarios. These assessments often include scenario-based questions that present workplace incidents or challenges, requiring candidates to demonstrate practical problem-solving skills. NEBOSH qualifications, such as the National Diploma and International Diploma, include scenario-based assessments (SBAs) that simulate real workplace situations. Candidates are typically given four weeks to complete each assessment, with a recommended study time of at least 40 hours per paper. These assessments aim to test not only knowledge but also the ability to analyze situations, identify risks, and propose effective solutions, ensuring candidates are well-prepared for real-world health and safety roles.

Importance of Scenario-Based Questions

Scenario-based questions are crucial in NEBOSH assessments as they replicate real-world challenges, allowing candidates to demonstrate practical application of health and safety knowledge. These questions assess critical thinking, problem-solving, and decision-making skills, essential for professionals in the field. By presenting realistic workplace incidents, they ensure that candidates can identify hazards, evaluate risks, and propose effective controls. This approach bridges the gap between theoretical learning and practical implementation, preparing candidates to handle actual workplace scenarios effectively. The use of scenario-based questions ensures that NEBOSH qualifications produce competent health and safety practitioners capable of making informed decisions in dynamic work environments.

Structure of NEBOSH Scenario-Based Assessments

NEBOSH scenario-based assessments present a workplace scenario followed by a series of questions. These questions test knowledge application, critical thinking, and problem-solving skills in realistic contexts.

Understanding the Format

NEBOSH scenario-based assessments begin with a detailed workplace scenario, followed by a series of questions or tasks. These questions require you to apply your knowledge to the situation, demonstrating practical problem-solving skills. The format is designed to mirror real-world health and safety challenges, ensuring candidates can think critically and make informed decisions. Each assessment is open book, allowing reference to study materials, but the focus is on the ability to extract and apply relevant information effectively. The scenario often involves incidents, risk assessments, or control measures, and candidates must provide structured, evidence-based answers using the PEE principle (Point, Evidence, Explanation). Understanding this format is key to performing well in NEBOSH exams.

Key Characteristics of SBAs

Scenario-Based Assessments (SBAs) are designed to replicate real-world workplace situations, requiring practical application of health and safety knowledge. They are case-study based, with questions linked to a specific scenario, ensuring candidates demonstrate their ability to analyze and resolve issues. SBAs are open-book, allowing access to study materials, but focus on the ability to apply knowledge effectively. Answers must be structured using the PEE principle (Point, Evidence, Explanation) for clarity and depth. Time management is crucial, as candidates must complete tasks within a set timeframe. SBAs also emphasize the importance of evidence-based decision-making, ensuring responses are grounded in relevant health and safety principles and practices.

How to Approach NEBOSH Scenario-Based Questions

Successfully tackling NEBOSH scenario-based questions requires a structured approach, beginning with thorough scenario analysis. Identify key issues, apply relevant health and safety principles, and use the PEE principle to ensure clear, evidence-based answers.

Using the PEE Principle (Point, Evidence, Explanation)

The PEE Principle is a structured approach to answering NEBOSH scenario-based questions effectively. It involves making a clear Point by identifying the key issue or requirement. Next, provide Evidence by referencing relevant health and safety regulations, standards, or best practices. Finally, offer a detailed Explanation of how the evidence applies to the scenario, demonstrating practical application. This method ensures answers are logical, well-supported, and aligned with examiners’ expectations. For example, in a scenario involving a workplace incident, you might identify the point as a breach of safety protocols, provide evidence from the Health and Safety at Work Act, and explain how the breach could have been prevented. This approach enhances clarity and depth, making it easier for examiners to assess your understanding.

Applying Health and Safety Knowledge

Applying health and safety knowledge is critical when answering NEBOSH scenario-based questions. Candidates must analyze the scenario, identify hazards, and recommend controls based on legal and best-practice standards. This involves understanding regulations like the Health and Safety at Work Act and applying them to real-world situations. For example, in a warehouse incident involving fork-lift trucks, you might identify inadequate training as a hazard and propose corrective actions like enhanced training programs. Demonstrating practical application of knowledge ensures answers are relevant and effective. This approach not only addresses the scenario but also aligns with broader health and safety principles, showcasing the ability to manage risks and improve workplace safety proactively.

Common Types of Scenario-Based Questions

Common NEBOSH scenario-based questions include workplace incident scenarios, such as accidents involving fork-lift trucks, and risk assessment scenarios requiring control measures identification.

Workplace Incident Scenarios

Workplace incident scenarios in NEBOSH assessments simulate real-life accidents or near-misses, such as forklift truck accidents in a warehouse. These questions require candidates to identify root causes, legal breaches, and corrective actions. Candidates must demonstrate the ability to apply health and safety principles to resolve the incident and prevent future occurrences.

Scenarios often involve tasks like conducting investigations, recommending controls, and explaining legal implications. For example, a scenario might describe a chemical spill, requiring candidates to outline emergency procedures and long-term safety measures. These questions test practical application of knowledge, ensuring candidates can handle real-world health and safety challenges effectively.

Risk Assessment and Control Scenarios

Risk assessment and control scenarios in NEBOSH exams present workplace situations requiring candidates to identify hazards and evaluate controls. For instance, a scenario might describe a manufacturing environment with noise exposure risks, asking candidates to recommend control measures like engineering solutions or PPE.

Candidates must apply the hierarchy of controls, prioritizing elimination or substitution over less effective measures. Scenarios often include tasks like justifying chosen controls, explaining legal standards, and ensuring compliance with regulations. These questions assess the ability to systematically manage risks, ensuring a safe working environment and preventing incidents.

Tips for Success in NEBOSH Open Book Exams

Mastering NEBOSH open book exams requires effective time management, thorough preparation, and applying the PEE principle. Practice with mock scenarios to enhance your problem-solving skills and ensure well-structured answers.

Effective Time Management

Effective time management is crucial for success in NEBOSH open book exams. Allocate specific time slots for reading the scenario, understanding tasks, and answering questions. Prioritize tasks based on complexity and points allocated. Avoid spending too much time on a single question; move forward and revisit if time permits. Use the remaining time to review answers for clarity and completeness. Practicing mock scenarios helps improve speed and accuracy, ensuring you cover all aspects of the assessment within the given timeframe. Proper planning and adherence to time constraints are key to achieving high scores in NEBOSH scenario-based assessments.

Practicing with Mock Scenarios

Practicing with mock scenarios is essential for preparing for NEBOSH open book exams. These simulations replicate real-world workplace situations, allowing learners to apply their knowledge effectively. Mock scenarios help identify gaps in understanding and improve the ability to structure answers using the PEE principle. Regular practice enhances time management skills and familiarizes candidates with the exam format. Utilizing mock scenarios from various industries ensures a comprehensive understanding of different health and safety challenges. By reviewing feedback and refining answers, learners can develop a clear and structured approach to scenario-based questions, significantly improving their chances of success in the actual assessment.

Real-World Examples of NEBOSH Scenarios

Real-world examples include incidents like a fork-lift truck accident in a warehouse, highlighting workplace risks and challenges. These scenarios enable learners to apply health and safety knowledge practically.

Case Studies from Various Industries

NEBOSH scenario-based questions often feature case studies from diverse industries, such as manufacturing, construction, and healthcare. For example, a warehouse scenario involving a fork-lift truck accident highlights risks like poor traffic management and inadequate training. Another case study might involve a security company facing challenges after a takeover, requiring risk assessments for new operational demands. These real-world examples help learners apply health and safety principles across different contexts, ensuring practical understanding. By analyzing these scenarios, candidates can identify hazards, recommend controls, and demonstrate their ability to manage workplace safety effectively.

Mastering NEBOSH scenario-based questions requires a combination of knowledge, practical application, and effective answering techniques. Candidates should utilize the PEE principle to structure their responses, ensuring clarity and depth. Regular practice with mock scenarios and real-world case studies is essential to build confidence and competence. Time management during exams is critical, as open-book assessments demand efficient use of available time. By focusing on hazard identification, risk control, and legal compliance, learners can demonstrate their ability to apply health and safety principles effectively. Ultimately, thorough preparation and a systematic approach will enhance performance in NEBOSH assessments, paving the way for career advancement in occupational health and safety roles.

Continue Reading

new home walk through checklist pdf

A final walk-through is a critical step before closing on a new home, ensuring all systems and features are functional and meet expectations. This process allows buyers to verify repairs, inspect for damages, and confirm the property’s condition, providing peace of mind before ownership transfer.

Importance of a Final Walk-Through Checklist

Importance of a Final Walk-Through Checklist

A final walk-through checklist is essential for ensuring a new home meets agreed-upon standards. It helps identify and document issues like damages, incomplete work, or malfunctioning systems. This checklist protects buyers by providing a clear record of the property’s condition before closing. It also ensures all repairs are completed and verified, giving buyers peace of mind. Using a detailed checklist prevents oversights and ensures the home is move-in ready, aligning with the buyer’s expectations and protecting their investment.

Purpose of the New Home Walk-Through

The purpose of a new home walk-through is to ensure the property is in the expected condition before closing. It allows buyers to inspect for defects, verify repairs, and confirm that all systems and features are functional. This step ensures the home is clean, damage-free, and ready for occupancy. It also provides an opportunity to address any last-minute issues, ensuring the home meets the buyer’s expectations and is move-in ready, protecting their investment and peace of mind.

Exterior Inspection Checklist

The exterior inspection ensures all outdoor features are in good condition. Check driveways, sidewalks, siding, trim, roof condition, gutters, and downspouts for damage or issues; Ensure everything is level and properly installed.

Driveway and Sidewalk Condition

Driveway and Sidewalk Condition

Inspect the driveway and sidewalks for cracks, uneven surfaces, or damage. Ensure proper leveling and finish. Check for any specified coatings or materials as per contract. Verify drainage is functioning correctly to prevent water pooling. Note any necessary repairs or touch-ups. Ensure all areas are clean and free from debris. Proper condition ensures safety and longevity of these exterior features. Record any issues for corrective action before finalizing the purchase.

Siding and Trim Inspection

Siding and Trim Inspection

Examine the siding for cracks, dents, or gaps. Verify proper installation and alignment. Check for any damage or unevenness. Inspect trim around windows, doors, and eaves for secure fit and proper sealing. Ensure all surfaces are free from damage or warping. Verify paint or finish meets contract specifications. Look for any signs of wear or weathering. Document any issues for the builder to address. Proper siding and trim ensure structural integrity and curb appeal, essential for a new home’s longevity and aesthetics.

Roof and Gutter Examination

Roof and Gutter Examination

Inspect the roof for damaged, missing, or loose shingles, tiles, or panels. Check for cracks in chimney caps, vents, and skylights. Verify that gutters are securely fastened and free of debris. Ensure downspouts direct water away from the foundation. Look for signs of wear, sagging, or unevenness in the roof structure. Test gutters by flushing water to confirm proper flow. Document any issues for repair, as a compromised roof or gutter system can lead to costly water damage or structural problems.

Interior Inspection Checklist

Examine walls, ceilings, and flooring for cracks, stains, or damage. Check windows, doors, and baseboards for proper installation and functionality. Inspect all interior systems, ensuring everything operates smoothly.

Walls and Ceiling Condition

Walls and Ceiling Condition

Inspect walls and ceilings for cracks, stains, or water damage. Ensure surfaces are smooth and evenly painted. Check for any nail pops or uneven finishes. Verify that all repairs were made as agreed upon. Look for signs of wear or damage in high-traffic areas. Ensure proper paint application and finish. Document any issues for further review or repair requests.

Flooring and Baseboards

Flooring and Baseboards

Inspect all flooring types (hardwood, carpet, tile) for cracks, unevenness, or damage. Ensure surfaces are level and properly installed. Check baseboards for dents, scratches, or gaps. Verify that all flooring transitions are smooth and secure. Look for proper sealing around edges and joints. Ensure baseboards are correctly painted and aligned. Document any issues or needed repairs. Confirm that all flooring meets the agreed-upon standards and condition as per the purchase agreement.

Windows and Doors Operation

Windows and Doors Operation

Check all windows and doors to ensure they open, close, and lock smoothly. Verify proper alignment and seal of doors and windows. Inspect for any cracks or damage to glass, frames, or screens. Test door handles, hinges, and window mechanisms for proper function. Ensure weatherstripping is intact and sealing correctly. Document any issues or malfunctions. Confirm that all windows and doors operate as intended and meet the standards outlined in the purchase agreement.

Essential Systems and Appliances

Inspect plumbing, electrical, and HVAC systems for proper function. Check all appliances for operation and ensure they are free from damage or malfunctions. Verify that all systems meet the agreed-upon standards and are ready for immediate use.

Plumbing System Check

Plumbing System Check

Inspect the plumbing system for leaks under sinks, around fixtures, and near water heaters. Test water pressure by running multiple faucets simultaneously. Ensure proper drainage by checking for clogs in sinks, toilets, and showers. Verify that all fixtures, including faucets and showerheads, are securely installed and functioning correctly. Check the water heater for proper operation and ensure it is set to the correct temperature. Document any issues or needed repairs to address before closing.

Electrical System Inspection

Inspect the electrical system by testing all switches, outlets, and fixtures to ensure they function properly. Check for flickering lights or warm outlets, which may indicate wiring issues. Verify that circuit breakers are properly labeled and functioning. Ensure all installed lighting fixtures and ceiling fans operate correctly. Test GFCI outlets to confirm they trip when necessary. Look for any exposed or damaged wiring and ensure all electrical components are securely installed and meet safety standards.

HVAC System Evaluation

Evaluate the HVAC system by turning on heating and cooling to ensure proper function. Check for unusual noises, inconsistent temperatures, or airflow issues. Verify that all vents and registers are clear and functioning. Test thermostats to confirm accurate temperature control. Inspect visible ductwork for leaks or damage. Ensure all system components, like filters, are clean and properly installed. Confirm that the system meets the specifications outlined in your contract. Consider hiring a professional for a detailed evaluation if concerns arise.

Appliances and Fixtures

Inspect all installed appliances to ensure they are in working condition. Test each appliance’s basic functions, such as ovens, dishwashers, and microwaves. Verify that all lighting fixtures, ceiling fans, and plumbing fixtures are operational. Check for any visible damage or defects. Ensure all appliances and fixtures are clean and free of debris. Confirm that all items match what was specified in the contract. Document any issues or missing items for corrective action before finalizing the purchase.

Documentation and Next Steps

Document all findings and notify the seller or builder of any issues. Ensure repairs are completed and verified before closing. Keep detailed records for future reference.

Recording Issues and Damages

Recording Issues and Damages

During the final walk-through, thoroughly document any issues or damages found. Use photos, videos, and detailed notes to record the condition of the property. Create a list of specific problems, such as cracks, dents, or malfunctioning systems. This documentation serves as evidence for repairs and ensures accountability. Consider involving a third-party inspector for an unbiased assessment. Organize all findings in a clear, structured format to present to the seller or builder, ensuring all issues are addressed before closing.

Understanding the Repair Process

Understanding the Repair Process

Understanding the repair process is essential for a smooth transition into your new home. Once issues are documented, the seller or builder typically addresses them before closing. Repairs should be completed in a timely manner, and buyers should verify that all fixes meet agreed-upon standards. A punch list may be created to track progress, ensuring no detail is overlooked. If repairs are significant, a timeline should be established to avoid delays. Always ensure repairs are finalized before taking possession of the property.

Specialized Checklists

Specialized checklists cater to unique property types, such as new construction homes, basements, or attics, ensuring every area meets quality and safety standards before occupancy.

New Construction Walk-Through

A new construction walk-through involves inspecting the property for any defects or omissions, ensuring all features meet the agreed-upon specifications. This includes checking the driveway, siding, and roof for quality and durability. Inside, examine walls, floors, and ceilings for evenness and proper finishing. Verify that all doors and windows open smoothly and seal properly. Ensure electrical outlets, plumbing fixtures, and HVAC systems are fully functional. This step is crucial for identifying and addressing issues before final acceptance of the home.

Basement and Attic Inspection

Inspecting the basement and attic is essential to ensure structural integrity and identify potential issues. Check for cracks in walls and floors, signs of water damage, and proper ventilation. Verify that insulation meets specifications and is evenly distributed. Look for pest infestations or evidence of rodents. Ensure all areas are clean, free of debris, and that any agreed-upon repairs are completed. Proper lighting and access to these spaces should also be confirmed for safety and functionality.

Continue Reading

mitel telephone user guide

Mitel Telephone Systems provide reliable and scalable communication solutions for businesses, offering advanced features and intuitive designs to enhance productivity and user experience.

1.1 Overview of Mitel IP Phones

Mitel IP Phones, such as the 5320, 5330, and 5340 models, offer high-quality voice communication with features like HD audio, intuitive interfaces, and integration with Mitel systems. Designed for flexibility, they support various calling options and accessories, ensuring a seamless experience for users in different work environments.

1.2 Key Features of Mitel Telephones

Mitel Telephones feature advanced communication tools like HD audio, touchscreen interfaces, and call management options. They support integration with mobile devices, customizable settings, and enhanced security. These phones also offer voicemail, call history, and conferencing capabilities, ensuring efficient and professional communication for various business needs.

Initial Setup and Configuration

Setting up Mitel telephones involves unboxing, installing, and connecting to the network. Configuration includes logging in, setting preferences, and ensuring proper network integration for optimal functionality.

2.1 Unboxing and Physical Installation

Begin by carefully unboxing the Mitel telephone and its accessories. Handle the device with care to avoid damage. Connect the power cable and Ethernet cable to the appropriate ports. Place the phone on a stable surface, ensuring proper ventilation. Proceed to plug in the power source and prepare for configuration.

2.2 Connecting the Phone to the Network

Connect the Mitel telephone to your network using an Ethernet cable. Plug one end into the phone’s Ethernet port and the other into a nearby network switch or router. Ensure the cable is securely attached to avoid connectivity issues. The phone will automatically obtain an IP address via DHCP. If required, configure VLAN settings as per your network specifications.

2.3 Logging In and Configuring Basic Settings

Log in to the Mitel telephone by accessing the web interface using the default admin credentials. Navigate to the settings menu to configure basic options like SIP server IP, VLAN settings, and timezone. Save changes to ensure proper functionality. Refer to the user guide for detailed login and configuration steps.

Making and Managing Calls

Mitel telephones enable seamless call management, allowing users to place, receive, and transfer calls effortlessly. Features like call hold, mute, and conference calling enhance communication efficiency and user experience.

3.1 Placing and Receiving Calls

Placing calls on Mitel phones is straightforward: dial the number using the keypad or select a contact from the directory. To receive calls, simply lift the handset or press the Answer key. The phone also supports Do Not Disturb mode to manage incoming calls during busy periods, ensuring uninterrupted workflow and maintaining professionalism in all communication scenarios.

3.2 Call Forwarding and Transfer

Mitel phones allow seamless Call Forwarding to another extension or external number, ensuring calls reach the right person. To activate, navigate to the phone menu and set forwarding options. For Call Transfer, press the Transfer button, dial the target number, and confirm with the Transfer key. This feature supports both blind and attended transfers, enhancing call management efficiency.

3.3 Using the Speakerphone and Mute Function

To use the speakerphone, press the Speaker button or dial *1 during a call. This enables hands-free communication. The Mute function deactivates the microphone, ensuring privacy. Press the Mute button to toggle it on/off. These features enhance call management and convenience, as detailed in the Mitel Telephone User Guide.

Advanced Calling Features

Mitel Telephone Systems offer advanced calling features to streamline communication, including voicemail, call history, and conference calling. These tools empower users to manage calls efficiently and stay productive.

4.1 Voicemail Setup and Navigation

Setting up voicemail on your Mitel telephone allows you to record a greeting, access messages, and customize notifications. Navigate the voicemail menu using keypad commands to manage messages efficiently and stay connected with callers when unavailable.

4.2 Call History and Redial

The Mitel telephone system allows users to view call history, including missed, outgoing, and answered calls. Redial functionality enables quick connection to recent numbers, streamlining communication and improving efficiency.

4.3 Three-Way Calling and Conference Calls

Mitel telephones support three-way calling and conference calls, enabling users to connect multiple parties seamlessly. During an active call, place the call on hold, dial the third party, and merge the calls to create a three-way conversation or conference, enhancing team collaboration and communication efficiency.

Customization and Personalization

Mitel telephones offer customization options, enabling users to adjust ring tones, volume settings, and personalize interfaces with custom backgrounds and shortcuts, boosting productivity.

5.1 Adjusting Volume and Sound Settings

Mitel phones allow users to customize audio preferences by adjusting volume levels for the handset, headset, and speakerphone. Additionally, sound settings can be personalized to enhance call quality and clarity, ensuring an optimal communication experience tailored to individual needs and environments.

5.2 Customizing Ring Tones and Alerts

Mitel phones offer the ability to personalize ring tones and alerts, allowing users to choose from predefined options or upload custom tones. This feature enhances user experience by enabling distinct notifications for different calls, ensuring important communications are easily identifiable and never missed.

5.3 Personalizing the Phone Interface

Mitel phones allow users to personalize the interface by adjusting wallpapers, themes, and time/date formats. Custom key labeling and screen brightness settings further enhance usability. These features ensure a tailored experience, making the phone interface intuitive and aligned with individual preferences for optimal productivity and comfort.

Troubleshooting Common Issues

Troubleshooting Mitel phones involves resolving connectivity, audio, and call drop issues. Restarting the device, checking network settings, and ensuring firmware updates can often resolve common problems quickly.

6.1 Resolving Connectivity Problems

Connectivity issues with Mitel phones can often be resolved by checking network cables, restarting the device, and ensuring proper VLAN settings. Power cycling the phone and verifying DHCP configuration can also restore connectivity quickly. For persistent issues, consulting the user manual or contacting support is recommended.

6.2 Fixing Audio Issues and Echo

To resolve audio issues or echo on Mitel phones, adjust the volume settings, ensure proper headset connections, and check for firmware updates. Restarting the device or resetting to factory settings can also address these problems effectively. Consulting the user manual for troubleshooting steps is recommended for optimal results.

6.3 Addressing Call Drop and Delay

To address call drop and delay issues, ensure stable network connectivity, check firewall settings, and verify QoS configuration. Restarting the phone or updating firmware can resolve connectivity problems. Consult the user manual for detailed troubleshooting steps to maintain consistent call quality and performance.

Using Mitel Telephone with Other Devices

Mitel telephones seamlessly integrate with headsets, computers, and mobile devices, enabling hot desking and remote features for enhanced productivity and flexibility in any work environment.

7.1 Pairing with Headsets and Accessories

Mitel telephones support seamless pairing with wireless headsets and accessories, enhancing call quality and user comfort. Compatible with a variety of devices, they offer easy connectivity options, including Bluetooth and USB, ensuring flexible communication solutions tailored to individual preferences and work environments.

7.2 Integrating with Computer and Mobile Devices

Mitel telephones seamlessly integrate with computers and mobile devices, enabling features like call control, contact syncing, and desktop apps. This integration enhances productivity by allowing users to manage calls directly from their computer or mobile device, ensuring a unified communication experience across all platforms.

7.3 Using Hot Desking and Remote Features

Hot desking allows users to log in to any Mitel phone, accessing their personal settings and calls. Remote features enable seamless communication from anywhere, ensuring flexibility and efficiency. Dialing 111 and the directory number logs out a Hot Desking user, while remote access keeps teams connected, enhancing productivity and collaboration across locations.

Security and Privacy Settings

Mitel telephones offer robust security features, including secure login, data encryption, and privacy controls to protect user information and ensure safe communication environments.

8.1 Securing Your Mitel Telephone

Enhance security by enabling password protection, securing login credentials, and encrypting voice traffic. Regularly update firmware and restrict unauthorized access to ensure your Mitel phone remains protected against potential threats and vulnerabilities, maintaining data integrity and privacy.

8.2 Managing User Permissions

Efficiently manage user permissions by assigning roles and access levels through the administrative interface. Restrict or grant access to specific features, ensuring only authorized users can modify settings or view sensitive data. Regularly review and update permissions to maintain security and compliance with organizational policies.

8.3 Protecting Voicemail and Call Data

Ensure voicemail and call data security by setting strong passwords and enabling encryption. Regularly update security settings and restrict access to authorized users only. Use secure authentication methods to safeguard sensitive information and maintain privacy. Mitel systems offer robust tools to protect your communications data effectively.

Software Updates and Maintenance

Regular software updates ensure optimal performance, security, and new feature integration. Use the administration portal to check for updates and install them to maintain system functionality and security.

9.1 Checking for Firmware Updates

To ensure your Mitel phone operates smoothly, regularly check for firmware updates. Access the phone’s administration portal, navigate to the “Updates” section, and review available firmware versions. Enable automatic updates or manually download and install the latest version to maintain optimal functionality and security.

9.2 Installing and Verifying Updates

After downloading the update, access the administration portal and select the firmware file. Confirm installation, and the phone will reboot automatically. Once updated, navigate to the settings menu to verify the new firmware version. Ensure all features function correctly and consult the user manual for detailed guidance.

9.3 Scheduling Regular Maintenance

Regular maintenance ensures optimal performance. Schedule periodic checks for firmware updates, network connectivity, and audio quality. Use the Phone Manager tool to automate updates and monitor system health. Refer to the Mitel user guide for detailed steps on configuring maintenance schedules and troubleshooting common issues efficiently.

Mitel Telephone Systems offer robust communication solutions, enhancing productivity and user experience. For further assistance, refer to the official Mitel User Manuals and visit their Support Portal for updates and troubleshooting guides.

10.1 Summary of Key Features and Benefits

Mitel Telephone Systems deliver advanced communication tools, including HD audio, intuitive call management, and seamless integration with other devices. Key benefits include enhanced productivity, customizable settings, and robust security features, ensuring a reliable and efficient user experience for businesses of all sizes.

  • HD Audio Quality for crystal-clear voice clarity.
  • Intuitive Interface designed for easy navigation.
  • Advanced Call Management features like forwarding and conferencing.
  • Seamless Integration with headsets, computers, and mobile devices.
  • Customizable Settings to personalize your experience.
  • Robust Security Features to protect your communications.

These features and benefits make Mitel systems a versatile and reliable choice for modern business communication needs.

10.2 Accessing Mitel User Manuals and Support

Mitel provides comprehensive user manuals and support resources to help users navigate their telephone systems. Manuals can be downloaded from the official Mitel website, Document Center, or platforms like ManualsLib. For additional assistance, users can contact Mitel Technical Support or explore the Mitel User Group for community-driven solutions.

  • Mitel Document Center offers detailed guides and troubleshooting tips.
  • Mitel Technical Support is available for direct assistance.
  • User Manuals are downloadable in PDF format for easy access.

Visit the official Mitel website to explore these resources and ensure optimal use of your telephone system.

10.3 Staying Updated with Mitel Innovations

To stay informed about the latest Mitel advancements, users can subscribe to Mitel’s newsletters and follow their official blog. Regularly visiting the Mitel website ensures access to new features, updates, and resources. Additionally, attending Mitel-hosted webinars and product launch events provides insights into cutting-edge technologies and best practices for system optimization.

  • Subscribe to Mitel newsletters for updates.
  • Follow the Mitel blog for feature announcements.
  • Visit the Mitel website for the latest resources;
  • Join Mitel User Group for community support.

Stay informed to maximize your Mitel telephone system’s potential.

Continue Reading

cuisinart ice cream machine instructions

The Cuisinart Ice Cream Machine is a popular choice for homemade frozen treats, offering a 2-quart capacity, fully automatic operation, and sleek design for effortless dessert creation, perfect for all skill levels.

Key Features of the Cuisinart Ice Cream Maker

The Cuisinart Ice Cream Maker features a 2-quart capacity, double-insulated freezer bowl, fully automatic operation, and BPA-free design, making it easy to craft delicious frozen treats at home.

2.1. Capacity and Versatility

The Cuisinart Ice Cream Maker offers a 2-quart capacity, perfect for creating generous portions of ice cream, frozen yogurt, or sorbet. Its versatility allows users to craft a variety of frozen desserts with ease, making it ideal for both small gatherings and family use. The machine’s design ensures consistent results, whether you’re making classic ice cream or experimenting with unique flavors and mix-ins for a customizable treat.

2.2. Automatic Operation

The Cuisinart Ice Cream Maker features fully automatic operation, allowing users to simply add ingredients and let the machine handle the rest. This hands-off approach ensures a smooth and consistent churning process, producing creamy results every time. The machine operates efficiently, typically taking about 20 minutes to craft 2 quarts of frozen dessert. Its automatic functionality makes it user-friendly and time-saving, perfect for both novices and experienced creators seeking hassle-free ice cream making at home.

2.3. Double-Insulated Freezer Bowl

The Cuisinart Ice Cream Machine features a double-insulated freezer bowl designed for optimal performance. This bowl must be pre-chilled in the freezer for at least 6 hours before use to ensure proper operation. The double insulation helps maintain consistent low temperatures, essential for creating smooth and creamy ice cream. Pre-chilling ensures the mixture freezes evenly, preventing ice crystals and delivering professional-quality results. This innovative design makes the machine both efficient and reliable for crafting homemade frozen desserts with ease and precision.

Preparing to Use the Machine

Preparation involves chilling the double-insulated freezer bowl in the freezer for at least 6 hours and ensuring all ingredients are ready for a smooth process.

3.1. Chilling the Freezer Bowl

Chilling the freezer bowl is essential for proper ice cream production. Place the bowl in the freezer for at least 6 hours or overnight. Ensure your freezer is set to 0°F (-18°C) for optimal results. The double-insulated design helps maintain low temperatures during churning. Avoid skipping this step, as it directly affects the machine’s ability to churn effectively. A well-chilled bowl ensures a smoother texture and faster freezing of your ingredients.

3.2. Preparing Ingredients

Preparing ingredients is crucial before using the Cuisinart Ice Cream Machine. Measure all components accurately and mix wet and dry ingredients separately. Ensure all ingredients are cold, as this aids in smoother churning. Avoid adding frozen mix-ins directly; chop them into small pieces first. For recipes with eggs or cream, chill the mixture thoroughly in the refrigerator before pouring it into the machine. Proper preparation ensures even flavor distribution and a creamy texture in your final frozen dessert.

3.3. Pre-Mixing the Batter

Pre-mixing the batter is essential for achieving a smooth and even texture in your ice cream. Begin by combining your base ingredients, such as cream, sugar, and flavorings, in a large bowl; Mix until the sugar is fully dissolved and the mixture is well incorporated. If using eggs or other additions, ensure they are thoroughly mixed in. Avoid overmixing, as this can make the batter too thick. Once combined, chill the mixture in the refrigerator for at least 1-2 hours to allow the flavors to meld and the batter to firm up before pouring it into the Cuisinart Ice Cream Machine. Proper pre-mixing ensures a creamy and consistent final product.

Operating the Machine

Turn on the Cuisinart Ice Cream Machine, pour the pre-chilled batter into the bowl, and let it churn. Monitor progress and add mix-ins as needed for perfect results.

4.1. Assembling the Machine

Start by attaching the double-insulated freezer bowl to the base unit, ensuring it locks securely into place. Next, insert the mixing paddle into the bowl, aligning it with the base. Place the clear lid on top, making sure it fits snugly. The ingredient spout on the lid allows easy addition of mix-ins. Finally, plug in the machine and ensure all parts are properly aligned for safe and efficient operation. Always refer to the user manual for precise assembly instructions to avoid errors.

4.2. Adding Ingredients

Pour your pre-chilled ice cream base into the double-insulated freezer bowl through the ingredient spout on the lid. Ensure the mixture is cold to achieve the best results. Add any mix-ins like fruits, nuts, or chocolate chips during the churning process, as indicated by the machine’s instructions. Do not overfill the bowl beyond the recommended 2-quart capacity. Always refer to the user manual for specific guidelines on ingredient ratios and preparation to ensure optimal performance and texture. Proper ingredient addition is key to a smooth, creamy finish.

4.3. Churning Process

The Cuisinart Ice Cream Machine features a fully automatic churning process. Once ingredients are added, the machine’s paddle mixes and aerates the batter, transforming it into smooth, creamy ice cream. The double-insulated freezer bowl ensures even freezing without the need for pre-freezing. Churning typically takes 20-30 minutes, depending on the mixture’s consistency. Monitor the process through the see-through lid to ensure desired texture. Avoid over-churning, as it can lead to a dense or icy finish. Proper churning is essential for achieving the perfect scoopable consistency.

4.4. Monitoring Progress

Monitor the churning process through the machine’s see-through lid to ensure even mixing and desired consistency. The paddle will move smoothly, incorporating air and breaking down ice crystals. Listen for changes in the motor sound, which may slow as the mixture thickens. Churning typically takes 20-30 minutes, depending on ingredients. Avoid opening the lid during operation to maintain temperature. Once the cycle completes, the ice cream will be scoopable but soft. Transfer it to an airtight container for firmer texture if preferred.

Adding Mix-Ins

Add mix-ins like nuts, candies, or fruits during the churning process for a personalized touch. Mix-ins should be added toward the end to ensure even distribution without crushing them.

5.1. Types of Mix-Ins

Popular mix-ins include nuts (walnuts, almonds), candies (chocolate chips, M&M’s), fruits (strawberries, blueberries), and even cookies or brownie bits. These additions enhance texture and flavor. For best results, ensure mix-ins are evenly sized and distributed during the churning process. Avoid overly large pieces, as they may not mix well. Experiment with combinations to create unique and personalized flavors for your homemade ice cream using the Cuisinart machine.

5.2. When to Add Mix-Ins

Mix-ins should be added toward the end of the churning process, typically during the last 2-3 minutes. This ensures they are evenly distributed without breaking down. Avoid adding mix-ins too early, as they may get over-mixed or lose texture. Refer to the user manual for specific timing guidance, as it varies by model. Proper timing ensures a smooth and consistent final product with well-integrated mix-ins for the best flavor and texture experience.

Maintenance and Cleaning

Regular maintenance ensures optimal performance and longevity of your Cuisinart Ice Cream Machine. After each use, wash the mixing bowl, lid, and paddle with warm, soapy water. Avoid abrasive cleaners to prevent scratching. The double-insulated freezer bowl is dishwasher-safe, while other parts should be hand-washed. Dry all components thoroughly before storing. Wipe the machine’s exterior with a damp cloth to remove any splatters. Proper cleaning prevents residue buildup and ensures your machine remains in excellent working condition for future use.

Safety Tips

Always follow safety guidelines when using the Cuisinart Ice Cream Machine. Ensure the freezer is set to 0°F for proper freezing. Keep children away from moving parts and electrical components. Avoid overfilling the bowl, as this can cause spillage. Use a stable, flat surface to prevent tipping. Never insert metal utensils or hands into the mixing bowl while it’s operating. Regularly inspect the machine for wear and tear. Refer to the user manual for troubleshooting and warranty information to maintain safety and performance.

Recipes and Customization Ideas

The Cuisinart Ice Cream Machine offers endless possibilities for creating delicious treats. From classic vanilla to unique flavor combinations, and dairy-free options, it encourages culinary creativity and experimentation.

8.1. Classic Ice Cream Recipes

Classic ice cream recipes remain timeless favorites, offering a foundation for delicious desserts. Try the simple vanilla bean recipe with just cream, sugar, and vanilla extract, or the rich chocolate version using cocoa powder. Strawberry ice cream is another classic, blending fresh strawberries with cream and sugar for a fruity twist. These recipes are easy to follow and deliver creamy, authentic results, perfect for any occasion or preference.

8.2. Unique Flavor Combinations

Experiment with unique flavor combinations to create one-of-a-kind ice cream. Try pairing matcha-green tea with white chocolate chips or caramel with a hint of fleur de sel. For a fruity twist, mix raspberry with dark chocolate chunks or mango with a drizzle of honey. These creative blends allow you to personalize your desserts and explore bold, adventurous tastes that stand out from traditional recipes, making every batch a delicious surprise.

8.3. Dairy-Free and Vegan Options

The Cuisinart Ice Cream Machine supports dairy-free and vegan creations, allowing you to craft delicious treats using plant-based ingredients. Substitute traditional milk with coconut milk, almond milk, or cashew cream for a creamy texture. Natural sweeteners like maple syrup or dates can replace refined sugars. Experiment with flavors such as chocolate avocado, mango coconut, or berry sorbet. These options cater to dietary restrictions while maintaining rich, indulgent flavors, making the machine versatile for all users, including those with lactose intolerance or vegan preferences.

Troubleshooting Common Issues

Common issues with the Cuisinart Ice Cream Machine include the freezer bowl not freezing properly or the motor not turning on. Ensure the freezer is set to 0°F for proper freezing. If the machine doesn’t start, check the power connection. For uneven churning, verify the bowl is fully assembled. Consult the user manual for detailed troubleshooting steps. The limited 3-year warranty covers defects, and customer support is available for further assistance. Regular maintenance can prevent many issues and ensure optimal performance.

Warranty and Customer Support

The Cuisinart Ice Cream Machine comes with a limited 3-year warranty, covering manufacturing defects and ensuring product quality. For troubleshooting or inquiries, refer to the user manual or contact Cuisinart’s customer support team. The warranty provides peace of mind, allowing users to enjoy their ice cream maker confidently. Additionally, the machine is BPA-free, further enhancing its durability and safety for long-term use. Customer service is accessible for any questions or concerns regarding the product.

The Cuisinart Ice Cream Machine is a versatile and user-friendly appliance perfect for creating delicious homemade ice cream, frozen yogurt, and sorbet. With its fully automatic operation and 2-quart capacity, it offers endless possibilities for customization. Whether you’re a novice or an experienced cook, this machine simplifies the process of making frozen treats. Its durability, ease of use, and included recipe book make it a valuable addition to any kitchen, allowing you to explore a world of flavors and enjoy homemade desserts with ease.

Continue Reading