The vagus nerve, often called the “wanderer,” is a vital cranial nerve connecting the brain to various body organs. It plays a central role in regulating heart rate, digestion, and emotional responses. Daily exercises targeting this nerve can enhance its function, improving mental and physical health significantly.
1.1 The Role of the Vagus Nerve in the Body
The vagus nerve, the longest cranial nerve, connects the brain to vital organs like the heart, lungs, and digestive system. It regulates heart rate, digestion, and respiratory functions. As part of the parasympathetic nervous system, it promotes relaxation and reduces stress. The nerve also facilitates communication between the brain and body, influencing mood and emotional responses. Its bidirectional signaling enables the body to respond to stress and maintain equilibrium. Strengthening the vagus nerve through daily exercises can enhance its ability to regulate these critical functions, improving overall health and well-being.
1.2 The Connection Between the Vagus Nerve and Emotional Regulation
The vagus nerve plays a crucial role in emotional regulation by influencing the body’s response to stress and anxiety. It facilitates communication between the brain and organs, helping to calm the nervous system. By activating the parasympathetic nervous system, the vagus nerve promotes relaxation and reduces emotional reactivity. This connection is vital for managing mental health, as a well-functioning vagus nerve can alleviate symptoms of anxiety and depression. Daily exercises that stimulate the vagus nerve, such as deep breathing and meditation, can further enhance emotional balance and resilience.

Understanding Vagal Tone and Its Impact on Health
Vagal tone refers to the activity of the vagus nerve, influencing heart rate variability and stress resilience. Higher vagal tone is linked to better emotional regulation and physical health.
2.1 What is Vagal Tone?
Vagal tone measures the activity of the vagus nerve, particularly its effect on heart rate variability (HRV). A higher vagal tone indicates stronger parasympathetic nervous system function, promoting relaxation and stress resilience. It reflects the nerve’s ability to regulate emotional responses and restore balance. Improved vagal tone is linked to better emotional regulation, reduced anxiety, and enhanced physical health. Daily exercises like deep breathing and meditation can strengthen vagal tone, fostering overall well-being and resilience to stress.
2.2 The Relationship Between Vagal Tone and Stress Management
A strong vagal tone enhances the body’s ability to manage stress by balancing the sympathetic (fight-or-flight) and parasympathetic (rest-and-digest) nervous systems. When vagal tone is high, the body can quickly shift from stress responses to relaxation, improving resilience. Daily vagus nerve exercises, such as deep breathing and cold exposure, strengthen this relationship, helping individuals recover faster from stress. This balance is crucial for maintaining emotional stability and overall well-being, making vagal tone a key factor in effective stress management.

Daily Exercises to Strengthen the Vagus Nerve
Daily exercises like deep breathing, cold exposure, and vocal techniques can significantly enhance vagal tone, promoting relaxation and improving overall nervous system function.
3.1 Deep Breathing Exercises
Deep breathing is a powerful tool for vagus nerve stimulation. Practice the 4-7-8 method: inhale deeply for 4 seconds, hold for 7, then exhale slowly for 8. This technique activates the parasympathetic nervous system, calming the mind and body. Regular deep breathing reduces stress, lowers anxiety, and improves heart rate variability. Incorporate this exercise daily, focusing on slow, deliberate breaths to enhance vagal tone and promote relaxation. Consistency is key for long-term benefits to emotional and physical well-being.
3.2 Cold Exposure Techniques
Cold exposure is a potent vagus nerve stimulator. Start with cold showers, gradually lowering the temperature, or splash cold water on your face and neck. Ice baths or ice packs applied to the chest also work. These practices trigger parasympathetic activity, calming the nervous system and reducing stress. Regular cold exposure enhances resilience, improves mood, and strengthens vagal tone. Begin with short sessions and increase duration as tolerance builds. Incorporate this technique into your daily routine for lasting benefits to mental and physical well-being.
3.3 Vocal Exercises for Vagal Stimulation
Vocal exercises, such as humming, chanting, or singing, stimulate the vagus nerve by engaging the muscles connected to it. These activities activate the parasympathetic nervous system, promoting relaxation and reducing stress. Start with simple humming or deep, resonant sounds. Consistent practice enhances vagal tone, improving emotional regulation and overall well-being. Incorporate vocal exercises into your routine, even for a few minutes daily, to strengthen the vagus nerve and experience its calming effects on both mind and body.
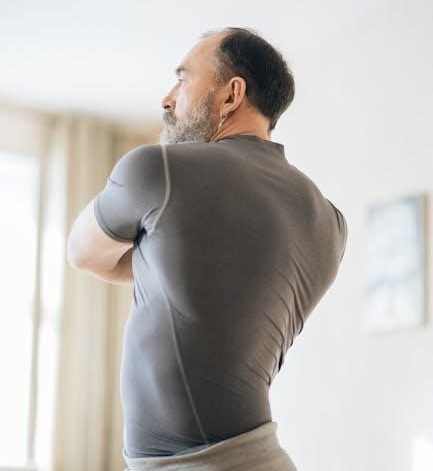
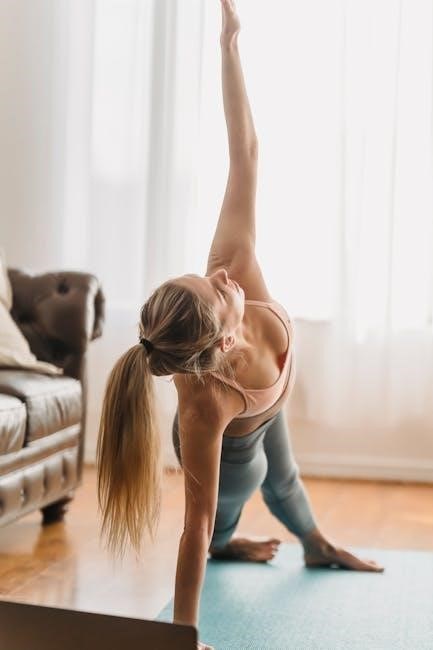
3.4 Physical Exercises and Neck Stretches
Physical exercises and neck stretches are effective ways to stimulate the vagus nerve. Gentle neck tilts, shoulder rolls, and slow head rotations can activate the nerve. Massaging the neck muscles or performing yoga poses like the “cat-cow” stretch also helps. These exercises improve blood flow and reduce tension, promoting vagal tone. Regular practice enhances relaxation, lowers stress, and supports overall nervous system balance. Incorporate these movements into your daily routine to strengthen the vagus nerve and enjoy its calming benefits for mental and physical well-being.
The Science Behind Vagus Nerve Stimulation

Vagus nerve stimulation activates the parasympathetic nervous system, promoting relaxation and reducing stress. It enhances communication between the brain and body, improving emotional regulation and overall well-being.
4.1 How Vagus Nerve Stimulation Affects the Brain
Vagus nerve stimulation directly impacts the brain by activating the parasympathetic nervous system, which promotes relaxation and reduces stress. It enhances the release of neurotransmitters like serotonin and dopamine, improving mood and emotional regulation. This stimulation also strengthens communication between the brain and body, fostering a state of calm and reducing anxiety. Regular stimulation can lead to long-term changes in brain activity, enhancing resilience to stress and improving overall mental well-being through consistent practice of daily vagus nerve exercises.
4.2 The Role of the Parasympathetic Nervous System
The parasympathetic nervous system (PNS) is the body’s “rest and digest” mechanism, countering stress by promoting relaxation and reducing heart rate. The vagus nerve is central to the PNS, regulating processes like digestion and sleep. It restores balance by slowing down physiological responses, fostering emotional stability. Daily vagus nerve exercises enhance PNS activity, strengthening its ability to calm the body and mind, thereby improving overall health and well-being through consistent stimulation of this vital system.

The Polyvagal Theory and Its Relevance
Developed by Stephen Porges, the Polyvagal Theory explains how the vagus nerve reacts to safety, danger, and life threats, guiding emotional and physiological responses hierarchically.
5.1 Understanding the Polyvagal Theory by Stephen Porges
Stephen Porges’ Polyvagal Theory revolutionized our understanding of the vagus nerve’s role in emotional and physiological responses. It describes a hierarchy of reactions to safety, danger, and life threats, emphasizing the vagus nerve’s function in regulating these states. The theory distinguishes between the ventral vagal complex (associated with safety and connection), the sympathetic nervous system (fight or flight), and the dorsal vagal complex (freeze response). This framework helps explain how vagal tone influences resilience and offers practical insights for using daily exercises to enhance emotional regulation and trauma recovery.
5.2 Applying the Theory to Daily Vagus Nerve Exercises
The Polyvagal Theory guides effective vagus nerve exercises by focusing on activating the ventral vagal complex, which promotes feelings of safety and connection. Techniques like deep breathing, vocal exercises, and cold exposure encourage parasympathetic dominance, enhancing emotional resilience. For example, humming or chanting stimulates the vagus nerve, fostering calm. These practices, rooted in Porges’ theory, help individuals move from states of hyperarousal or immobilization to a balanced, regulated state, improving overall well-being and response to stress.

Benefits of Daily Vagus Nerve Exercises
Daily vagus nerve exercises enhance emotional regulation, reduce anxiety, improve sleep quality, and boost resilience to stress, promoting overall mental and physical well-being effectively.
6.1 Improved Emotional Regulation and Reduced Anxiety
Strengthening the vagus nerve through daily exercises enhances emotional regulation by activating the parasympathetic nervous system, which promotes calmness. This reduces anxiety and stress responses, fostering resilience. Techniques like deep breathing and cold exposure stimulate the nerve, helping to balance emotional reactions and improve mental stability. Regular practice can lead to long-term improvements in mood management and a decreased tendency to experience overwhelming emotions, creating a more balanced and composed state of being.
6.2 Enhanced Sleep Quality
Daily vagus nerve exercises can significantly improve sleep quality by promoting relaxation and reducing stress. Techniques like deep breathing and cold exposure activate the parasympathetic nervous system, calming the body and mind. This activation helps regulate sleep patterns, making it easier to fall asleep and stay asleep. Over time, consistent practice can reduce sleep disruptions and enhance overall restfulness, leading to better physical and mental restoration. Improved vagal tone is closely linked to deeper, more rejuvenating sleep, benefiting long-term health and well-being.
6.3 Increased Resilience to Stress
Daily vagus nerve exercises enhance stress resilience by strengthening the body’s ability to manage stressors. Techniques like deep breathing and cold exposure activate the parasympathetic nervous system, promoting calm and reducing cortisol levels. Improved vagal tone allows for better emotional regulation, helping individuals recover faster from stressful events. Regular practice fosters a balanced nervous system, enabling the body to respond to challenges more effectively. Over time, this leads to increased resilience, making it easier to navigate life’s demands with greater emotional and physical stability.

Incorporating Vagus Nerve Exercises into Your Daily Routine
Consistency is key to benefiting from vagus nerve exercises. Start with short, manageable practices like deep breathing or neck stretches. Incorporate mindfulness to enhance effectiveness and gradually build a sustainable daily routine tailored to your lifestyle for long-term well-being.
7.1 Tips for Consistency and Effectiveness
For consistent vagus nerve exercise, start with short daily sessions, like 5-10 minutes, and gradually increase duration. Schedule exercises at the same time each day to build a habit. Combine practices like deep breathing with mindfulness to enhance focus. Track progress in a journal to stay motivated. Prioritize techniques that suit your lifestyle, such as cold exposure in the morning or vocal exercises during commutes. Consistency strengthens vagal tone, reducing stress and improving emotional regulation over time.
7.2 Combining Exercises with Mindfulness Practices
Combining vagus nerve exercises with mindfulness practices enhances their effectiveness. Start with deep breathing while focusing on the sensation of air moving in and out. Pair neck stretches with mindful awareness of tension release. Vocal exercises, like humming, can be done alongside meditation to deepen relaxation. Mindfulness helps maintain focus, ensuring exercises are performed correctly and consistently. This synergy strengthens vagal tone, promotes emotional balance, and reduces stress, fostering overall well-being and resilience. Regular practice cultivates a calm, centered state, amplifying the benefits of vagus nerve stimulation.
Incorporating daily vagus nerve exercises can have a transformative impact on emotional balance and resilience. Start your journey today for improved well-being and a calmer tomorrow.
8.1 The Long-Term Effects of Regular Vagus Nerve Stimulation
Regular vagus nerve stimulation leads to enhanced emotional resilience, improved sleep quality, and better stress management. Over time, it strengthens the parasympathetic nervous system, promoting a balanced response to stress. Long-term practice can reduce chronic inflammation, improve digestion, and support heart health. Consistency fosters a calmer nervous system, enhancing overall well-being and mental clarity. These sustainable benefits highlight the profound impact of daily vagus nerve exercises on long-term physical and emotional health.
8.2 Encouragement to Start Your Daily Vagus Nerve Exercise Journey
Embracing daily vagus nerve exercises is a simple yet powerful step toward improving your overall well-being. These practices are accessible, requiring minimal time and effort, and can be incorporated into even the busiest routines. By committing to regular stimulation, you can experience lasting benefits like enhanced emotional resilience and improved physical health. Start small, remain consistent, and witness the transformative impact on your life. Your journey toward a healthier, calmer you begins with just one exercise today.