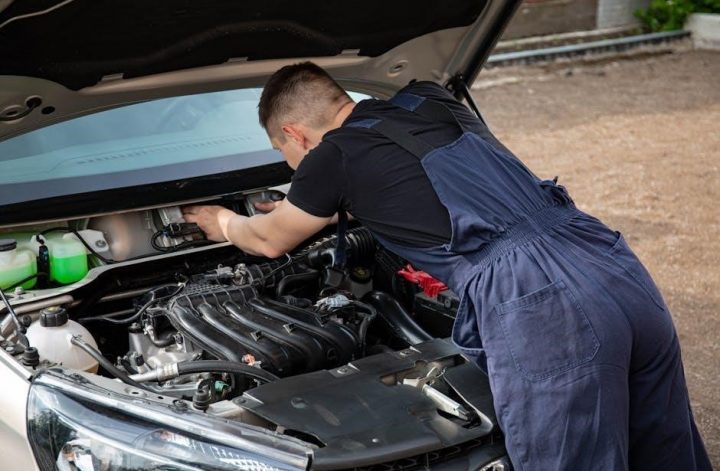
Manual transmission troubleshooting involves identifying issues like clutch wear, low fluid levels, or damaged gears. Understanding these components is crucial for drivers to maintain performance and prevent costly repairs.

Common Issues and Their Causes
Common manual transmission issues include clutch wear, low fluid levels, damaged gears, failed synchronizers, and faulty shifter cables. These problems often arise from poor driving habits, lack of maintenance, or excessive wear and tear on critical components over time.
2.1; Clutch Wear and Tear
The clutch is one of the most critical components in a manual transmission system, and it is prone to wear and tear due to frequent engagement and disengagement. Over time, the friction material on the clutch disc can degrade, leading to slipping gears and poor acceleration. This wear can be exacerbated by improper driving habits, such as “riding the clutch” (keeping the clutch partially engaged) or aggressive shifting. High mileage and frequent stop-and-go driving also contribute to clutch wear.
Symptoms of a worn clutch include difficulty shifting gears, a spongy or loose clutch pedal, and a burning smell during heavy acceleration. If left unaddressed, clutch wear can lead to complete failure, requiring costly repairs. Regular inspection and maintenance, such as adjusting the clutch pedal and replacing worn components, can help extend its lifespan. Proper driving techniques, like using the clutch fully and avoiding unnecessary gear changes, are also essential to prevent premature wear.
Understanding the causes and signs of clutch wear is vital for maintaining the overall health of a manual transmission. Early detection and repair can save time and money, ensuring smooth and efficient performance on the road.
2.2. Low Transmission Fluid Level
A low transmission fluid level is one of the most common issues in manual transmissions. Transmission fluid lubricates the gears and synchronizers, ensuring smooth operation. If the fluid level drops, it can lead to increased friction, overheating, and premature wear on critical components like gears and bearings. This can result in rough shifting, grinding noises, or even complete gear failure.
The primary causes of low transmission fluid include leaks from worn seals, gaskets, or pan bolts, as well as infrequent fluid changes. Over time, the fluid can degrade, losing its lubricating properties and requiring replacement. Symptoms of insufficient fluid may include difficulty engaging gears, especially when accelerating or decelerating, and a noticeable delay in gear shifts.
To address this issue, it’s essential to check the transmission fluid level regularly using the dipstick or by consulting the vehicle’s manual. If the level is low, top it up with the recommended type of fluid. However, if the fluid level consistently drops, it may indicate a leak that requires immediate attention from a mechanic. Regular fluid changes and inspections can help prevent these problems and ensure the longevity of the transmission.
Ignoring low transmission fluid can lead to costly repairs, so prompt action is crucial to maintain the health of your manual transmission system.
2.3. Damaged Gears
Damaged gears are a common issue in manual transmissions and can lead to significant problems if left unaddressed. Gears are responsible for transferring power from the engine to the wheels, and any damage can disrupt this process. Common causes of gear damage include improper shifting techniques, such as grinding gears or shifting too quickly, which can cause excessive wear and tear. Additionally, a lack of proper lubrication from low transmission fluid levels can lead to overheating and premature gear wear.
Symptoms of damaged gears include grinding or clunking noises during shifting, difficulty engaging gears, and a noticeable hesitation or lag in acceleration. In severe cases, the transmission may completely fail to engage gears, leaving the vehicle immobile. Ignoring these signs can result in further damage to other components, such as the shafts or bearings, which can lead to costly repairs.
Regular maintenance, such as checking transmission fluid levels and ensuring proper shifting techniques, can help prevent gear damage. If damage is suspected, it’s crucial to have the transmission inspected by a professional mechanic to avoid further complications. Early detection and repair are key to maintaining the longevity and performance of the manual transmission system.
2.4. Failed Synchronizer Ring
A failed synchronizer ring is a common issue in manual transmissions, often causing difficulty in shifting gears smoothly. Synchronizer rings play a critical role in ensuring that gears engage properly by bringing the rotational speeds of the gear and shaft into alignment. When these rings fail, drivers may experience grinding or clunking noises when shifting, particularly when moving into lower gears or reversing.
The primary cause of a failed synchronizer ring is wear and tear over time, exacerbated by aggressive driving habits such as rapid shifting or “riding the clutch.” Additionally, insufficient transmission fluid levels can lead to inadequate lubrication, accelerating the deterioration of the synchronizer rings. In some cases, misalignment during gear engagement can also contribute to their failure.
Symptoms of a failed synchronizer ring include a noticeable “grind” when shifting gears, difficulty engaging gears, and a general feeling of resistance when attempting to change gears. If left unaddressed, a failed synchronizer ring can lead to further damage to the gears and other transmission components, resulting in more costly repairs.
Replacing the synchronizer rings typically requires disassembling the transmission, making it a labor-intensive process. Regular maintenance, such as checking transmission fluid levels and practicing smooth shifting techniques, can help extend the life of the synchronizer rings and prevent premature failure.
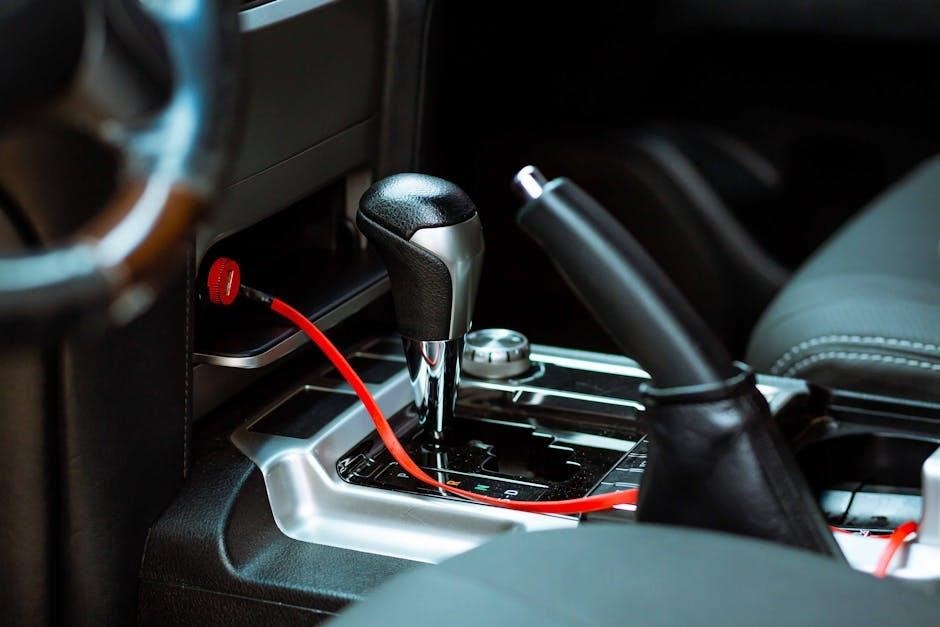
2.5. Faulty Shifter Cable
A faulty shifter cable is another common issue in manual transmissions, often leading to problems with gear selection. The shifter cable connects the gearshift to the transmission, allowing the driver to control gear changes. When the cable becomes worn, stretched, or broken, it can prevent the transmission from engaging gears properly.
Symptoms of a faulty shifter cable include difficulty shifting into the desired gear, a loose or unresponsive gearshift, and the inability to engage certain gears altogether. In some cases, the cable may completely detach, leaving the driver unable to shift gears at all. This can be particularly dangerous in traffic or when driving uphill.
The primary causes of shifter cable failure include wear and tear over time, excessive stress from aggressive shifting, or environmental factors like extreme temperatures or moisture. In some cases, improper installation or alignment of the cable can also lead to premature failure.
Replacing the shifter cable is typically the recommended solution, as repairing it is often not feasible. While this issue is less complex than others, it still requires mechanical expertise to ensure proper installation and alignment. Regular inspections of the shifter cable can help identify potential issues before they become critical.
Bad Driving Habits to Avoid
Bad driving habits, such as resting your hand on the gear stick, using the clutch to hold the car on a hill, or leaving the car in gear at a red light, can prematurely wear out the transmission components.
3.1. Resting Hand on the Gear Stick
Resting your hand on the gear stick is a common habit that can cause unnecessary wear on the transmission components. The constant pressure, even if subtle, can lead to premature wear of the shifter cable, synchronizer rings, and gear engagement mechanisms.
This habit can also result in rough shifting or difficulty engaging gears over time. Drivers who frequently rest their hands on the gear stick may notice increased resistance when changing gears or a “notchy” feel during shifts.
To avoid this issue, it’s recommended to keep your hand on the steering wheel or in your lap while driving. Breaking this habit can significantly extend the lifespan of your manual transmission and prevent costly repairs down the line.
Additionally, being mindful of your driving posture and hand placement can improve overall control of the vehicle. By avoiding unnecessary contact with the gear stick, you ensure smoother shifting and better performance from your car.
3.2. Using the Clutch to Hold the Car on a Hill
Using the clutch to hold your car on a hill is a harmful habit that can lead to premature wear of the clutch and transmission components. When you ride the clutch on an incline, it causes the clutch to remain partially engaged, generating excessive heat and friction.
This constant strain can result in accelerated wear on the clutch disc, pressure plate, and flywheel. Over time, this can lead to costly repairs, including the need for a new clutch assembly. Additionally, the repeated stress can damage the transmission’s synchronizer rings and gear teeth.
A better practice is to use the parking brake or hill-start assist (if equipped) to hold the car in place. This reduces the burden on the clutch and prevents unnecessary wear. Proper use of the clutch ensures smoother shifting and extends the lifespan of your manual transmission.
By avoiding this habit, drivers can maintain better control of their vehicle and reduce the risk of mechanical failures. It’s important to develop good driving habits to protect your car’s transmission and clutch from avoidable damage.
3.3. Leaving the Car in Gear at a Red Light
Leaving your car in gear at a red light is a common habit that can cause unnecessary strain on the transmission. When the car is in gear and stationary, the clutch remains partially engaged, creating constant pressure on the clutch disc, pressure plate, and transmission components.
This prolonged stress can lead to premature wear on the clutch and transmission, especially in stop-and-go traffic. Over time, this can result in costly repairs, such as replacing the clutch assembly or transmission parts. Additionally, it can cause the synchronizer rings to wear out faster, leading to difficulty when shifting gears.
To avoid this, it’s better to shift into neutral while stopped at a red light. This reduces the strain on the clutch and transmission, allowing them to cool down and reducing wear. Using the parking brake on an incline can also help prevent rollback and take pressure off the clutch.
By developing the habit of shifting into neutral at red lights, drivers can significantly extend the lifespan of their manual transmission and clutch, ensuring smoother and more efficient driving over time.